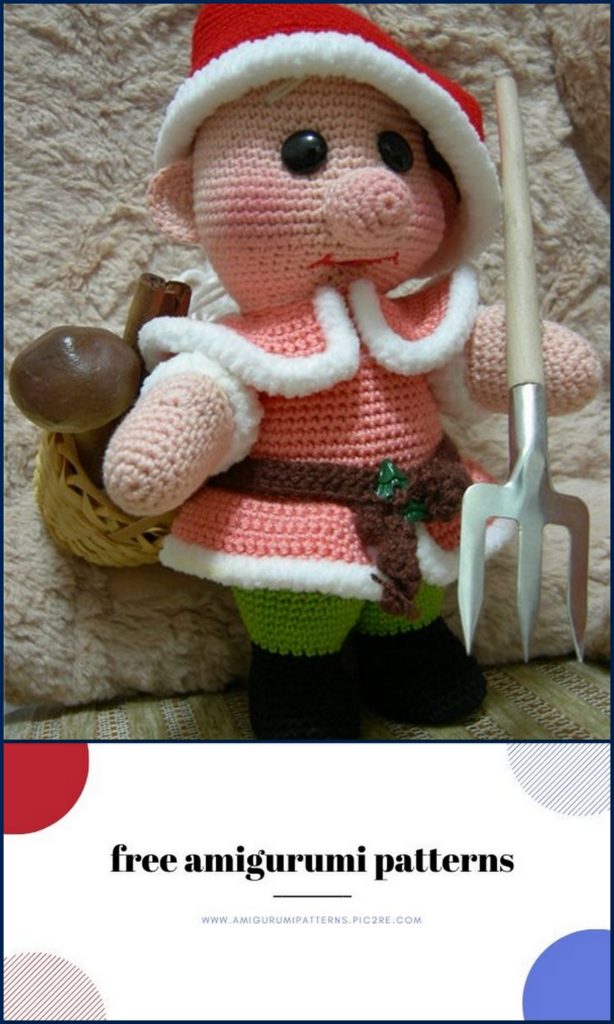
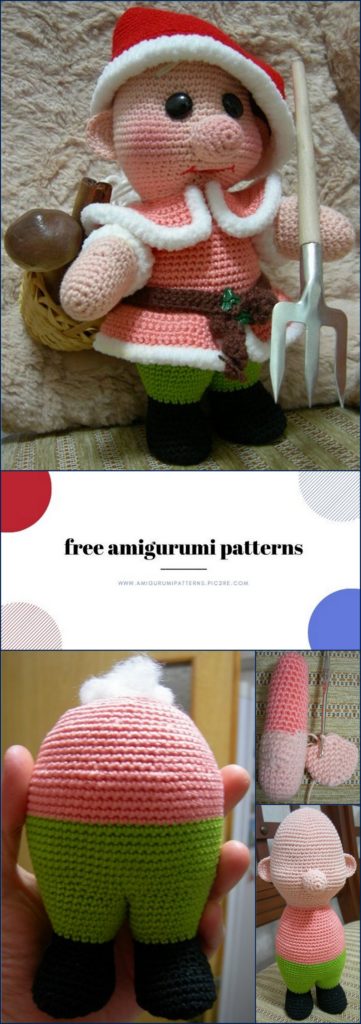
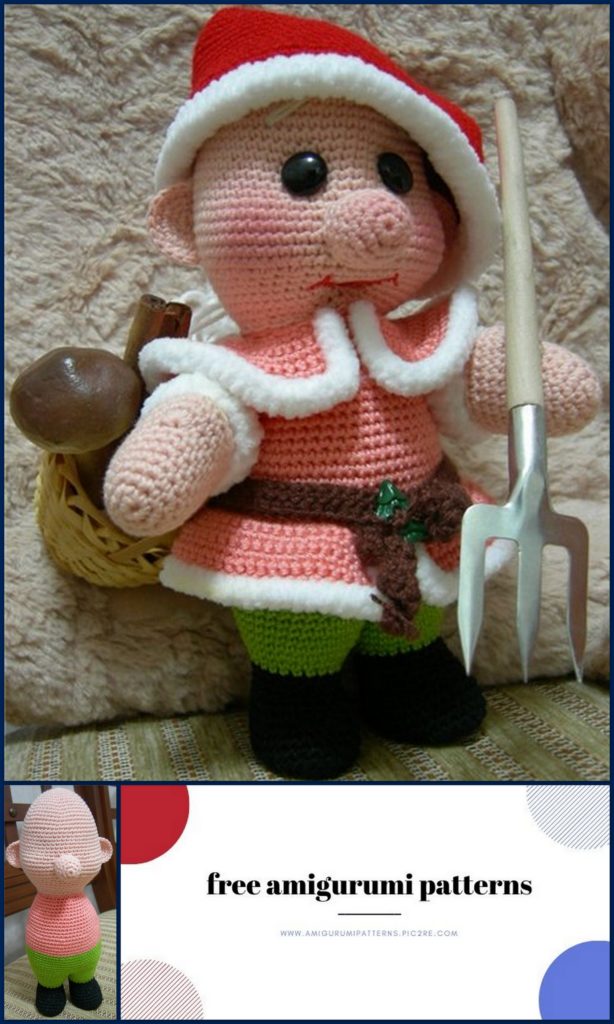
Amigurumi Gnome Free Crochet Pattern
Pinterest Offical Page : amigurumipatterns.pic2re.com
Facebook Group: amigurumipatterns.pic2re.com
Facebook Offical Page: amigurumipatterns.pic2re.com
What we need:
1 – any smooth thread: pink, peach or bodily for the head and palms, dark color – for shoes, any
colors for
jackets and pants (can be knitted in one color), red for the cap.
2-two black buttons for the eyes.
3-two buttons for button fastening handles.
4-filler.
5- for beard white or flesh thread, wool can. If
want a beard
curly, as in the photo, then tie a garter stitch (persons. and
out. rows of front loops)
a small square, then wash it while we knit the Dwarf
it will dry and then it
knit a little square, because there will be
even hair, better let
they’ll stay, then not enough. Who doesn’t want to mess with
such a beard, it can be tied
elongated loops, but then.
6-blush for tinting.
I knitted with cotton 260m-100g, hook number 1.75. I
The growth of the Gnome turned 22cm.
HEAD
1 pp. -6sc in magic ring (6)
2p .- (inc.) – 6 times (12)
3p .- (1sc.inc.) – 6 times (18)
3
4r .- (2sc.inc.) – 6 times (24)
5r .- (3sc.inc.) – 6 times (30)
6 pp .- (4sc.inc.) – 6 times (36)
7r.- in a circle (36)
8 pp .- (5sc.inc.) – 6 times (42)
9r .- (6sc.inc.) – 6 times (48)
10r .- (7sc.inc.) – 6 times (54)
11r .- (8sc.inc.) – 6 times (60)
12R.-22R.- in a circle (60)
23r .- (sc.inc.) – 4 times, 7sc, (sc.inc.) – 4 times, sc to the end
rows (68)
24R.-28R.- in a circle (68)
29p .- (sc.dec.) – 4 times, 7sc, (sc.dec) -4 times, sc to the end
row (60)
30r .- (4sc.dec.) – until the end of the row (50)
31R.-33R.-in a circle (50)
34r .- (3sc.dec.) – until the end of the row (40)
35r .- (6sc.dec.) – until the end of the row (35)
DO NOT CONNECT, cut the thread to dist. approx 30cm (for
stitching)
EARS (2 children)
1 pp. -6sc in magic ring (6)
2p .- (inc.) – 6 times (12)
3p .- (1sc.inc.) – 6 times (18)
4p .- (2sc.inc) -6 times (24)
Fold the ears in half and tie both halves, for which
knit 1p.sc, capturing the loops of both halves (12)
4
NOSE
1 pp. -6sc in magic ring (6)
2r. (Inc.) – 6 times (12)
3p .- (1sc.inc.) – 6 times (18)
4r.-6r.- in a circle (18)
DO NOT CONNECT, leave the thread for sewing. Beige
threads will be needed even for palms, but can be done, such as
mittens.
Crochet Dwarf
BODY
We start from the foot. With dark threads we collect a chain of 12
ch (We try to knit the boots very tight, especially in
places of decreases so that there are no holes, and then through
dark filler filler will be visible.
front walls sc. How to do this, look at the topic
“Knitting Secrets” on page 4)
1p.-from the 2nd ch we knit 3sc, 9sc, 3sc into the last
loop.Then on the other side of the chain we knit 9sc (24)
2R-1sc, 4sc in one loop, 11sc, 4sc in one loop
loop, 10sc (30) -link is shifted by one loop for
symmetry.
3p .- (4sc, inc.) To the end of the row (36)
4r.-7r.-in a circle (36)
8 pp. -16sc, (dec.) 5 times, 10sc (31)
9 pp. -13sc, (dec.) 2 times, 3sc, (dec.) 2 times, 7sc (27)
10 p. -11sc, (dec.) 2 times, 3sc, (dec.) 2 times, 5sc (23)
11r.-12r.- in a circle (23)
5
change color
13r.- in a circle (23)
14 pp .- (2sc, inc.) 7 times (30)
15r .- (5sc.inc.) 5 times (35)
16R.-19R.- in a circle (35)
We knit the second leg LIKE! It is possible from cardboard or
thin plastic make insoles, then the gnome will
stand firmly on feet, it is advisable to stick insoles, with
using double-sided tape or something else.
crocheted
Then on the second leg we do not break the thread, but add both
legs flat and knit through both legs 10sc.
We carefully watch the photo
We knit the rest of the loop
1r.- in a circle (50)
2p .- (4sc.inc.) To the end of the row (60)
3p .- (5sc.inc.) To the end of the row (70)
4R.-10R.-in a circle (70)
change color
11r.-16r.-in a circle (70)
17r .- (5sc.dec.) To the end of the row (60)
18R.-22R.- in a circle (60)
23r .- (4sc.dec.) To the end of the row (50)
24R.-26R.- in a circle (50)
27r .- (3sc.dec.) To the end of the row (40)
28r .- (6sc.dec.) To the end of the row (35)
DO NOT CONTRACT.
6
Sew the head to the body, pay attention to
cheeks were convex (we put a filler).
Fill the spout with filler and sew between the 20th and 28th
r. from the top of the head between the cheeks.
Sew ears on both sides between the 18th and 28th p. from the top
parts, slightly bending.
HANDS
knit in beige
1 pp. -6sc in magic ring (6)
2p .- (inc.) 6 times (12)
3p .- (1sc.inc.) 6 times (18)
4R.- in a circle (18)
5p .- (5sc.inc.) – until the end of the row (21)
6r.-8r.- in a circle (21)
9R.-6sc in one loop (finger), 20sc (26)
10r.-12r.- in a circle (26)
13r .- (dec.) 4 times, 18sc (22)
change color
14r.-27r.-in a circle (22)
we stuff the hands with a tighter filler, and the upper part
not very tight
28r .- (3sc.dec) -to the end of the row (18)
hands if necessary
29p .- (1sc, dec.) – to the end of the row (12)
30r .- (dec.) – to the end of the row (6)
31r .- (dec.) – to the end of the row (3)
Pull off
Cuffs
the color of the jacket or white
30ch, lock in the magic ring ss, knit in a circle 3p.sc.Then
pull on the handles, the initial loops should lie on
wrists and sew on the 1st row.
We attach handles with button or thread
fasteners (thumb should be turned
forward).
COLLAR (knit back and forth)
with the color of the jacket we dial 45ch.
1p.- first sc into the second loop from the hook, and then into
each to the end of the row (44), ch, turn
2p .- (4sc, inc.) To the end of the row (52), ch, turn
3R.- in a circle (52), ch, turn
4p .- (5sc, inc.) To the end of the row (60), ch, turn
5p .- (6sc, inc.) To the end of the row (68), ch, turn
6p .- (7sc, inc) to the end of the row (76), ch, turn
7p .- (8sc, inc) to the end of the row (84), ch, turn
8p .- (9sc, inc.) To the end row (92), ch, turn
9r.- in a circle (92), ch, turn
knit with white thread 2-3 rows, sew
JACKET WRAP (knit back and forth)
with the color of the jacket we dial 74ch.
1p.- first sc into the second loop from the hook, and then into
each to the end (73), ch, turn
2R.- in a circle (73), ch, turn
3p.-6sc, inc, (9sc, inc) 6 times (80), ch, turn
4R.- in a circle (80), ch, turn
5p.-7sc, inc, (11sc, inc) to the end of the row (87), ch, turn
6r.-7r.- in a circle (87)
we knit with white thread 2-3 rows, sew on the level
11th torso row, i.e. on color change.
BELT (knit back and forth)
with brown or black thread, type 86ch and knit 2
row sc. and sew over the frill.
EYES
mark the points between the 18th and 19th near the top
the head, the distance between the eyes is 10 p.
we bring out under the nose and make a tightening so that the eyes sit in
eye hollows and thereby denote the mouth.
with which we will make a beard, embroider over the eyes
eyebrows.
CAP
dial 80ch and close in the magic ring
1p.-3p.-in a circle (80)
4p .- (6sc, dec.) To the end of the row (70)
5R-12R-in a circle (70)
13p .- (5sc, dec.) To the end of the row (60)
14R.-15R.- in a circle (60)
16p .- (4sc, dec.) To the end of the row (50)
17R.-20R.- in a circle (50)
21p .- (3sc, dec.) To the end of the row (40)
22R.-26R.- in a circle (40)
27r .- (2sc, dec) to the end of the row (30)
28R.-31R.- in a circle (30)
32p .- (1sc, dec.) To the end of the row (20)
33r.-35r.-in a circle (20)
36r .- (2sc, dec.) To the end of the row (15)
37R.-38R.- in a circle (15)
39r .- (1sc, dec.) To the end of the row (10)
40R.-41R.- in a circle (10)
42r .- (dec.) To the end of the row (5)
43r.- in a circle (5)
we tie with white thread 2-3 rows.
You can make a brush on the cap.
Tinted cheeks, nose and ears with blush.
Girls who knitted a square for a beard, dissolve it and
wrap it up weakly.
BEARD
We cut the threads with a length of approx. 18 cm.
Cut off a strip of fabric (length from ear to ear).
We lay the threads along the entire length of the strip, the middle of the threads
lie on the strip.
The threads are tightly tuned into a strip, make sure that they do not
shifted.
Sew or stick a beard with a strip outward
a pistol on the face (from the middle of one ear to the middle
other).
Lay the threads lying at the top, closing them
a strip (I slightly rolled them with felting needles).
We cut our beard, to the sides a little shorter.
HAIR
Cut the thread approx. 4 cm long.
Cut off a strip of fabric (length from ear to ear, on the back of the head).
Threads are evenly tuned into a strip, so that
the ends protruded only on one side.
Cut our hairs to a length of approx. 2.5 cm, slightly to the sides
in short.
Sew or glue the hair with a strip inward
a pistol at the level of the 14th row (count from above
heads).
