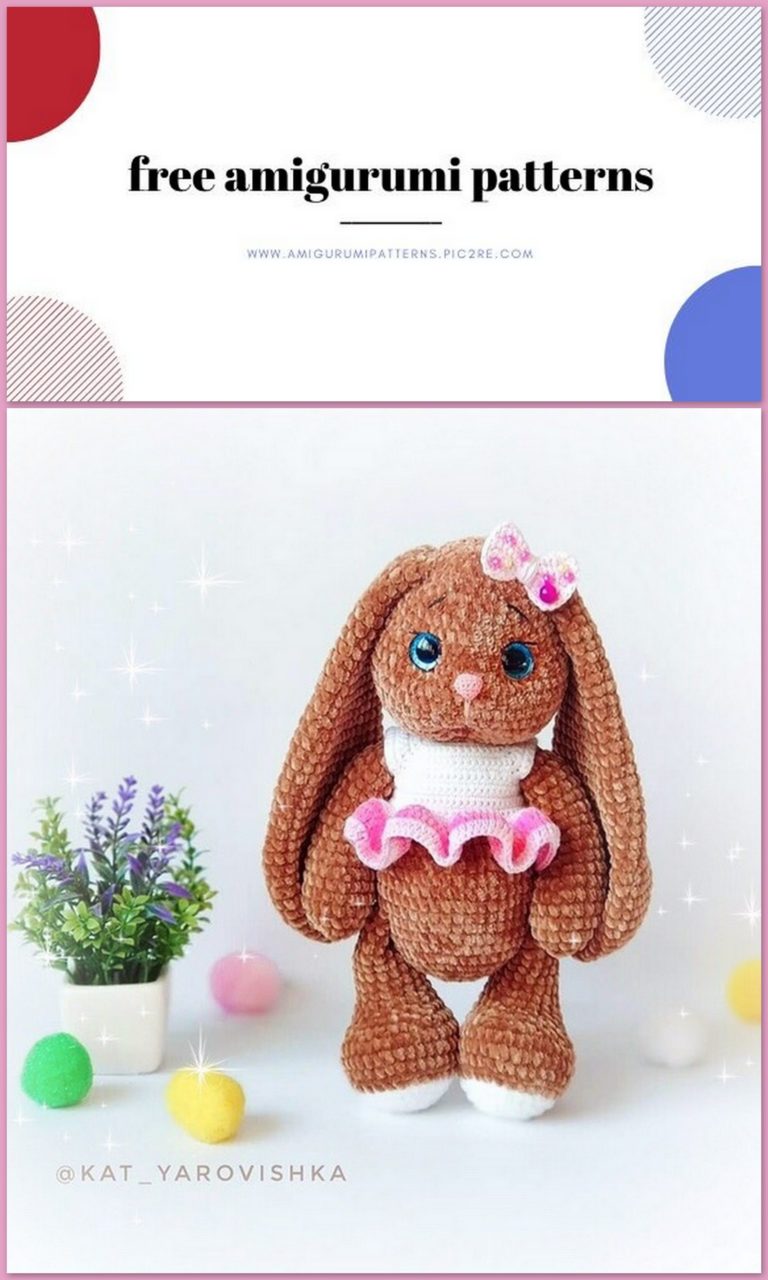
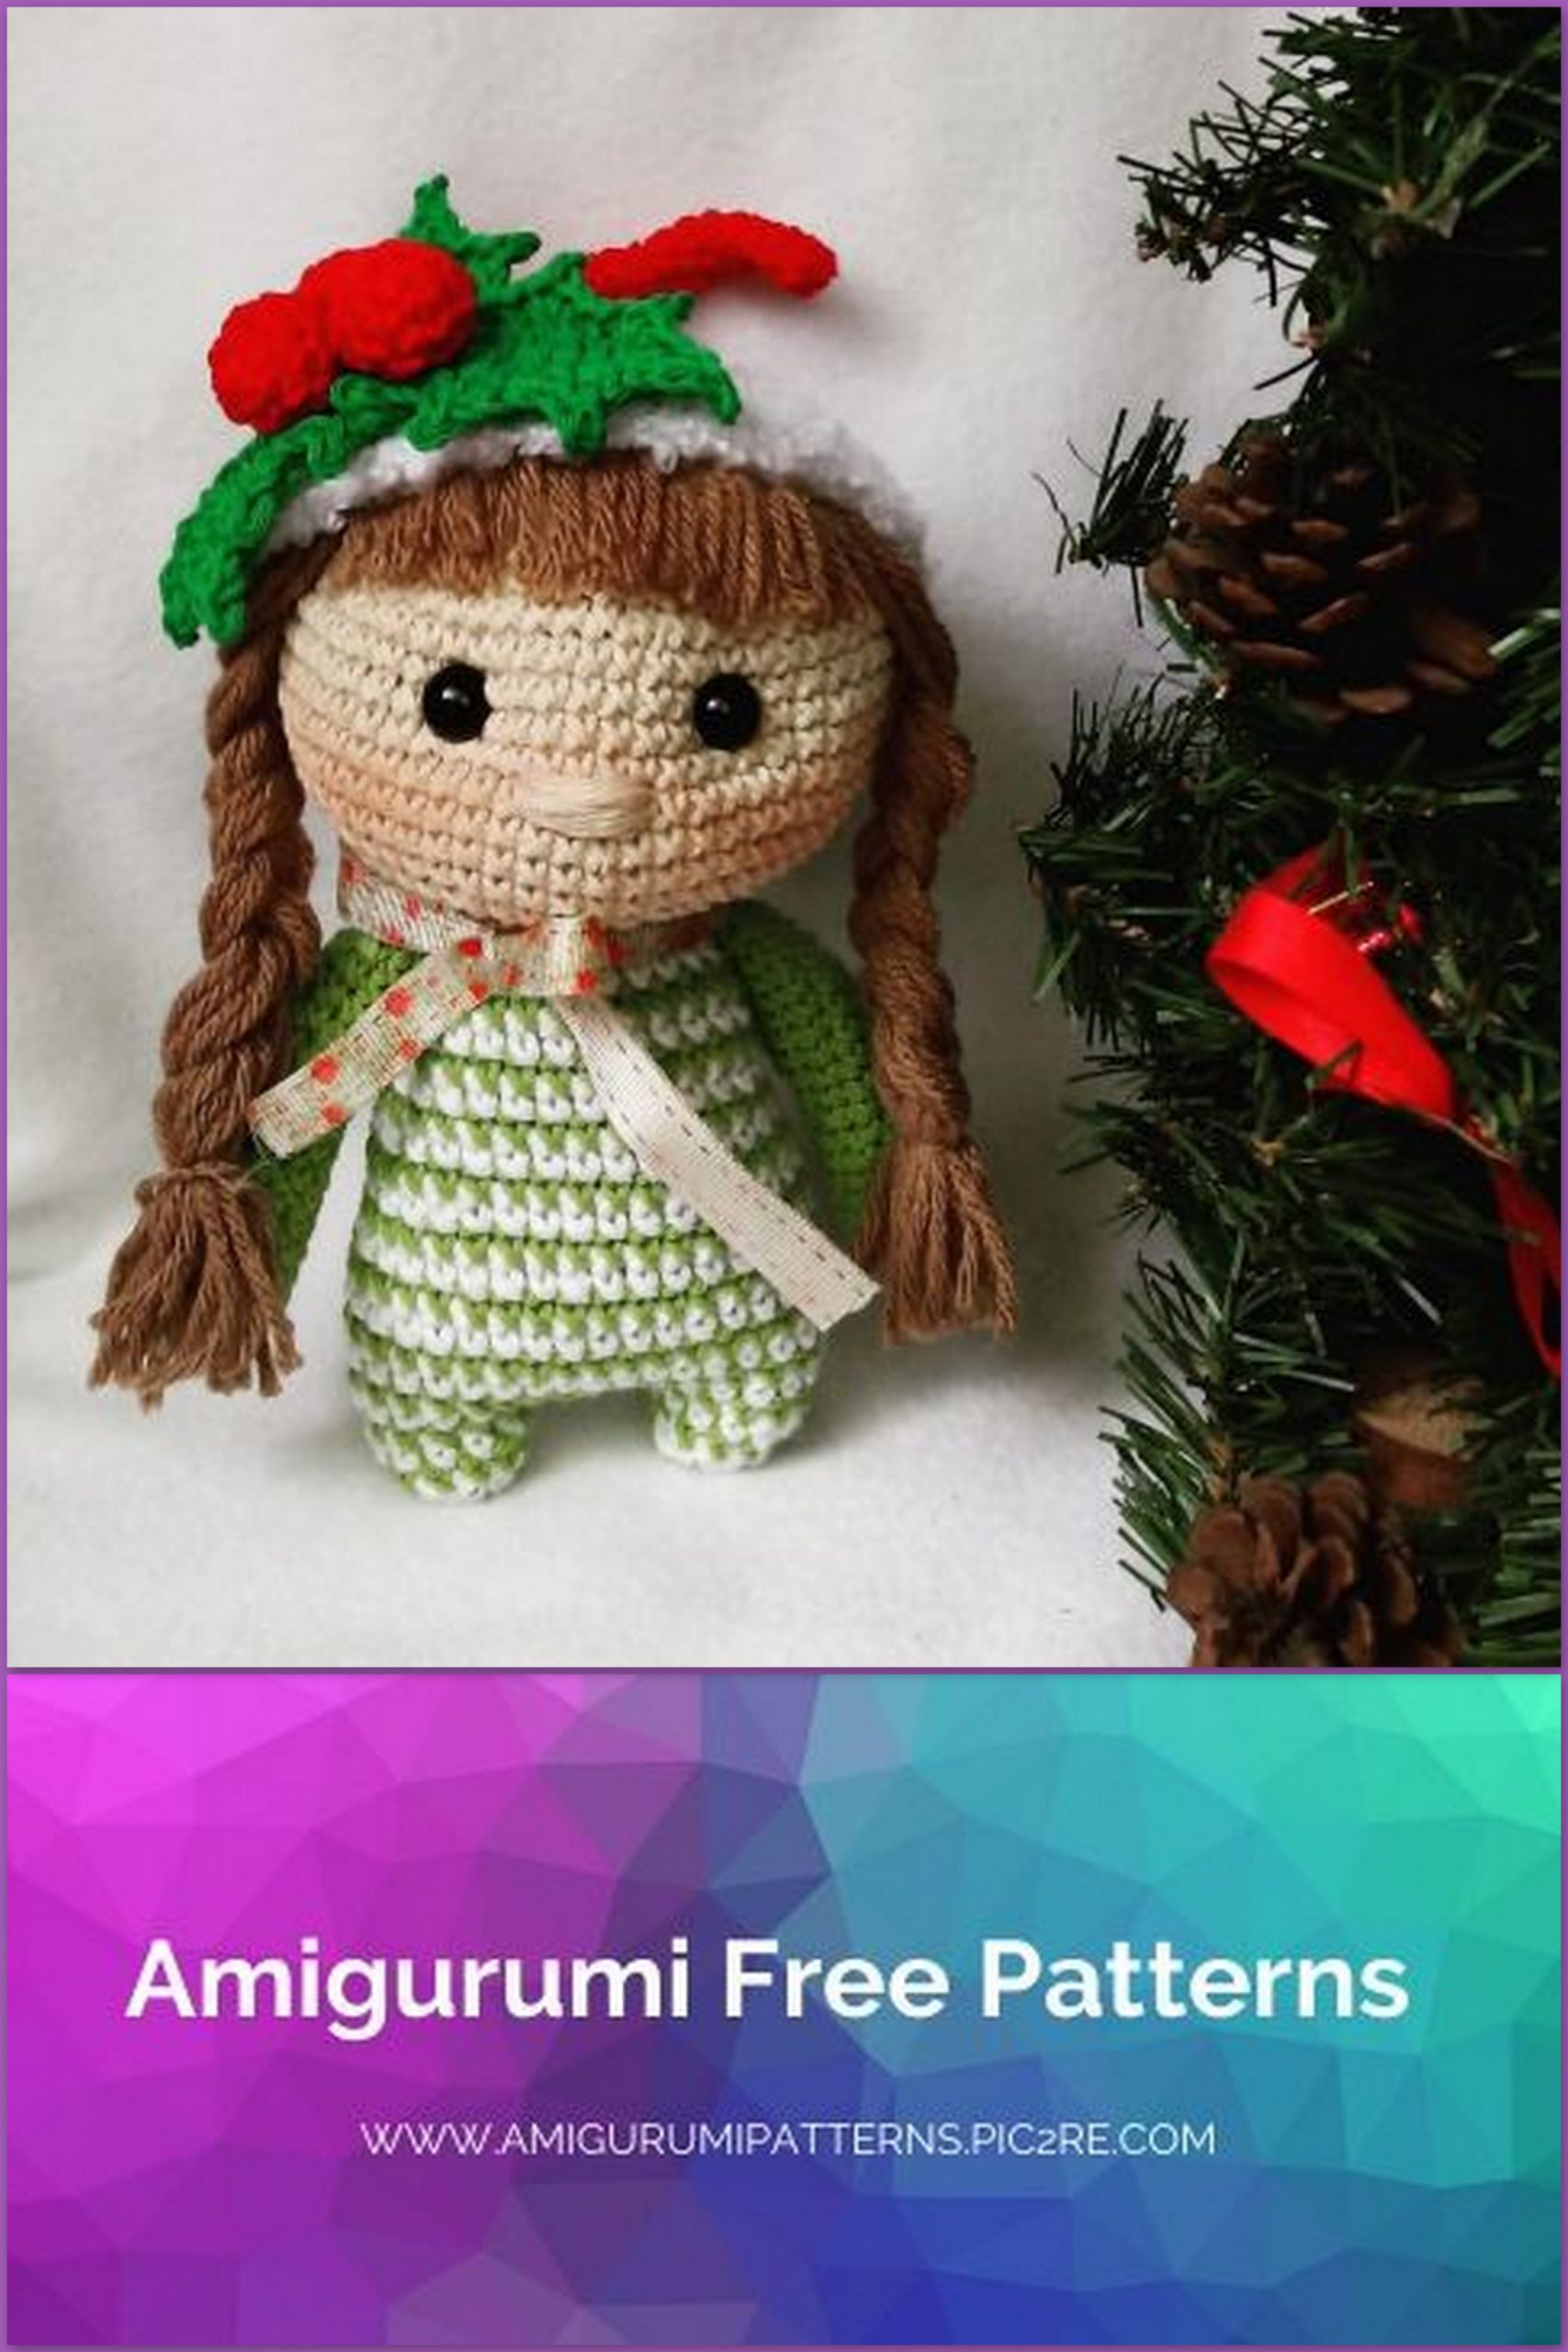
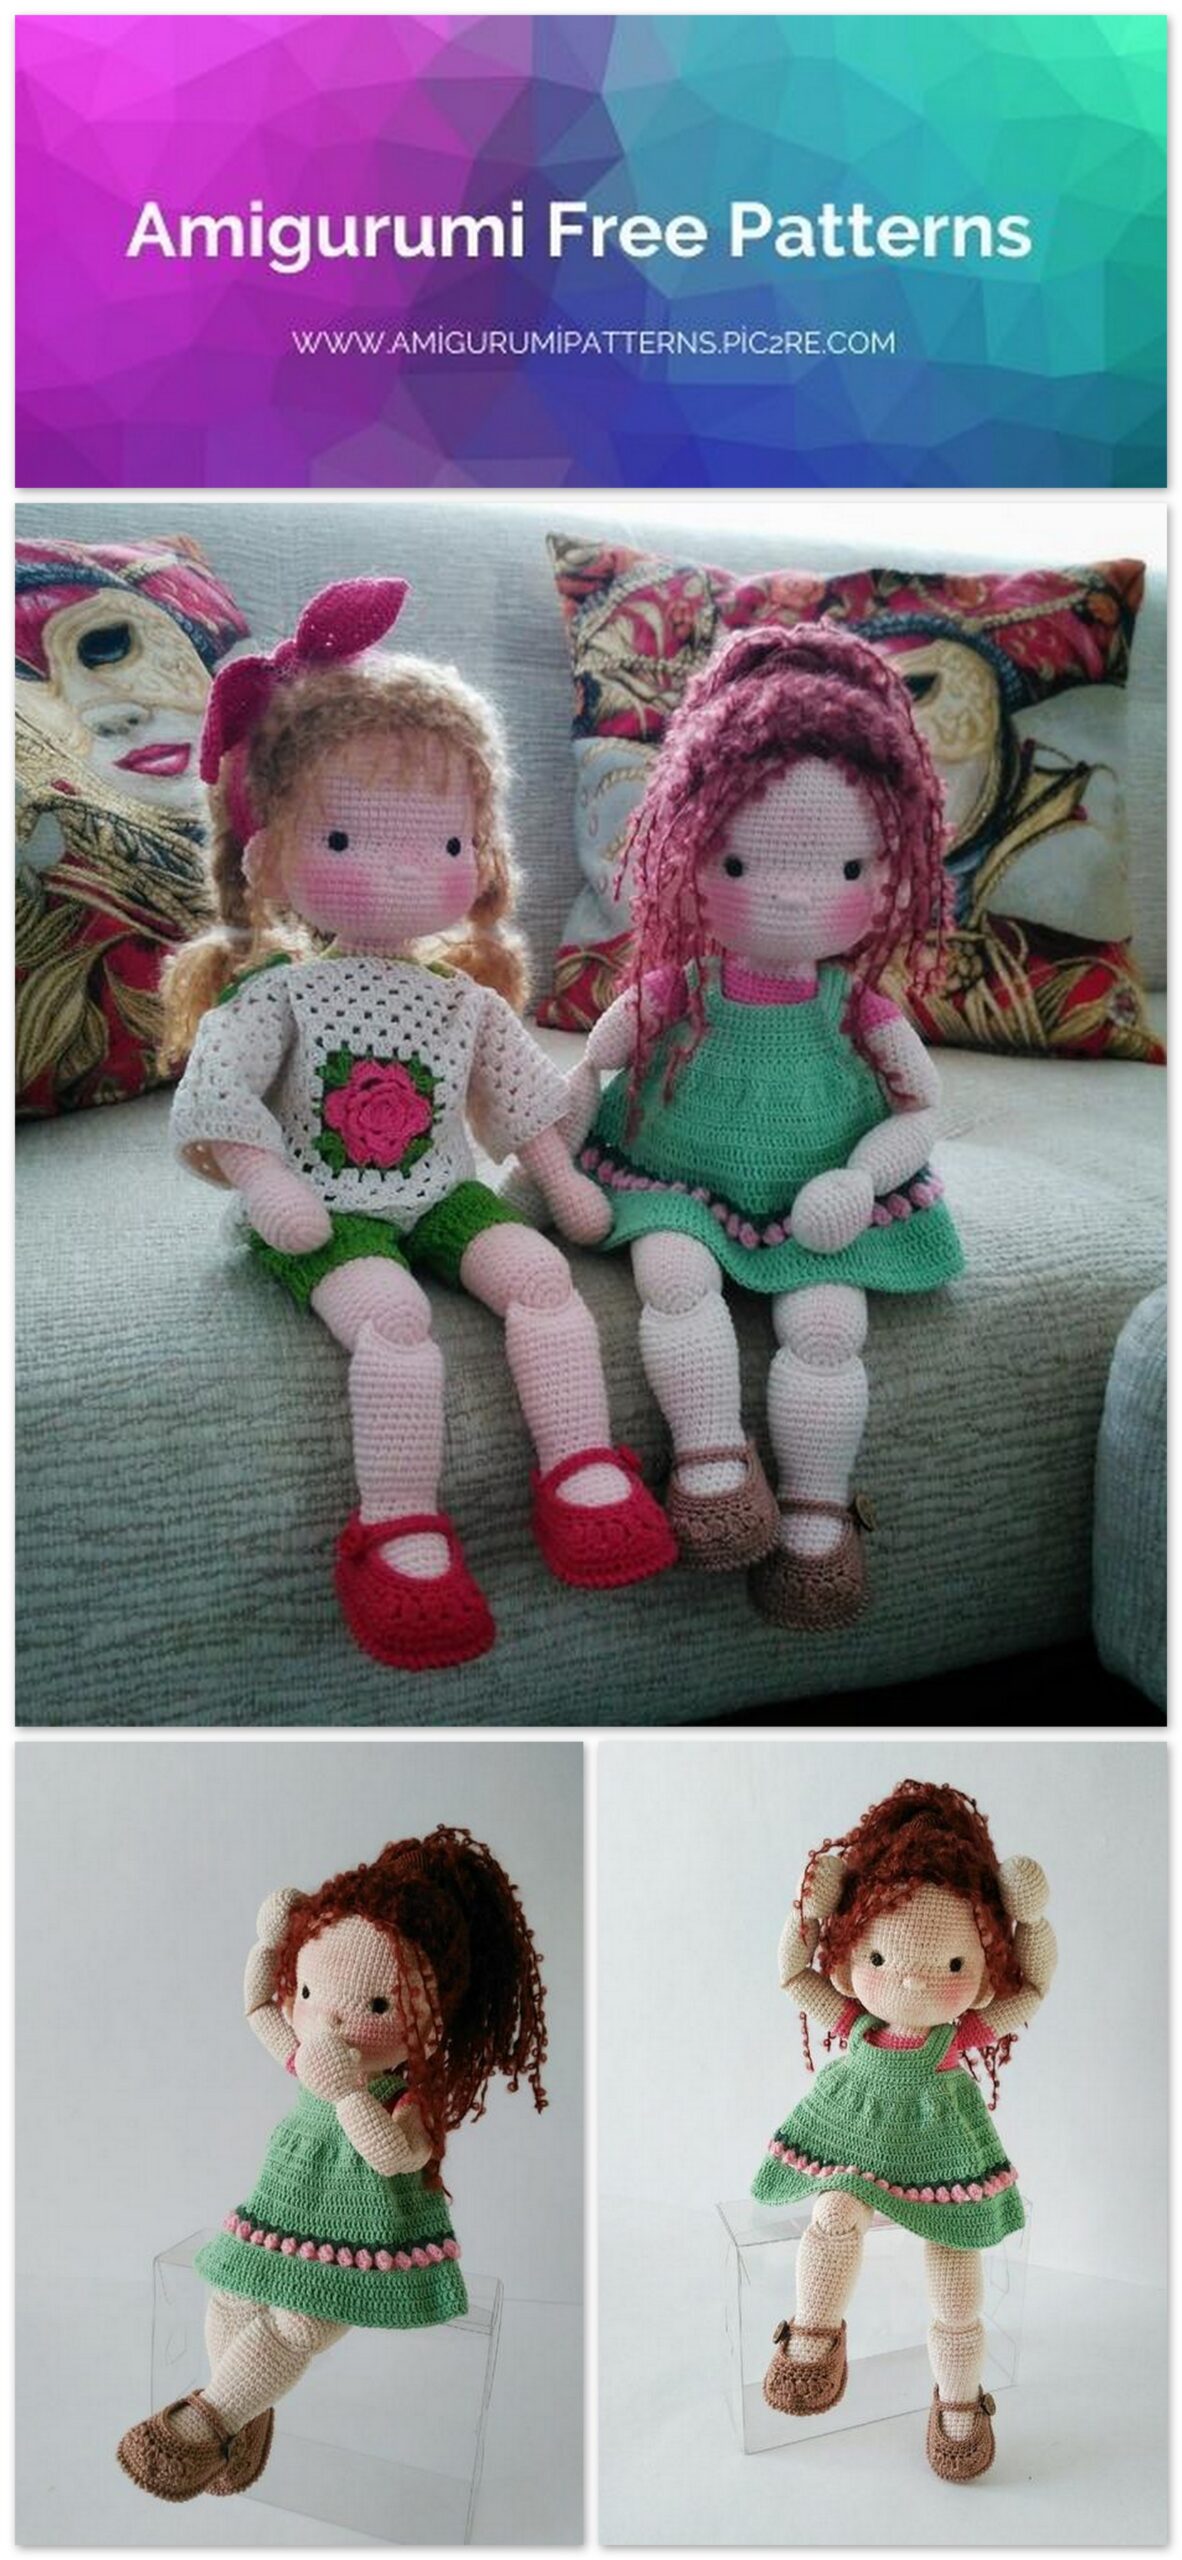
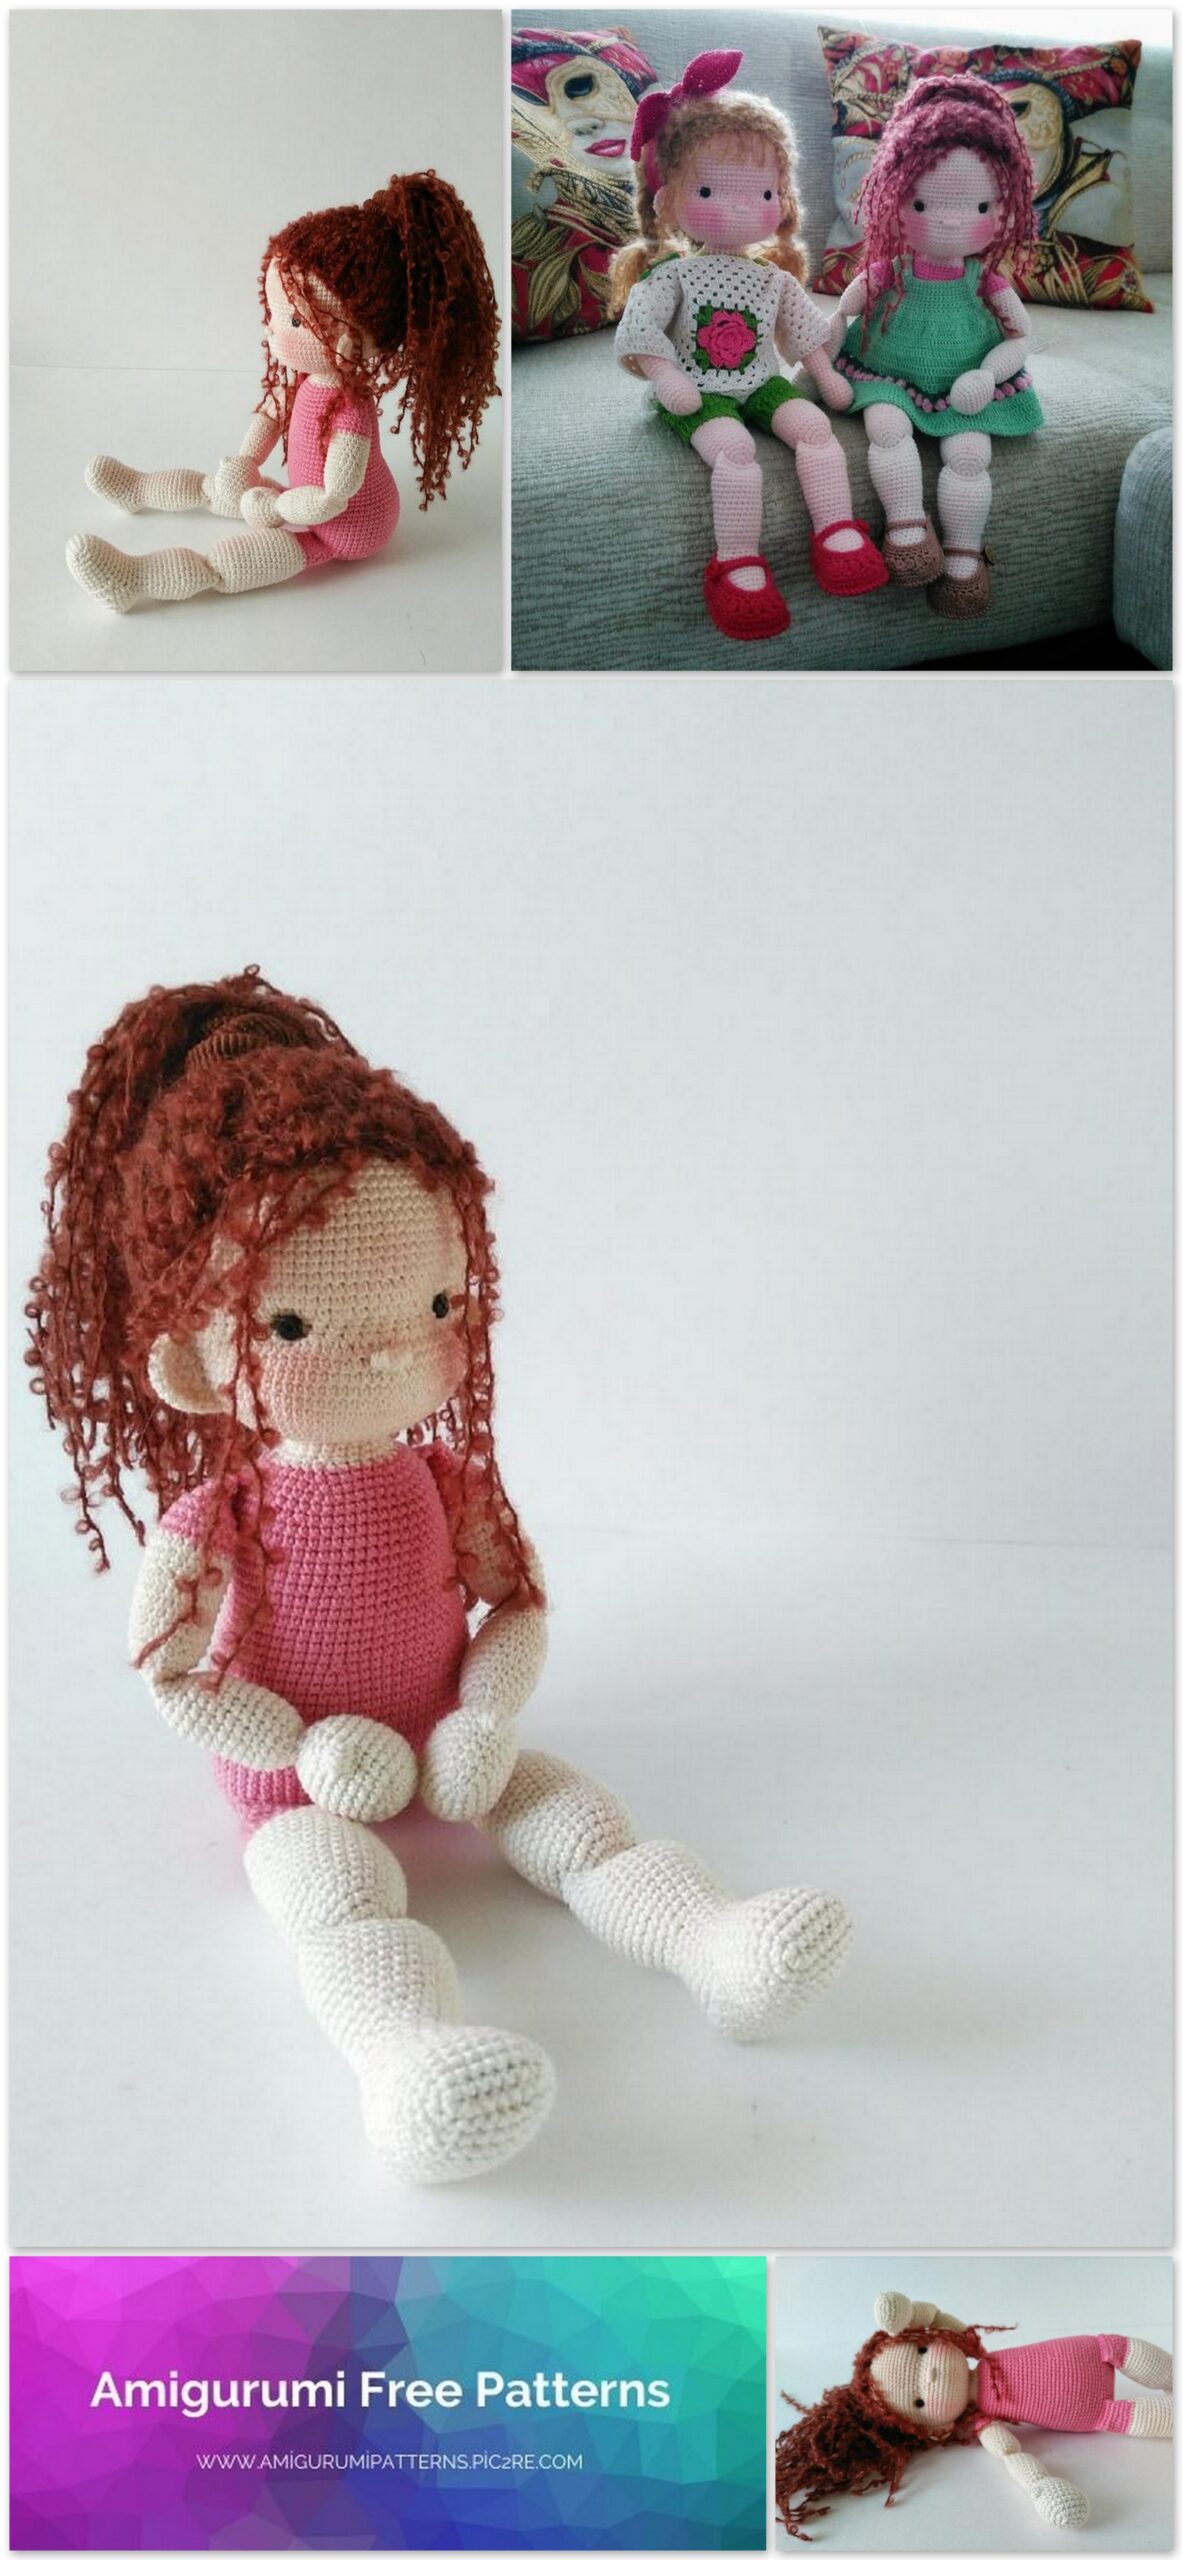
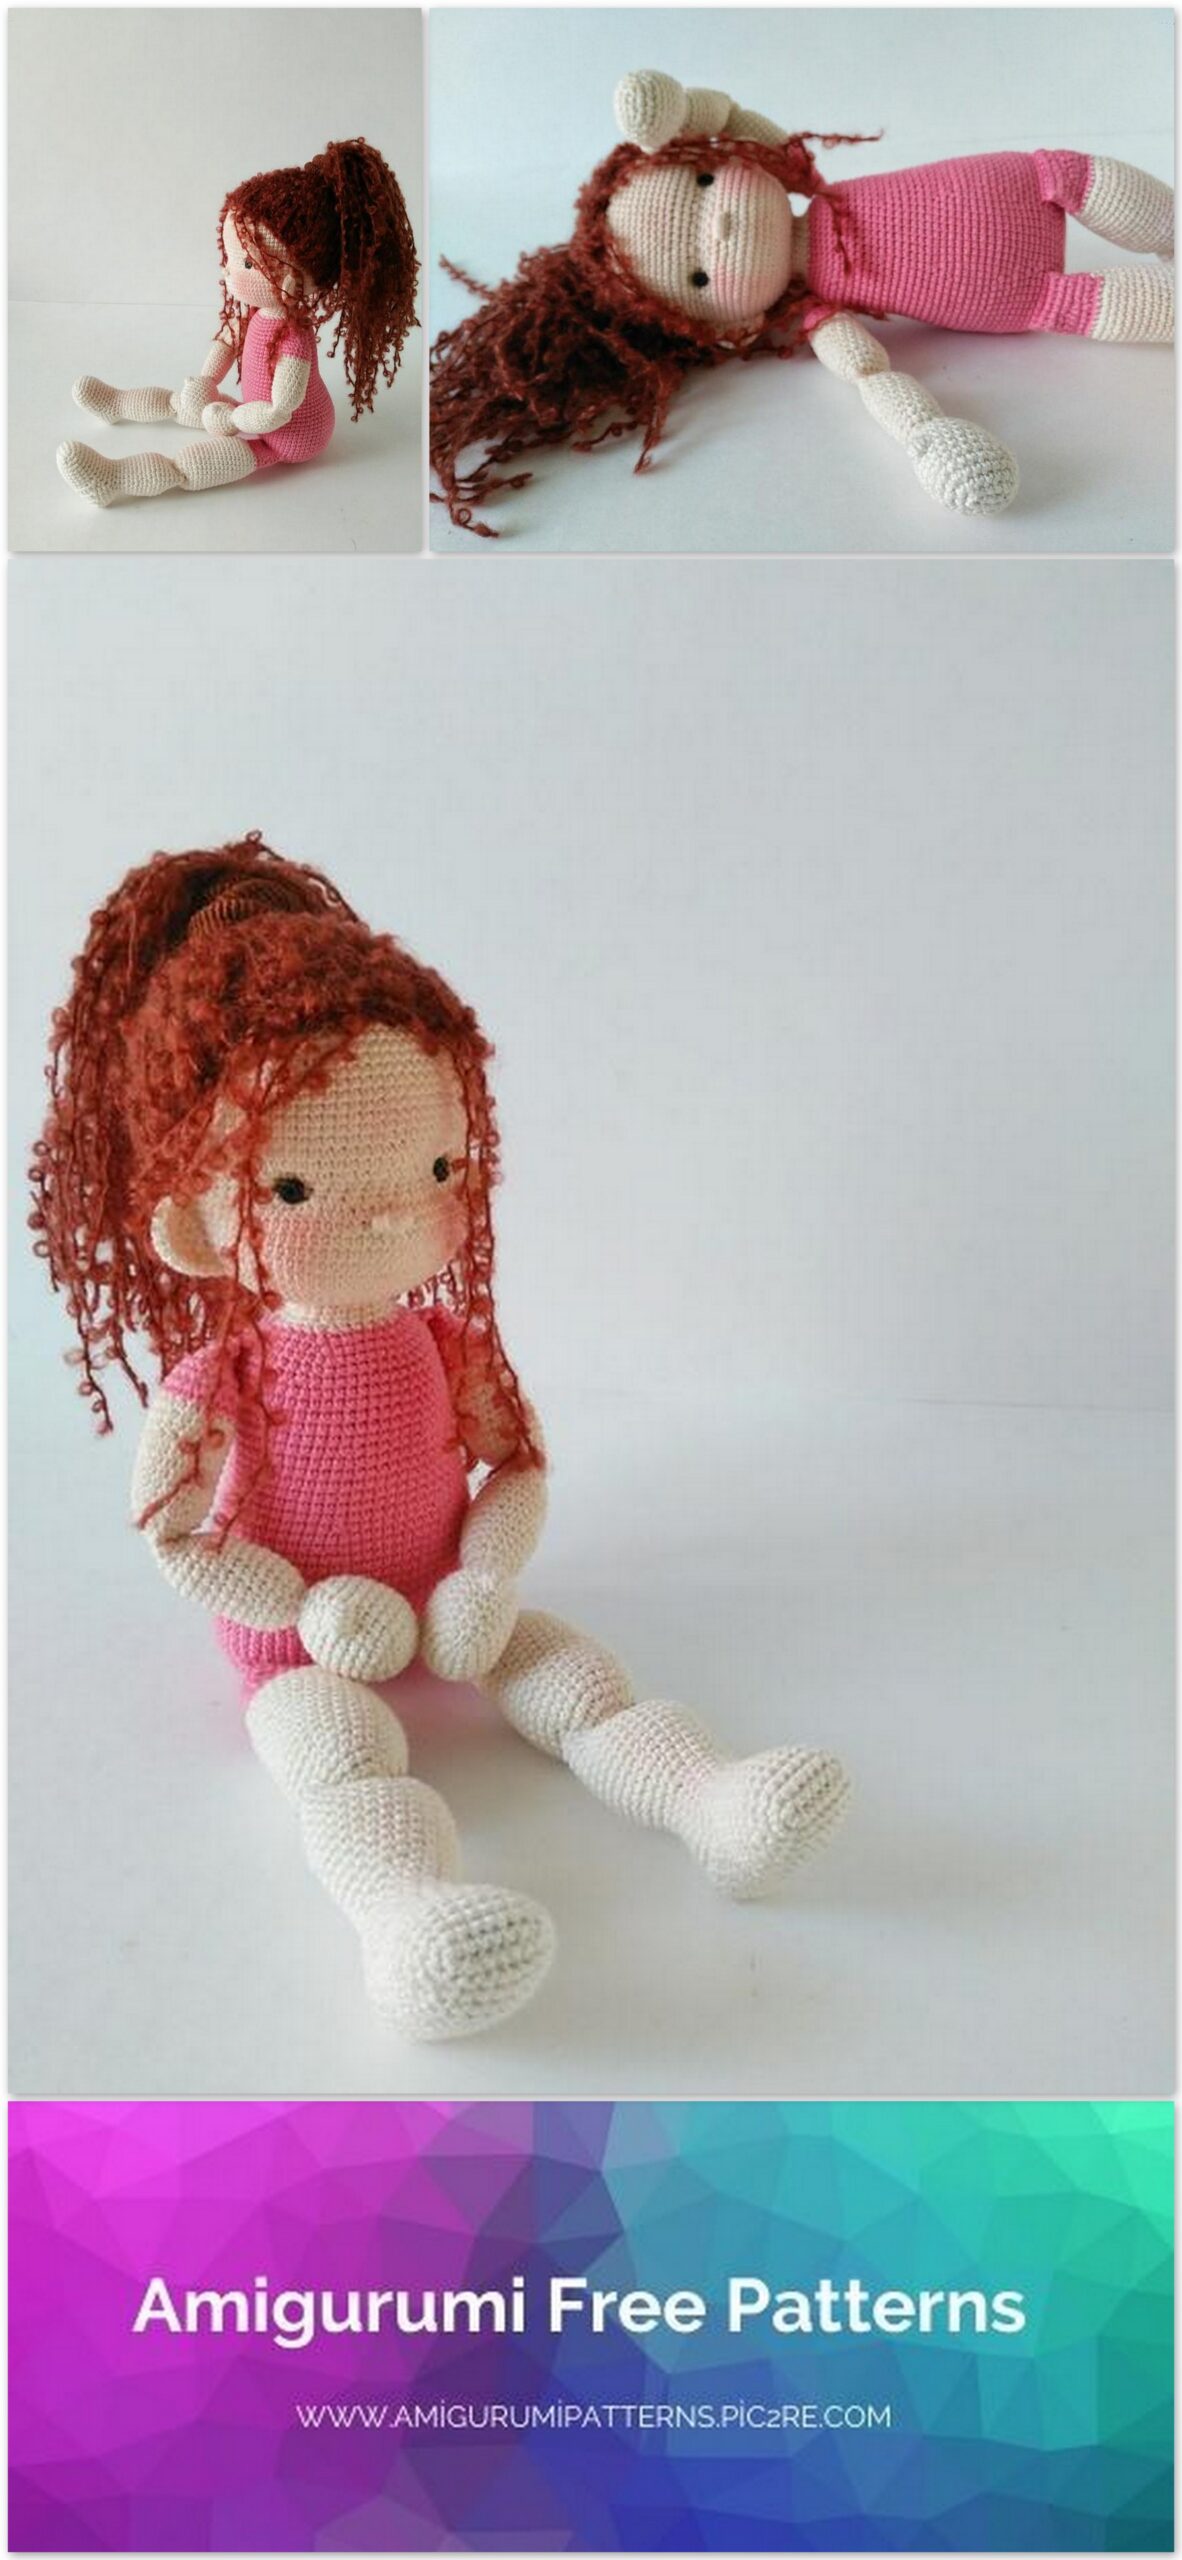
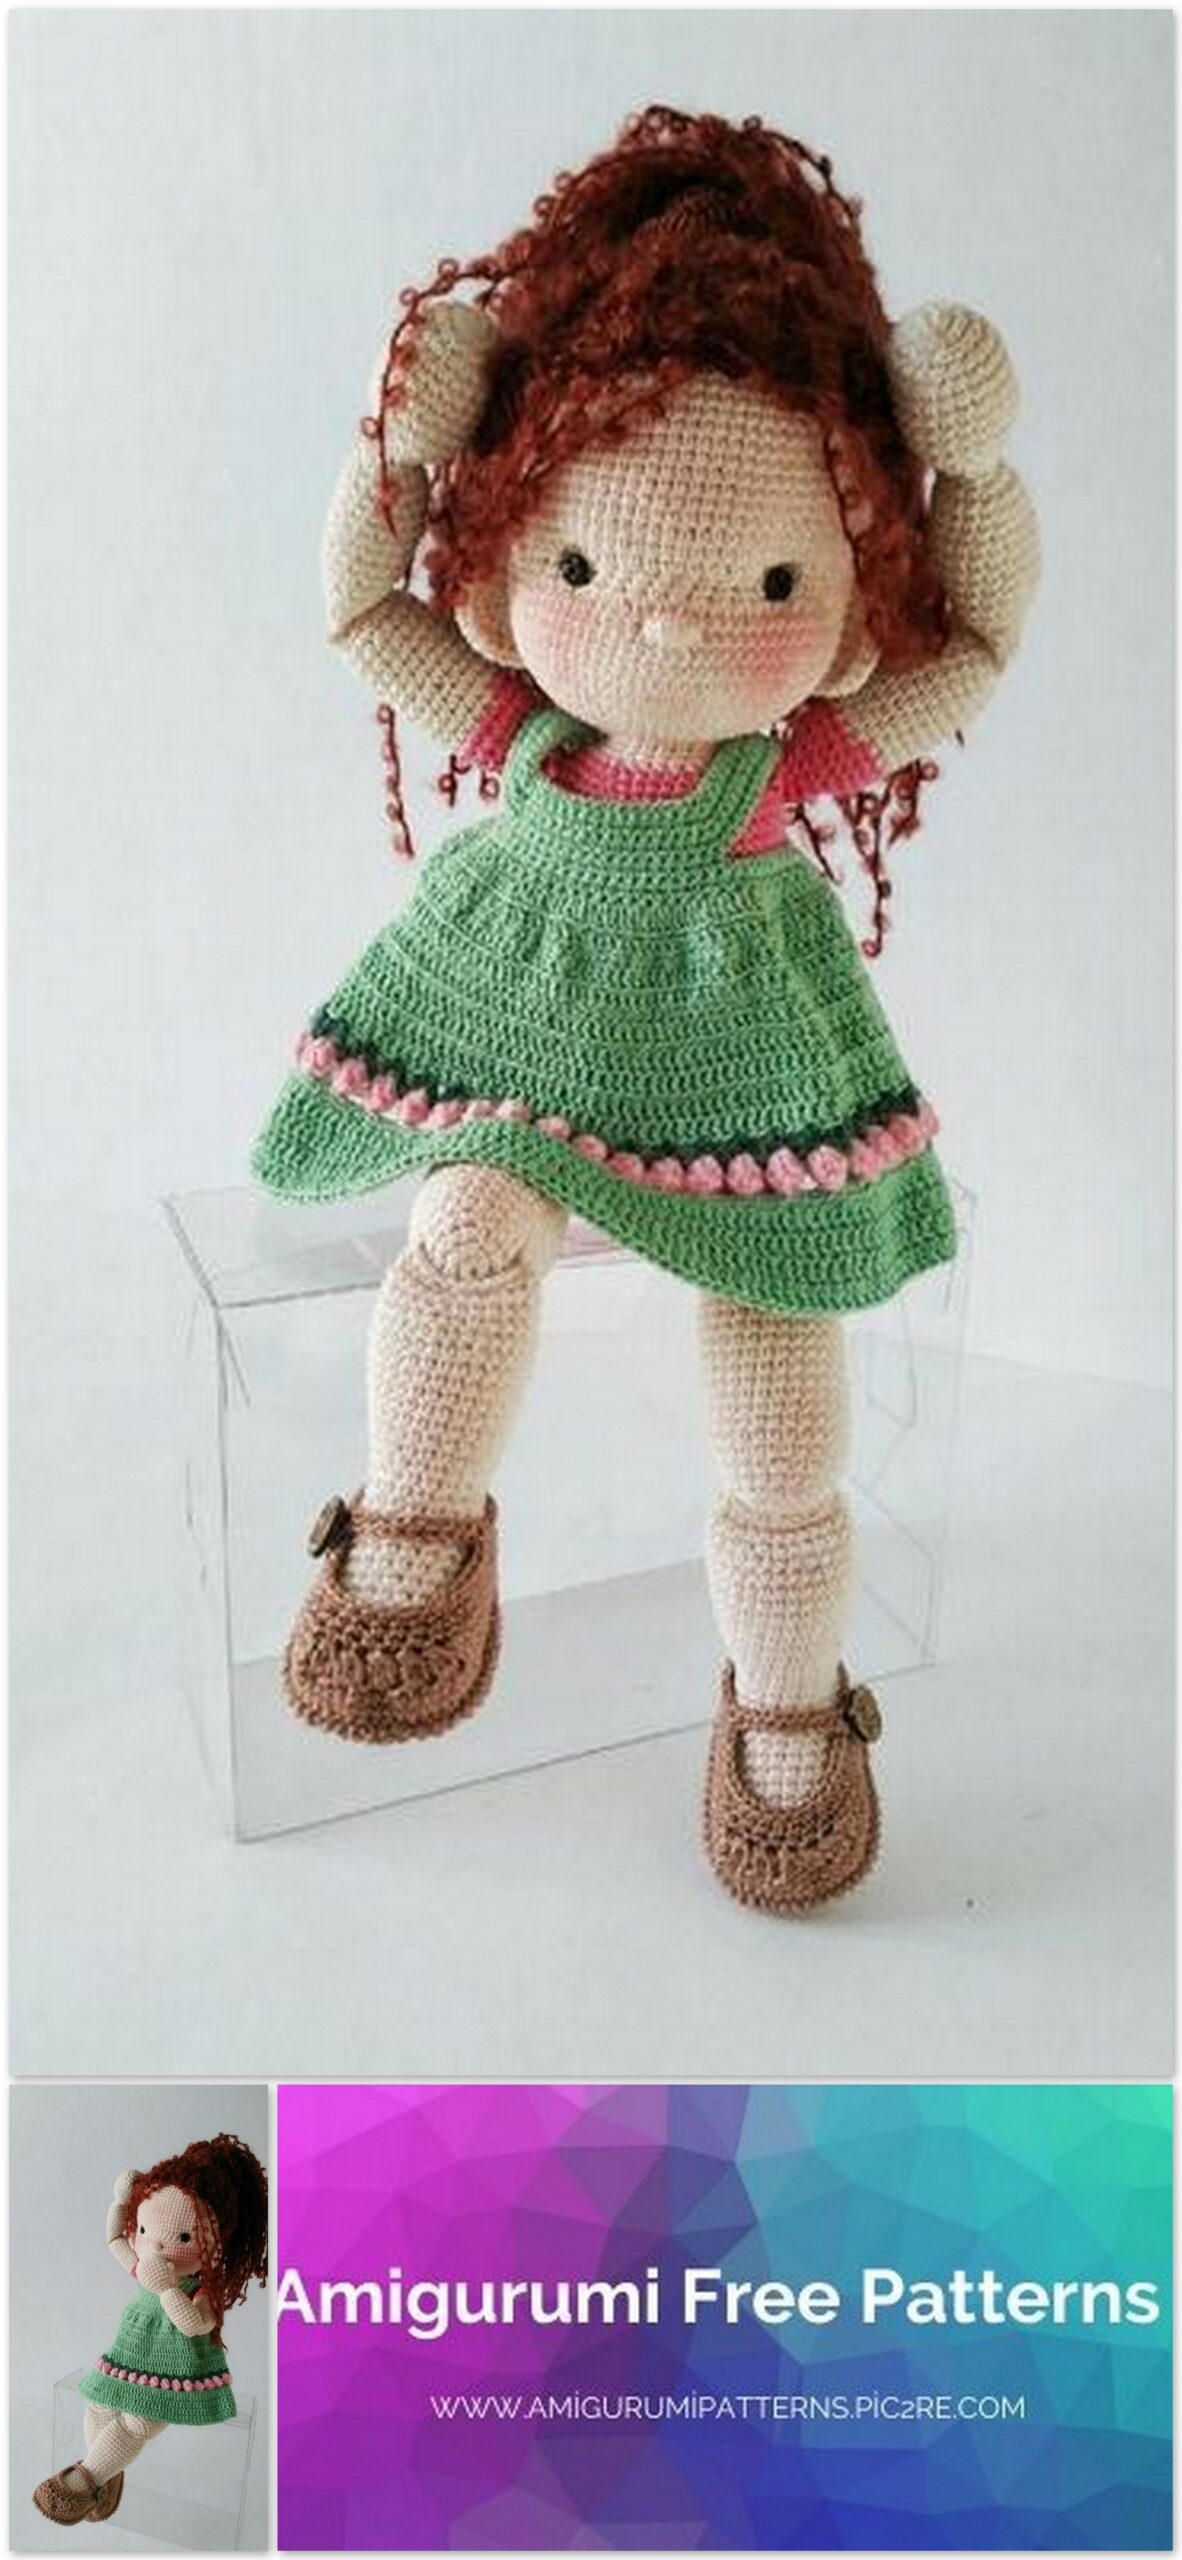
Amigurumi Mari Doll Free Crochet Pattern
Pinterest Offical Page : amigurumipatterns.pic2re.com
Facebook Group: amigurumipatterns.pic2re.com
Facebook Offical Page: amigurumipatterns.pic2re.com
A great pattern was shared for free. Amigurumi mari doll is here. You can browse our website for more patterns.
Pattern: @talula_boom
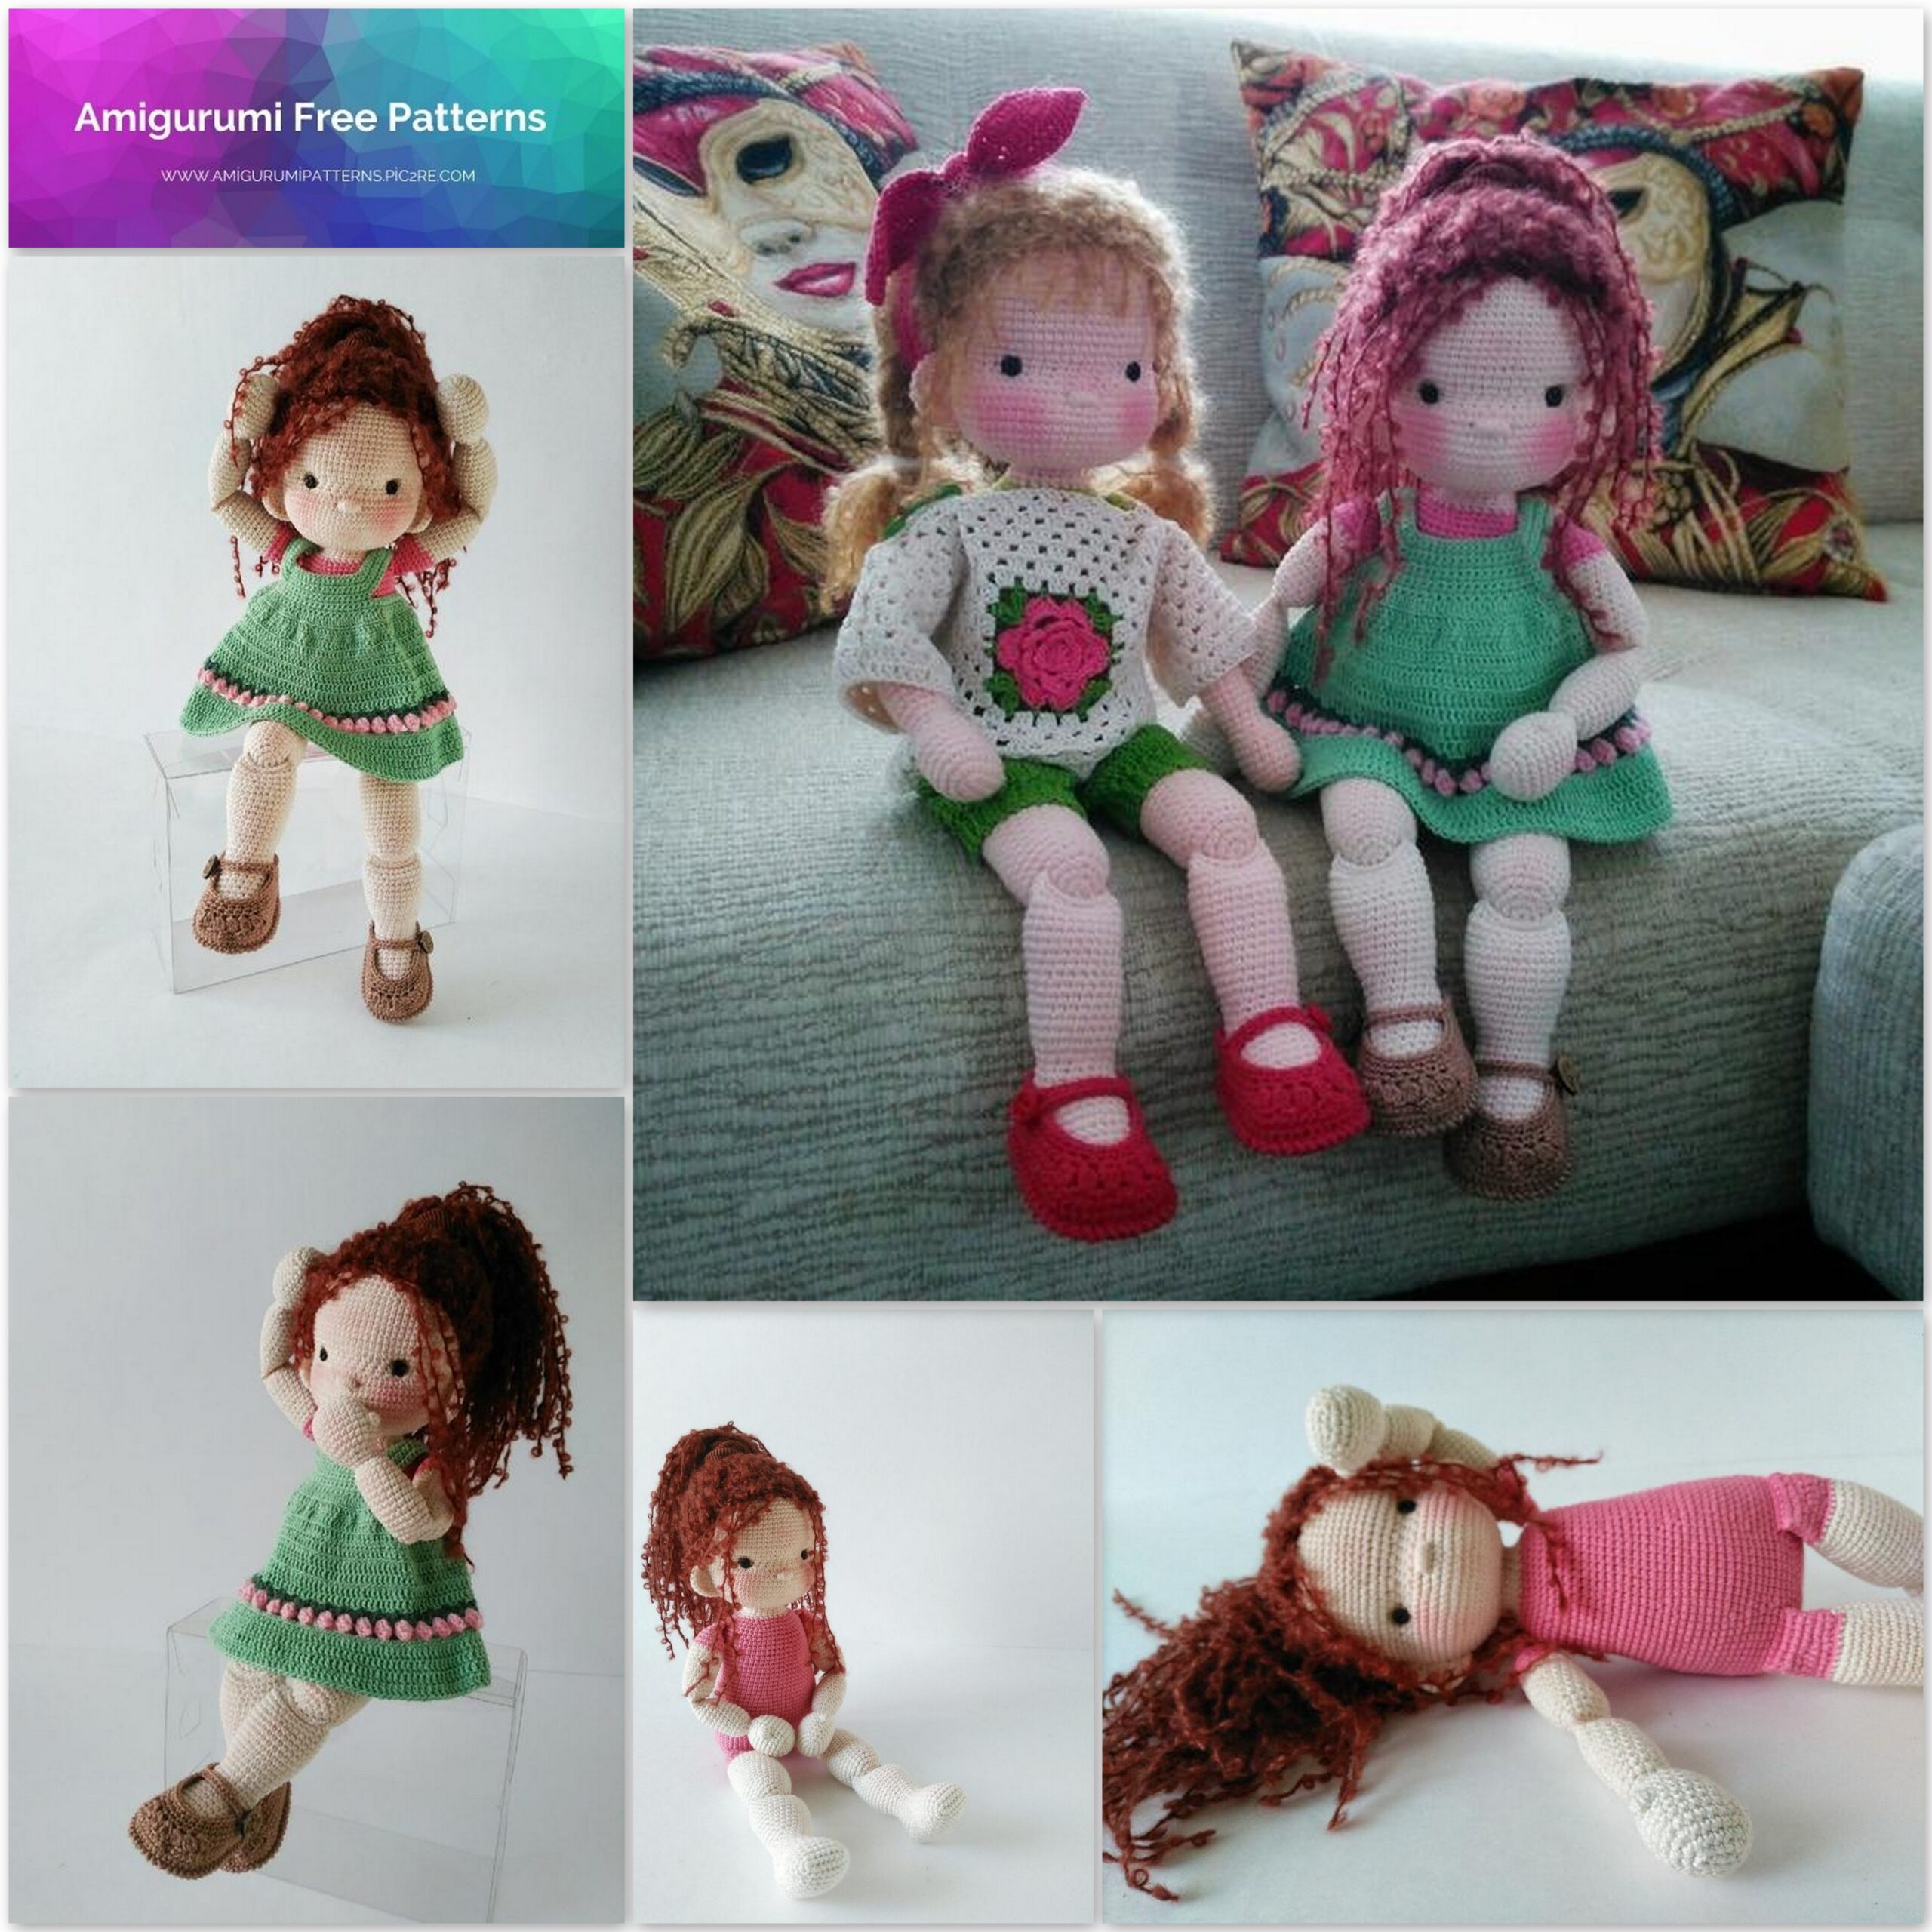
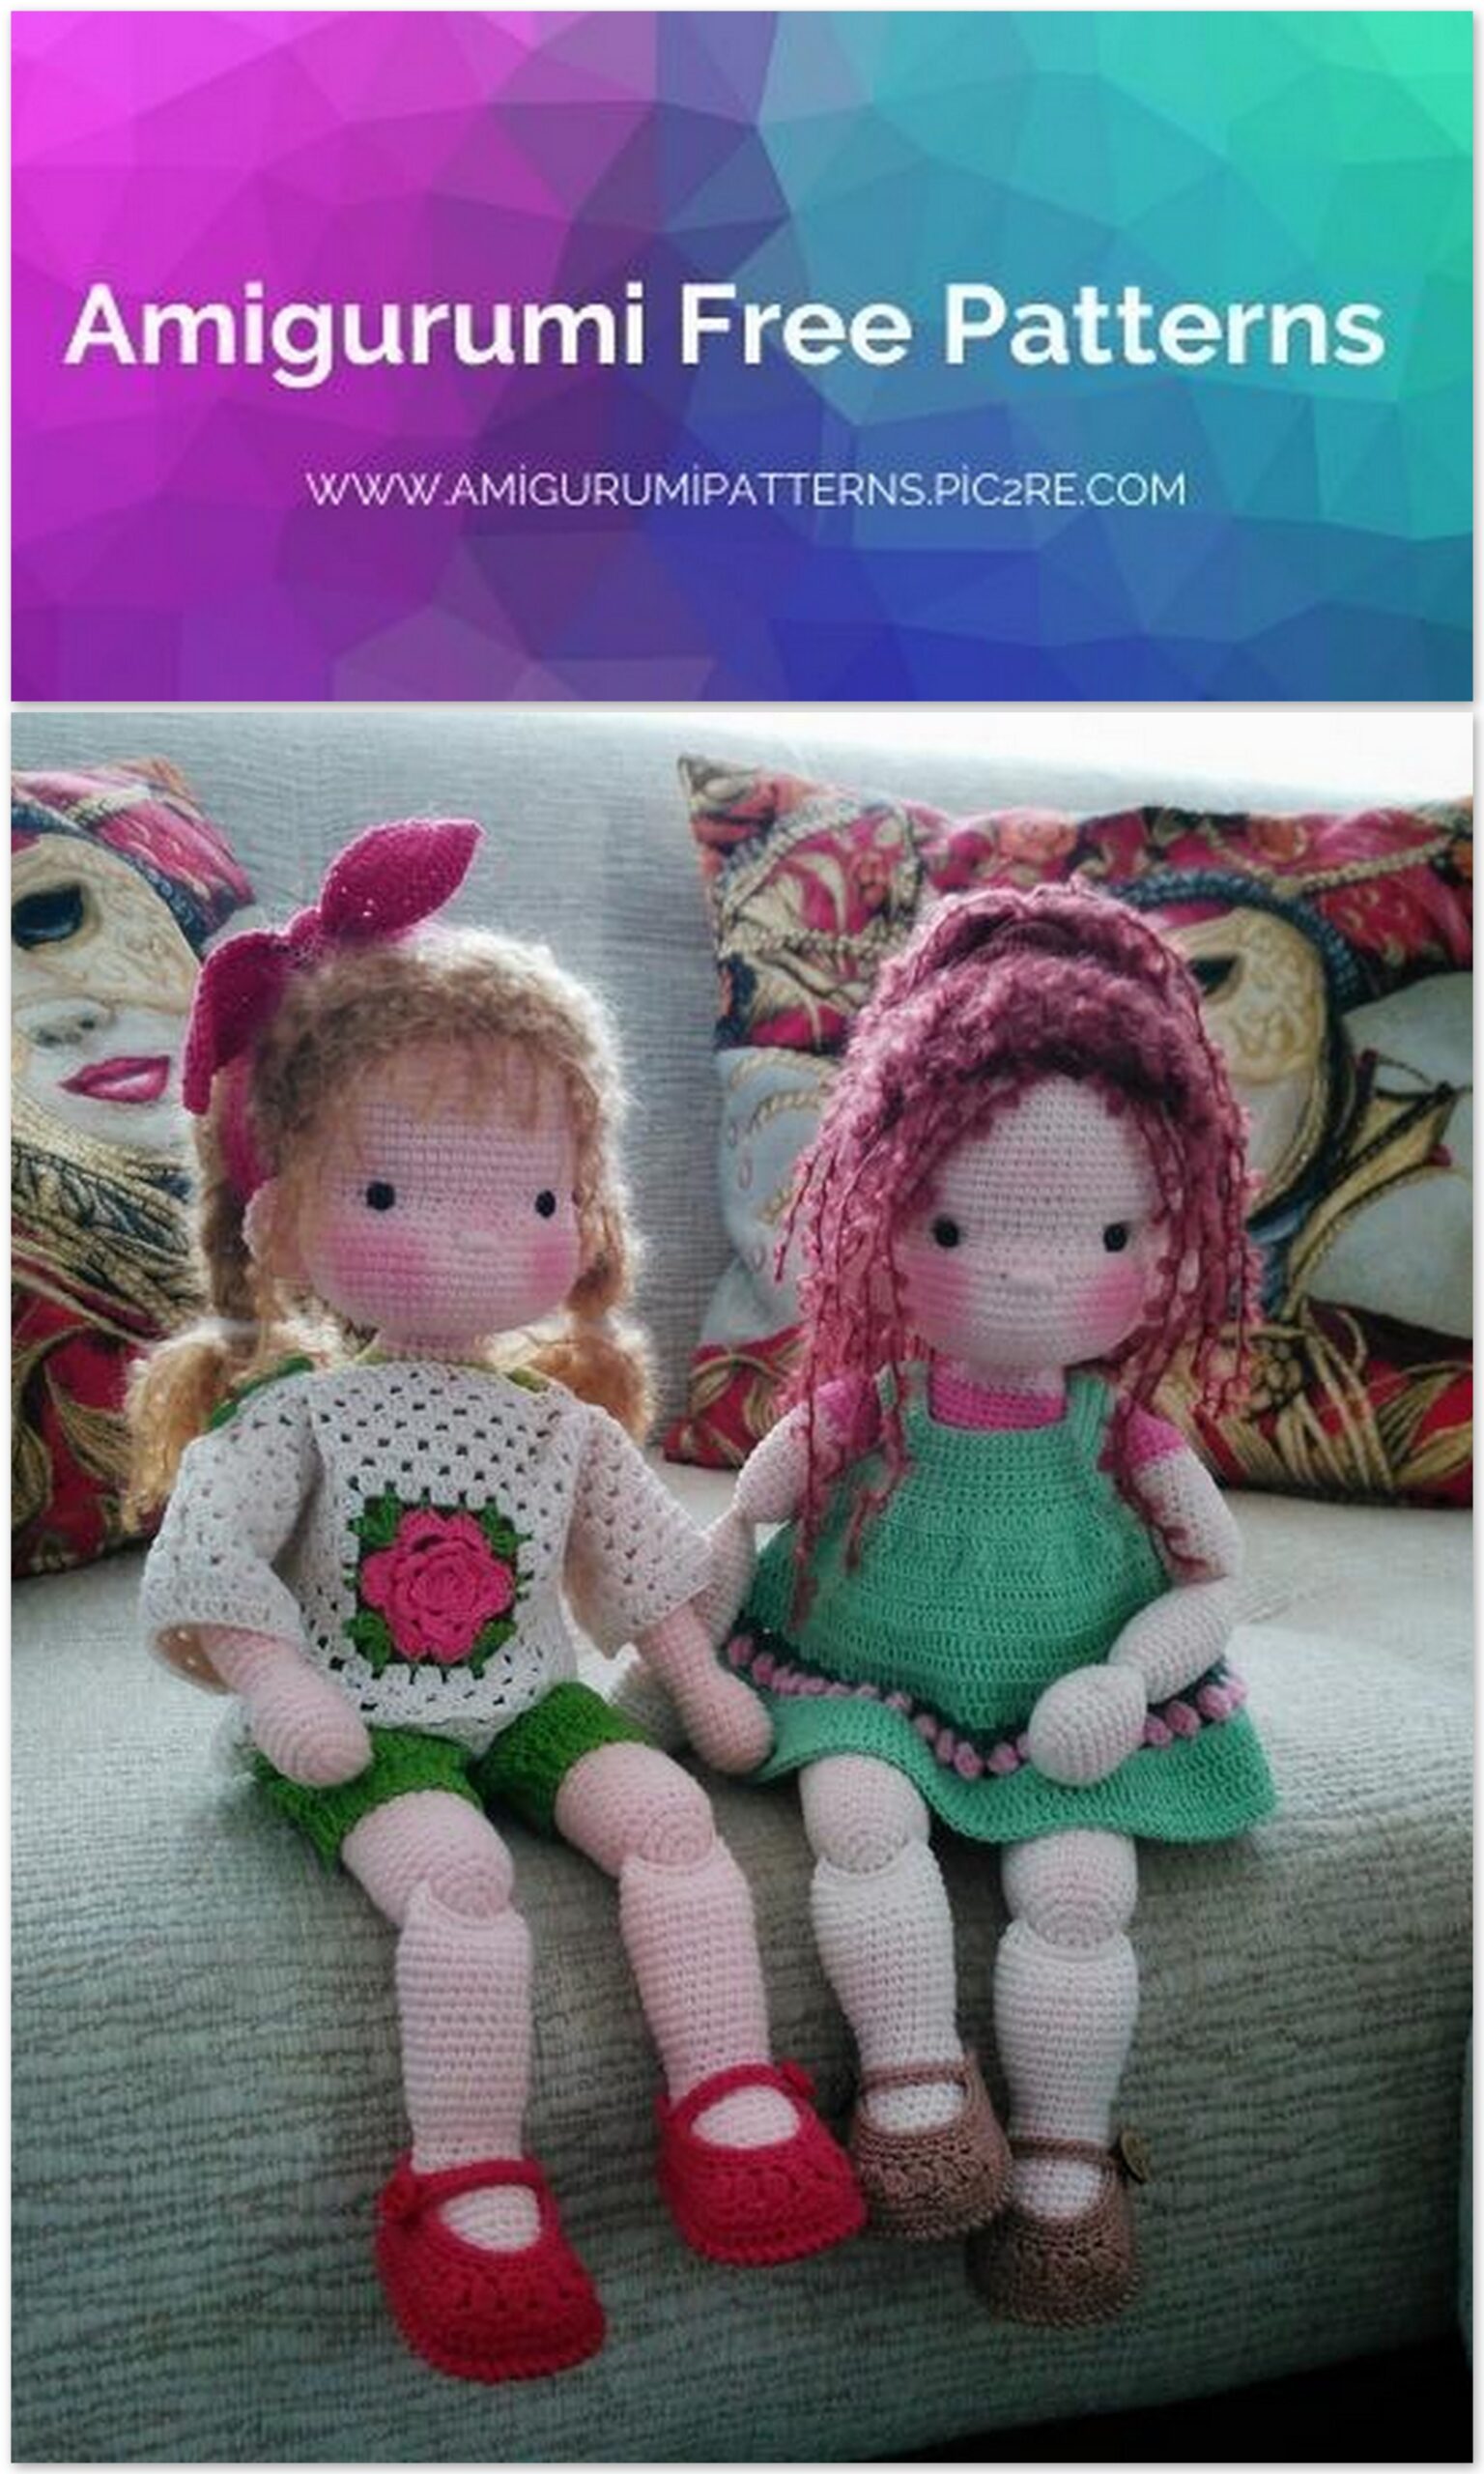
I’d like to present you a pattern for crochet doll Mari.
She has a waldorf-inspired design.
The doll can sit without support. She has bending arms and legs.
Final size of the toy with recommended materials and tools — 35 cm.
The doll doesn’t have a wire frame. She is crocheted in a continuous spiral
from the bottom up. You add arms and legs while crocheting.
Lower legs and ears are sewn to the body.
The pattern is designed for people with an average level of crocheting skill.
the doll crocheting process
face making
hair design
The pattern includes:
Warning!
Pattern does not include the clothes making process!
You would also need:
Different ways of crocheting can affect the final size of the doll.
ALPINA NANA (105m/50gr) 06 (pale pink). 200 m of yarn required.
ALPINA NANA (105m/50gr) 03 (pink). 100 m of yarn required.
Alize COTTON BABY SOFT (270m/100gr) 01 (creamy). 200 m of yarn required.
Alize COTTON BABY SOFT (270m/100gr) of any other color that suits the hair.
50 m of yarn required.
Required materials
Here I can offer you two types of yarn from different price categories.
Choose the one you like.
Type 1
You can use any other color for the body.
The doll on the left is made of ALPINA NANA.
Type 2
Crochet hook 1.75;
Toy stuffing material (holofiber);
Wooden stick for stuffing;
Spool of threads matching hair color — to sew the wig to the head;
2 black metal sew-on buttons (5mm) — for eyes;
Strong black threads — to sew the eyes;
Needle for tightening — no shorter than 15 cm;
Short needle with large eye — for the hair stitching;
Simple sewing needle — to sew the wig to the head;
Super glue for eyes fixation;
Dry pastel to tint cheeks;
Color-head pins for the hair markings.
Abbreviations
sc – single crochet
dc – double crochet
hdc – half double crochet
ch – chain stitch
inc – increase (crochet 2 stitches into 1 stitch in the round below)
dec – decrease (make invisible decrease)
You can use any other yarn you like; you just need to find the crochet hook of the right size for it.
However it can also affect the size of the doll.
Hair materials
Boucle mohair yarns Adele (100m/50gr). 1 ball of yarn for the thick long hair.
Different hairstyles require different amounts of yarn.
You can use other boucle mohair yarn types if you’d like.
Crochet a chain 5ch
1. Starting from the 2nd stitch from hook crochet — 3sc, 4sc into the last stitch, 3sc at the other side of the chain, 1inc into the last stitch. (12)
2. Marker the first stitch of the round.
1inc, 3sc, 2inc, 4sc, 1inc, 1sc (16)
3. 1inc, 4sc, 1inc, 1sc, 1inc, 1sc, 1inc, 4sc, 1inc, 1sc (21)
4. 1inc, 1sc, 1inc, 5sc, 1inc, 12sc (24) (pic.1)
5-8. (4 rounds) 24sc (24)
9 round is for the thumb. It has a different position on left and right hands.
9. Right hand: 1 puff stitch of 4dc, 23sc (24)
9. Left Hand: 11sc, 1 puff stitch of 4dc, 12sc (24)
10. 24sc (24)
11. (2sc, 1dec)х6 (18)
12. (1sc, 1dec)х6 (12)
13. 12sc (12)
14. Stuff it and sew the back loops together loosely.
I use the contrast thread for illustrative purposes (pic.2)
Crochet 12sc (12) using the front loops (pic.3)
Arms (2 parts)
Crochet it in a spiral. Start crocheting with skin-colored yarn.
Puff stitch — how to do it
15. (1sc, 1inc)х6 (18)
16-25. (10 rounds) 18sc (18)
26. 3sc, 1dec, 2sc, 1dec, 3sc, 1dec, 2sc, 1dec (14)
27. 14sc (14)
28. 4sc, stuff it and fold it in half.
29. Crochet 2 sides together. 7sc, 1ch, turn (7) (pic.4-5)
30. Crochet in a circle using 7 front and 7 back loops (14) (pic.6)
The first stitch of the next round would be its starting point.
31. 14sc (14)
32. 1sc, 1inc (2sc, 1inc)х4 (19)
33-42. (10 rounds) 19sc (19)
43. 6sc, switch color to the pink, 13sc (19)
44-46. (3 rounds) 19sc (19)
Stuff the hand.
47. 1sc, 9dec (10)
48-49. (2 rounds) 10sc (10)
50. 4sc, fold it in half and crochet 2 sides together:
4sc, 1ch, turn
51. 4sc (4)
Hide the remaining thread into the hand.
Arms (2 parts)
Crochet the hips from the knee up. We start with the skin-colored thread.
1. 6sc into the magic ring (6)
2. 6inc (12)
3. (1sc, 1inc)х6 (18)
4. (2sc, 1inc)х6 (24)
5. 24sc (24)
6. (5sc, 1inc)х4 (28)
7-19. (13 rounds) 28sc (28)
20. (1dec, 5sc)х4 (24)
21. 24sc (24)
Switch color to the pink.
Leave 15 cm of the previous color thread.
22. 24sc (24)
Stuff the leg and fold it in half. Use previously left thread to fasten 2 sides, using back loops. Sew it together loosely (pic.8-9)
23. Crochet in circle, using the front loops (4sc,
1dec)х4 (20)
24. 5sc, 1hdc, 9dc, 1hdc, 4sc (20)
25. (1dec, 3sc)х4 (16)
26. 16sc, turn.
27. Fold it in half. Crochet 2 sides together 8sc (8)
Hide the remaining thread into the leg.
Legs (4 parts)
Each leg consists of 2 separate parts
Feet
To crochet a foot use a decrease type SKIPPING LOOP:
1dec = 1sc skip + 1sc
If you use this type of decreases, the foot would look neater.
1. 8ch
2. Starting from the 2nd stitch from hook crochet — 6sc. 6sc at the other side of the chain, 2sc into the last stitch (18)
3. 1inc, 7sc, 1inc, 9sc (20)
4. 1inc, 9sc, 1inc, 9sc (22)
5. 1inc, 10sc, 1inc, 10sc (24) (pic.12)
6 round would be different for the right and left feet.
6. Right foot: 12sc, 1inc, 11sc (25)
6. Left foot: 1inc, 23sc (25)
7-9. (3 rounds) 25sc (25)
10. 11sc, 1dec, 10sc, 1dec (23)
11. 3sc, turn.
Start crocheting the turning round without the chain stitches, there would be 1 stitch lesser each round due to it.
12. From the 2nd stitch from hook – 12sc, turn (12)
13. From the 2nd stitch from hook – 11sc, turn (11)
14. From the 2nd stitch from hook – 10sc, turn (10)
15. From the 2nd stitch from hook – 9sc, turn (9)
16. From the 2nd stitch from hook – 8sc, turn (8)
17. From the 2nd stitch from hook – 7sc, turn (7)
18. From the 2nd stitch from hook – 6sc, turn (6)
19. Crochet in circle: 5sc, 8sc crochet on the side of turning rounds, 10sc, 7sc — on the other side of turning rounds (30)
Legs (4 parts)
Right and left feet are a bit different
20. 1sc, 1dec, 9sc, 1dec, 9sc, 1dec, 5sc (27)
21. 1sc, 1dec, 7sc, 1dec, 9sc, 1dec, 4sc (24)
22. 1sc, 1dec, 5sc, 1dec, 9sc, 1dec, 3sc(21)
23. 1sc, 1dec, 4sc, 1dec, 8sc, 1dec, 2sc (18)
24. 18sc (18)
Make the green pin decreases skipping the loop
Make all the other decreases any way that is comfortable for you.
Lower leg
25. 4sc, 1inc, 3sc, 1inc, 4sc, 1inc, 3sc, 1inc (22)
26. 22sc (22)
27. 6sc, 1inc, 12sc, 1inc, 2sc (24)
28. 24sc (24)
29. 7sc, 1inc, 12sc, 1inc, 3sc (26)
30-31. (2 rounds) 26sc (26)
32. 8sc, 1inc, 14sc, 1inc, 2sc (28)
33. 28sc (28)
34. 9sc, 1inc, 15sc, 1inc, 2sc (30)
35-36. (2 rounds) 30sc (30)
37. 1sc, 1dec, 3sc, 1dec, 8sc, 1dec, 3sc, 1dec, 7sc (26)
38. 2sc, 1dec, 12sc, 1dec, 8sc (24)
39. 24sc (24)
40. 10sc, turn.
Stuff it.
Try to push forward the big toe while stuffing.
41. Fold it in half. Crochet 2 sides together 12sc (12)
Leave 25 cm of the thread.
Legs (4 parts)
Right and left feet are a bit different
Crochet a chain 23ch, loosely.
1. Starting from the 2nd stitch from hook crochet 22sc, 1ch, turn
Crochet the turning rounds:
2-7. (6 rounds) 22sc, 1ch, turn (22)
Crochet 7 turning rounds without the chain stitch.
8. From the 2nd stitch from hook – 21sc, turn (21)
9. From the 2nd stitch from hook – 20sc, turn (20)
10. From the 2nd stitch from hook – 19sc, turn (19)
11. From the 2nd stitch from hook – 18sc, turn (18)
12. From the 2nd stitch from hook – 17sc, turn (17)
13. From the 2nd stitch from hook – 16sc, turn (16)
14. From the 2nd stitch from hook – 15sc, turn (15)
15. From the 2nd stitch from hook — crochet in circle.14sc, 14sc to the side of turning rounds, 22sc to theother side of the 1st round chain,14 sc to the side of turning rounds (64)
16. 64sc (64)
17. 26sc, attach the leg, 8sc with the left leg, 8sc,8sc with the right leg, 14 sc (64) (pic.17-18)
18. 1sc, 1inc, 10sc, 1inc, 21sc, 1inc, 6sc, 1inc, 22sc(68)
19. 37sc, 1inc, 7sc, 1inc, 22sc (70)
20. 70sc (70)
21. 37sc, 1inc, 9sc, 1inc, 22sc (72)
22. 72sc (72)
23. 37sc, 1inc, 11sc, 1inc, 22sc (74)
24-26. (3 rounds) 74sc (74)
27. 2sc, (1sc, 1dec)х5, 57sc (69)
28-29. (2 rounds) 69sc (69)
30. 2sc,1dec, 6sc, 1dec, 57sc (67)
.
Body
Crochet the body from the bottom up.
We start with the pink thread.
mark where round starts
31. 31sc, 1dec, 10sc, 1dec, 22sc (65)
32. 2sc, 1dec, 4sc, 1dec, 55sc (63)
33. 29sc, 1dec, 8sc, 1dec, 22sc (61)
34. 3sc, 1dec, 2sc, 1dec, 52sc (59)
35. 15sc, 1dec, 32sc,1dec, 8sc (57)
36. 57sc (57)
37. 4sc, 1dec, 51sc (56)
38-39. 56sc (56)
40. 26sc, 1dec, 6sc, 1dec, 20sc (54)
41-42. 54sc (54)
43. 15sc, 1dec, 28sc, 1dec, 7sc (52)
44-45. (2 rounds) 52sc (52)
46. (11sc, 1dec)х4 (48)
47. 48sc (48)
Stuff it. Don’t forget to sculpt the nice right form while stuffing.
Add the arms.
48. 14sc, 4sc crochet with arms, 22sc, 4sc crochet with arms, 4sc (48) (pic.20)
Check the symmetry of the attached arms.
49. (6sc, 1dec)х6 (42)
Change the pink thread to the skin colored.
50. (5sc, 1dec)х6 (36)
51. (4sc, 1dec)х6 (30)
52. (3sc, 1dec)х6 (24)
53-55. (3 rounds) 24sc (24)
You can see the scheme of increases and decreases on the pic.19.
Reds = increases, greens = decreases.
.
Body
marker where round starts
Front
Back
The increases should be located strictly at the center of the face / the back of the head.
1. 12sc, 10inc, 2sc (34)
2. 4sc, 1inc, 1sc, 1inc, 27sc (36)
3. 4sc, 1inc, 2sc, 1inc, 7sc, (1inc,1sc)х10, 1sc (48)
4. 4sc, 1inc, 4sc, 1inc, 38sc (50)
5. 5sc, 1inc, 5sc, 1inc, 7sc, (1inc, 2sc)х10, 1sc (62)
6. 5sc, 1inc, 7sc, 1inc, 48sc (64)
7. 1sc,1inc, 18sc, 1inc, 3sc, (1inc, 4sc)х8 (74)
8. 7sc, 1inc, 8sc, 1inc, 57sc (76)
9. 2sc, 1inc, 20sc, 1inc, 52sc (78)
10. 8sc, 1inc, 9sc, 1inc, 59sc (80)
11. 80sc (80)
12. 9sc, 1inc, 10sc, 1inc, 59sc (82)
13. 82sc (82)
14. 10sc, 1inc, 11sc, 1inc, 59sc (84)
15. 43sc, 7dec, 3sc, 7dec, 10sc (70)
16-17. (2rounds) 70sc (70)
18. 41sc, (1inc, 1sc)х5, 2sc,(1inc, 1sc)х5, 7sc (80)
19. 80sc (80)
20. 35sc, 1inc, 12sc, 1inc, 17sc,1inc, 12sc, 1inc (84)
21-28. (8 rounds) 84sc (84)
Stuff the upper body and the necktightly. The head should sit on it steadily.
You can see the scheme of increases and decreases on the pic.22.
Reds = increases, greens = decreases.

Head
Continue crocheting from the 24th loop of the body — bottom up
Face
Back marker where round starts
29.(12sc, 1dec)х6(78)
30.78sc(78)
31.(11sc, 1dec)х6(72)
32.72sc(72)
33.(10sc, 1dec)х6(66)
34.(9sc, 1dec)х6(60)
35.(8sc, 1dec)х6(54)
Stuff the head, most attention tothe cheeks. 36. (7sc, 1dec)х6 (48) 37. (6sc, 1dec)х6 (42) 36. (5sc, 1dec)х6 (36) 37. (4sc, 1dec)х6 (30) 38. (3sc, 1dec)х6 (24) 39. (2sc, 1dec)х6 (18) Finish the stuffing of the head. 40. (1sc, 1dec)х6 (12) 41. 6 decreases. Pull the hole tightly. Leave the 35 cm thread — we will stitch the nose with it later. To stabilize the shape of the head put 2 marks under the chin. Pierce the head through one mark to the top of the head. Put the other end of the thread to the needle again and make the piercing through the second mark to the top of the head. Tie the threads with a double knot. Hide the ends of the threads inside the head using a needle. Do the same with the back of the head (pic.23-24) When stuffing and stabilizing the head, you should imagine yourself a sculptor to make head pretty and right.
Head
To make the eyes I use black metal sew-on buttons (5 мм) — the thickest part of them. You
can use any other eyes material.
Insert strong black thread into the button holes. Glue the eyes with super glue in 16th-17th
head round. The distance between them — ~10 stitches.
Glue them so the eyes would not shift when we sew them on. When the eyes are glued to
the head, put the threads into the needle, pierce the head and get the threads to the back of
the head. Tie the threads at the back of the head — you can also make a slight tightening of
the eye area. Hide the ends of the threads inside the head.
.
Head
Face design
Nose
Get the thread left on the top of the head to the 13-14th rounds in the center of the face.
Make 3-4 horizontal stitches, pulling 3-4 loops. Then sew it over with the vertical stitches —
carefully, placing each stitch parallel to another (pic.28-30)
Ears (2)
1. 6sc in the magic ring (6)
2. 4inc, 1ch, turn (8)+(2)
3. 2sc, 1inc, (1sc, 1inc)х2, 1ch, turn
4. 11sc (11)+(2)
Leave the 20 cm thread to attach the ears to the head.
Attach them at the distance of 7 stitches from the eyes.
The top of the ear should be at eye level.
.
Head
Nose and ears
I use boucle mohair yarns to make hair. First we crochet a wig base, then we sew the hairs
to it. You can choose the distance between hairs. I usually leave 1.5-2 cm. The point of
making the wig base instead of sewing the hairs to the head directly — the doll wouldn’t look
bald, even if there isn’t much hair.
Wig base.
Use any threads and crocheting style you like.
1. 6sc into the magic ring
2. 6inc (12)
3. (1sc, 1inc)х6 (18)
4. (2sc, 1inc)х6 (24)
5. (3sc, 1inc)х6 (30)
6. (4sc, 1inc)х6 (36)
7. (5sc, 1inc)х6 (42)
The number of round can vary. I make a head with the 27 cm girth. Stop making increases
as soon as circle’s diameter = 7 cm. Then crochet without increases and try the wig on the
head from time to time. It should fit tightly.
Fix the wig on the head using pins. Sew it to the head by the threads of matching color —
first on the sides, then in the middle.
Head
Hair
Use pins to choose the placement for the hairs. Here’s the way of hair attachment —
I use the contrast thread and the other head for illustrative purposes.
Put the thread into the needle, but don’t cut it off the ball.
Attach two hairs at a time. Look at the pic.34.
The hairs would be attached tightly.
You need to pull them to fix even better and cut at the desired length. Fill the head with hair from the sides of the wig to its top.
Head
Hair
Last step is attaching the lower legs.
Mark the attachment points near the 4th round (pic.35)
Try it on using a needle (pic.36)
Sew the lower leg to the upper leg, piercing the marked points several times.
Tint the cheeks and the bridge of nose with the dry pastel or blusher.
Congratulations! Your doll is ready!
Attaching the lower legs