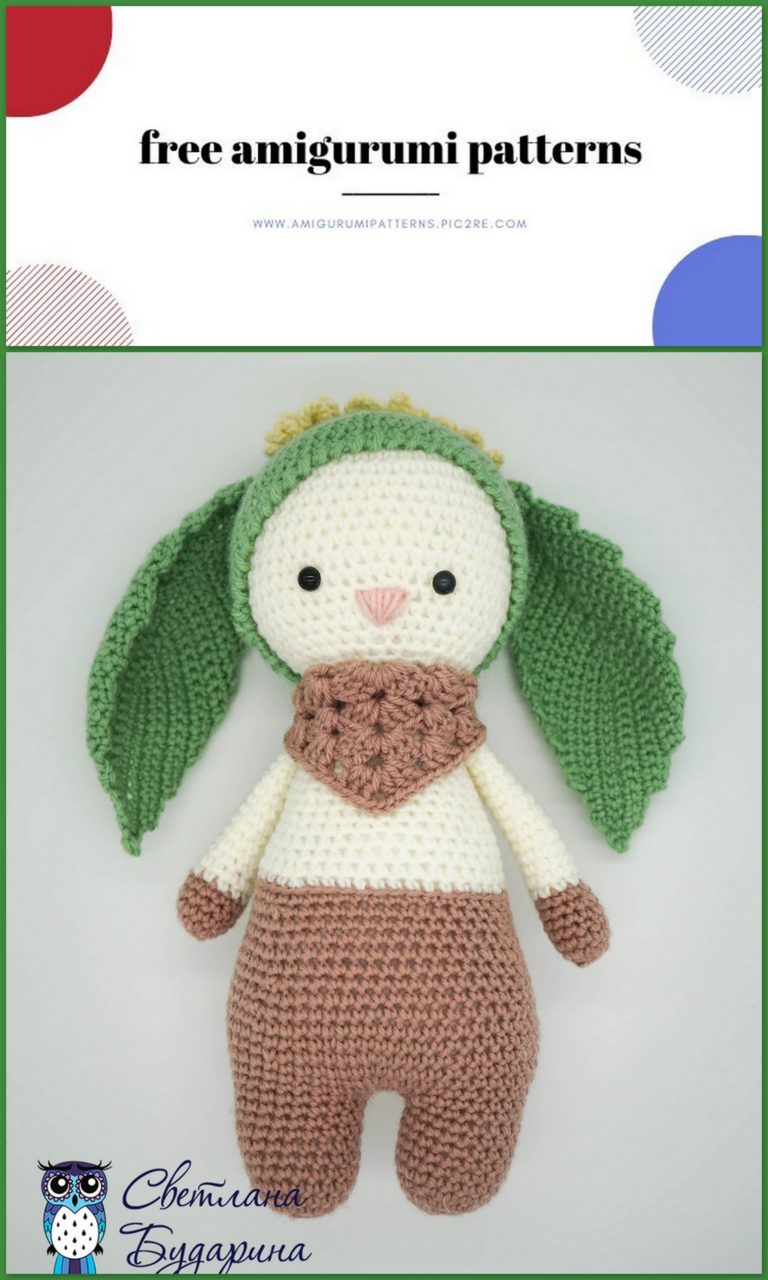
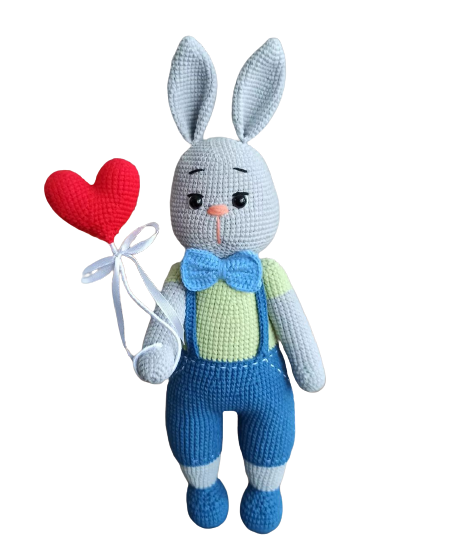
Amigurumi Rabbit Earl and Freya Free Crochet Pattern
Pinterest Offical Page : amigurumipatterns.pic2re.com
Facebook Group: amigurumipatterns.pic2re.com
Facebook Offical Page: amigurumipatterns.pic2re.com
We share the amigurumi rabbit pattern for you free of charge. You can browse our website for beautiful patterns from each other.
Rabbits Earl and Freya from Laura Leonard
Materials
Special Stylecraft Double Knit Thread
Hook 2.5 mm
Row marker
A pair of 12 mm eyelet for each rabbit
Stitching needle
Filler
All parts are knitted continuously, in a spiral, unless otherwise specified.
It is recommended that you use the row marker by moving it in each row to the beginning.
Leave the end for sewing upon completion of knitting.
Size: 44 cm in height from the tops of the ears to the priests (sitting).
The size will vary depending on your yarn and hook size.
Designations
sc = single crochet
ch = air loop
inc = increase
dec = decrease
sl-st = slip stitch
Body and neck
Knitting goes from the bottom, knit in the color of pants
1.6 sc into magic ring. (6)
2.6 inc (12)
3. (sc, inc) x 6 (18)
4. (2 sc, inc) x 6 (24)
5. (3 sc, inc) x 6 (30)
6. (4 sc, inc) x 6 (36)
7. (5 sc, inc) x 6 (42)
8. (6 sc, inc) x 6 (48)
9. (7 sc, inc) x 6 (54)
10. (8 sc, inc) x 6 (60)
11. (9 sc, inc) x 6 (66)
12. (10 sc, inc) x 6 (72)
13. (11 sc, inc) x 6 (78)
14. (12 sc, inc) x 6 (84)
15-30. no change (84)
31. (12 sc, dec) x 6 (78)
32. unchanged (78)
33. (11 sc, dec) x 6 (72)
34. unchanged (72)
35. for the front half loops, unchanged (72)
36. unchanged (72)
Cut and fasten the thread.
We attach the thread to the loops of the 35th row, knit with the color of the body or the color of the blouse.
37. 72 sc per loop 35 rows (72)
38. (10 sc, dec) x 6 (66)
39. unchanged (66)
40. unchanged (66)
41. (9 sc, dec) x 6 (60)
42. unchanged (60)
43. (8 sc, dec) x 6 (54)
Add filler during knitting.
44. unchanged (54)
45. unchanged (54)
46. (7 sc, dec) x 6 (48)
47. unchanged (48)
48. unchanged (48)
49. (6 sc, dec) x 6 (42)
50. unchanged (42)
51. unchanged (42)
52. (5 sc, dec) x 6 (36)
53. unchanged (36)
54. unchanged (36)
Change the color to the main one (rabbit color)
55. (4 sc, dec) x 6 (30)
56-60. no change (30)
Fasten the thread, cut off, leaving a long end for sewing.
Head
We start knitting with the main color (rabbit color). Knitting goes on top of the head.
1.6 sc into magic ring (6)
2.6 inc (12)
3. (sc, inc) x 6 (18)
4. (2 sc, inc) x 6 (24)
5. (3 sc, inc) x 6 (30)
6. (4 sc, inc) x 6 (36)
7. (5 sc, inc) x 6 (42)
8. (6 sc, inc) x 6 (48)
9-12. no wintering (48)
13. (7 sc, inc) x 6 (54)
14. (8 sc, inc) x 6 (60)
15. (9 sc, inc) x 6 (66)
16. (10 sc, inc) x 6 (72)
17. (11 sc, inc) x 6 (78)
18-29. no change (78)
30. (11 sc, dec) x 6 (72)
You might want to attach security eyes for the moment.
I recommend sticking them in the 15th row and about 8 loops between them.
Start stuffing your rabbit, then add the filler in the process of knitting.
31. unchanged (72)
32. (10 sc, dec) x 6 (66)
33. (9 sc, dec) rx 6 (60)
34. (8 sc, dec) x 6 (54)
35. (7 sc, dec x 6 (48)
36. (6 sc, dec) x 6 (42)
37. (5 sc, dec) x 6 (36)
38. (4 sc, dec) x 6 (30)
Cut and fasten the thread.
Using the filler, create the correct shape of the head.

Muzzle
Let’s start with the colors you have chosen for the face of the rabbit.
1.6 sc into magic ring (6)
2.6 inc (12)
3. (sc, inc) x 6 (18)
4.5 sc, 4 increments, 5 sc, 4 increments (26)
5. no change (26)
6.7 sc, 6 increments, 7 sc, 6 increments (38)
7-8. no change (38)
9.11 sc, 8 increments, 11 sc, 8 increments (54)
10-12. without changes
Fasten the thread, leave a long tail for sewing.
Sew the muzzle to the head.
Be careful when sewing, keep in mind that this oval is located along the face.
Nose
Let’s start with the colors you have chosen for the nose of the rabbit.
1.6 sc into magic ring (6)
2.6 inc (12)
3. (sc, inc) x 6 (18)
4-6. no change (18)
7. (sc, dec) x 6 (12)
Cut and fasten the thread, leave the thread for sewing.
Sew the nose to the muzzle, then pull the muzzle in the middle with the same thread.
Ears (2 parts)
Let’s start with the color you chose for the rabbit’s ears.
1.6 sc into magic ring (6)
2.6 inc (12)
3. (sc, inc) x 6 (18)
4. (2 sc, inc) x 6 (24)
5. (3 sc, inc) x 6 (30)
6-15. no change (30)
16. (3 sc, dec) x 6 (24)
17-27. no change (24)
28. (2 sc, dec) x 6 (18)
29. unchanged (18)
30. Fold in half and knit 9 sc for both sides.
Cut the thread and fasten, leave the end for sewing.
Sew ears to the head.
Depending on where the ears will be located (as well as the eyes), the expression and character of your rabbit will change.
Hands (2 parts)
We start with the color that you have chosen for the paws.
1.6 sc into magic ring (6)
2.6 inc (12)
3. (sc, inc) x 6 (18)
4. (2 sc, inc) x 6 (24)
5-10. no change (24)
11. (2 sc, dec) x 6 (18)
12. (4 sc, dec) x 6 (15)
Change the color to the color of the sleeve.
13-46. no change (15)
Cut and fasten the thread. Sew hands to the body.
Legs (2 parts)
Start with the color you have chosen for the trousers.
1.6 sc into magic ring (6)
2.6 inc (12)
3. (sc, inc) x 6 (18)
4. (2 sc, inc) x 6 (24)
5. knit for the rear half loops (24)
6-15. no change (24)
16. (2 sc, dec) x 6 (18)
17-20. no change (18)
21. Fill, fold in half and knit 9 sc for both sides.
Fasten, leaving a long tail for stitching legs to the body.
Stop (2 parts)
Start with the color you have chosen for the rabbit.
1.6 sc into magic ring (6)
2.6 inc (12)
3. (sc, inc) x 6 (18)
4. (2 sc, inc) x 6 (24)
5. (3 sc, inc) x 6 (30)
6. (4 sc, inc) x 6 (36)
7-10. no change (36)
11. (4 sc, dec) rx 6 (30)
12-15. no change (30)
16. (3 sc, dec) x 6 (24)
17-24. no change (24)
Fill the part in the process of knitting.
25. (2 sc, dec) x 6 (18)
26. unchanged (18)
27. (sc, dec) x 6 (12)
28. dec x 6 (6)
Cut the thread and fasten, leaving the end for sewing.
Sew to the legs for the visible loops of 5 rows (where they were knitted for the back p / loops).
Make a pair of paws.
Tail
Make a pompom and sew on.