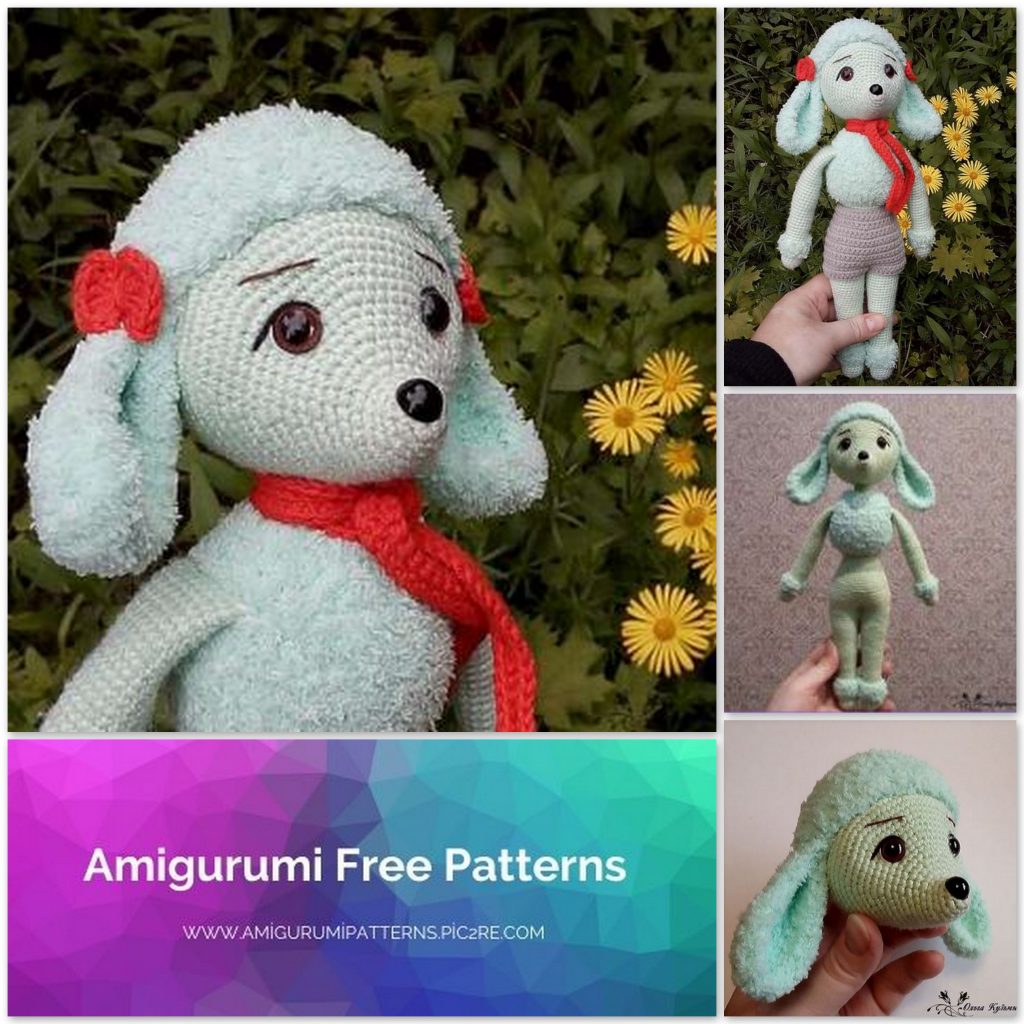
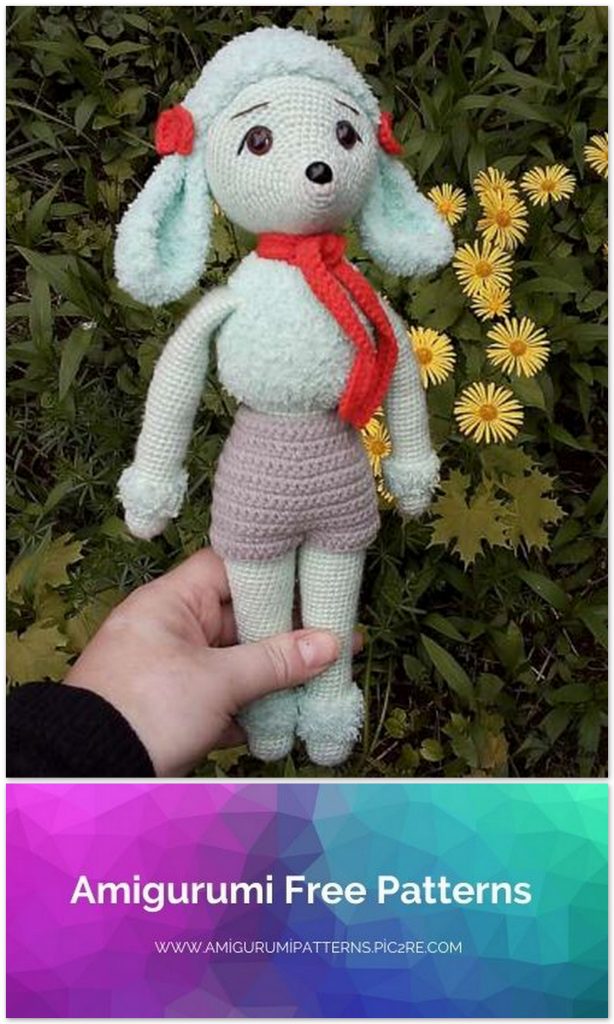
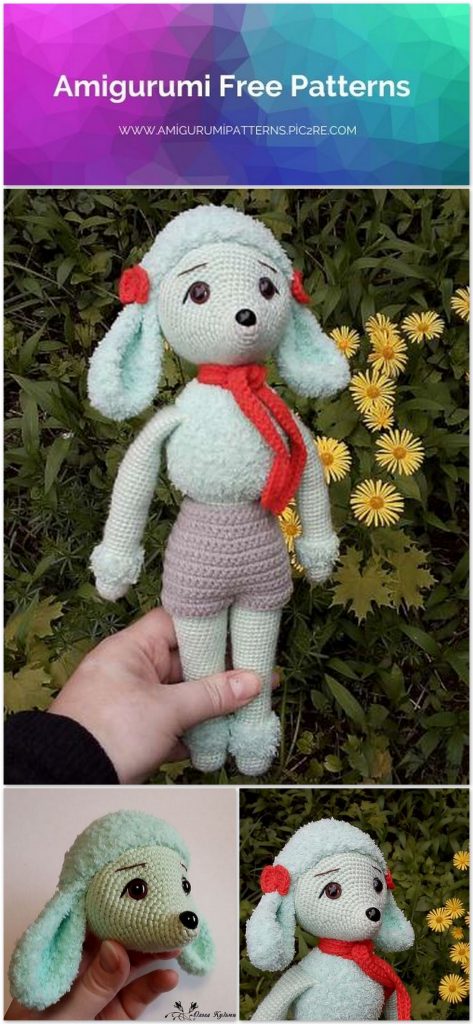
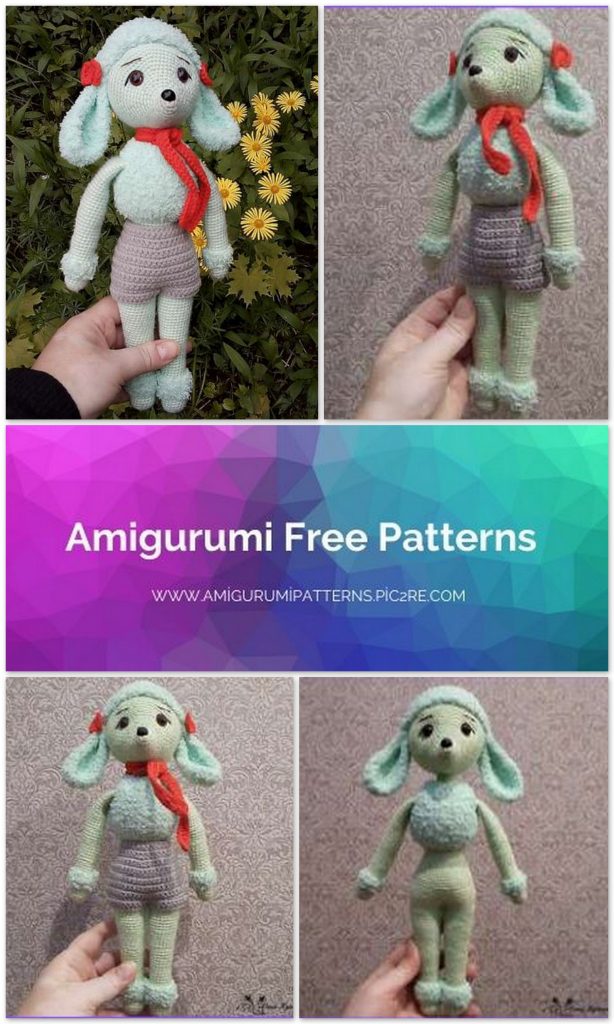
Amigurumi Cute Dog Free Crochet Pattern
Pinterest Offical Page : amigurumipatterns.pic2re.com
Facebook Group: amigurumipatterns.pic2re.com
Facebook Offical Page: amigurumipatterns.pic2re.com
DESCRIPTION OF KNITTING
We continue to share the most beautiful and free amigurumi patterns. You can visit our website for free cute dog pattern.
Mademoiselle Fife and
materials and tools
1. Yarn Alize Sekerim Bebe (100% acrylic; 320 m / 100 gr)
color 188 (tender mint);
2. Yarn Color City Kuzya Klubochkin (15% cotton 85%
p about l and a m and d; 9 5 m / 5 0 g p) – color 1 0 (ay with berg);
3. Slightly spicy / short, white and red veto in – for the formulation of the morbid;
4. Hooks 2.0mm, 2.5mm and 4mm;
5. Filler – 1 5 0 – 2 0 0 g p;
6. Eyes with a secure fastening, 10 mm in diameter – 1 pair;
7. Spout with secure attachment 10 mm – 1 piece;
8. Long and long for children;
9. Needle for embroidery of proteins, eyebrows and mouth;
10. Strong thread for tightening and attaching ears;
11. Scissors;
12. Markers;
13. Glue “MOMENT GEL” for the application of the grill;
14. Dry pastel pink for toning (if desired).
legend
sc – single crochet
hdc – half double crochet
dc – double crochet
ch – chain
inc – increase
dec – decrease
sl-st – concatenated column
pens
We start knitting with smooth yarn.
1 row – 6sc into magic ring (6)
2nd row – 6 * inc (12)
3 row – (3sc, inc) * 3 (15)
4 – 7 rows (4 rows) – 15sc (15)
We change the yarn to textured.
8 – 9 rows (2 rows) – 15sc (15)
Change the yarn to a smooth one.
10 row – 15sc (15)
11 row – (4sc, inc) * 3 (18)
12 – 41 rows (30 rows) – 18sc (18)
We fill the palm very tightly, the rest of the hand is slightly 1/3 in height.
Fold the piece in half and knit 8sc, connecting the two sides of the piece. Cut the thread, fix it and hide it inside the part.
Knit the other hand in the same way.
2 details
If knitting with textured yarn is difficult, then first we knit the entire piece with smooth yarn, while knitting rows 8 and 9 behind the back half-loop of the previous row.
When the part is fully connected, we return to the 8th row, attach the textured thread and knit two rows for the front half-loops.
Cut the thread, fix it and hide it inside the part.
The marker should remain strictly to the side, so I recommend using a contrasting thread instead of the marker. If the marker moves from the middle to either side, but you need to adjust it by knitting offset loops.
We start knitting with smooth yarn.
1 row – 6sc into magic ring (6)
2nd row – 6 * inc (12)
3 row – (1sc, inc) * 6 (18)
4-8 rows (5 rows) – 18sc (18)
We change the yarn to textured.
9-11 rows (3 rows) – 18sc (18)
Change the yarn to a smooth one.
12-13 rows (2 rows) – 18sc (18)
14th row – 17sc, inc (19)
15-16 rows (2 rows) – 19sc (19)
17th row – 18sc, inc (20)
18 – 19 rows (2 rows) – 20sc (20)
20 row – 19sc, inc (21)
21 – 22 rows (2 rows) – 21 sc (21)
23 row – 20sc, inc (22)
24 – 25 rows (2 rows) – 22 sc (22)
26 row – 21sc, inc (23)
27 – 28 rows (2 rows) – 23sc (24)
29 row – 22 sc, inc (24)
30 row – 24sc (24)
31 row – 23sc, inc (25)
32 row – 25sc (25)
33 row – 24sc, inc (26)
34 row – 26sc (26)
35 row – 25sc, inc (27)
legs
2 details
36 row – 27sc (27)
37 row – 26sc, inc (28)
38 row – 28sc (28)
39 row – 27sc, inc (29)
40 row – 29sc (29)
41 row – 28sc, inc (30)
42 row – 30sc (30)
Cut the thread and fasten.
Knit the second part in the same way, but do not cut the thread
If knitting with textured yarn is difficult, then we knit the whole piece with smooth yarn, while knitting rows 8 and 9 behind the back half-loop of the previous row.
When the part is fully connected, we return to the 8th row, attach the textured thread and knit two rows for the front half-loops.
Cut the thread, fix it and hide it inside the part.
Fill the legs tightly.
In row 43, we will connect the legs. To do this, first on the first leg, we count from the marker 15sc and set the marker, and on the second leg we knit another 15sc.
Remove the hook from the loop and insert it from the inside of the first leg into the loop marked with a marker. We grab the loop left on the second leg and pull it out (this way we avoid the formation of a hole when connecting the legs).
43 row – 30sc on the first leg, 30sc on the second leg (60)
We set the marker – now there will be the beginning of the row. From this point on, you do not need to monitor the offset, the marker serves only to determine the beginning of the row.
44 – 50 rows (7 rows) – 60sc (60)
51 row – (8sc, dec) * 6 (54)
52 – 55 rows (4 rows) – 54sc (54)
56 row – (7sc, dec) * 6 (48)
57 – 59 rows (3 rows) – 48sc (48)
60 row – (6sc, dec) * 6 (42)
61 – 62 rows (2 rows) – 42sc (42)
63 row – (5sc, dec) * 6 (36)
64 – 68 rows (5 rows) – 36sc (36)
Cut the thread and fix it. We fill the part tightly.
Next, we will knit with textured yarn.
body
69 row – 36sc (36)
Next, crochet 2.5mm.
70 – 75 rows (6 rows) – 36sc (36)
In the next row we will knit pens. To do this, we put the toy in front of us, put the handles on the sides and align (10sc should be obtained between the handles). I got it like this:
76 row – 9sc, knit hand 8sc, 10sc, knit hand 8sc, 1sc (36)
77 row – 36sc (36)
78 row (knit decreases between the hands) – 1sc, (dec, 1sc) * 3, 8sc (hand), 1sc, (dec, 1sc) * 3, 8sc (hand) (30)
79 row – (3sc, dec) * 6 (24)
80 row – (2sc, dec) * 6 (18)
Cut the thread and fasten.
We knit with a smooth thread crochet 2.5mm.
81 row – 18sc (18)
Continue crocheting 2.0mm.
82 – 86 rows (5 rows) – 18sc (18)
Fasten and cut the thread, leaving a long enough end for sewing on the head.
We knit with smooth yarn.
We closely follow the marker – it should be located strictly in the middle of the chin! If required, we knit offset loops.
1 row – 6sc into magic ring (6)
2nd row – 6 * inc (12)
3 row – 12sc (12)
4 row – (1sc, inc) * 6 (18)
5 row – 18sc (18)
6 row – 6sc, 6 * inc, 6sc (24)
7 row – 24sc (24)
8 row – 6sc, (1sc, inc) * 6, 6sc (30)
9 row – 5sc, (2sc, inc) * 6, 7sc (36)
10 row – 36sc (36)
Install the spout. I installed between 1 and 2 rows. Make sure that the nose is set exactly in the middle of the increments.
11 row – 5sc, (3sc, inc) * 6, 7sc (42)
12 row – 4sc, (4sc, inc) * 6, 8sc (48)
13 row – 4sc, (5sc, inc) * 6, 8sc (54)
14 row – 54sc (54)
15 row – 3sc, (6sc, inc) * 6, 9sc (60)
16 row – 3sc, (7sc, inc) * 6, 9sc (66)
17 row – (10sc, inc) * 6 (72)
18 – 24 rows (7 rows) – 72sc (72)
Set eyes between 12 and 13 rows (between the eyes 12-13 visible sc).
25 row – (10sc, dec) * 6 (66)
26 row – 66sc (66)
27 row – (9sc, dec) * 6 (60)
28 row – 60sc (60)
29 row – (8sc, dec) * 6 (54)
30 row – 54sc (54)
head
We begin to fill the head, paying special attention to the nose and cheeks.
31 row – (7sc, dec) * 6 (48)
32 row – (6sc, dec) * 6 (42)
33 row – (5sc, dec) * 6 (36)
34 row – (4sc, dec) * 6 (30)
35 row – (3sc, dec) * 6 (24)
36 row – (2sc, dec) * 6 (18)
37 row – (1sc, dec) * 6 (12)
Finish packing.
38 row – 6 * dec (6)
Cut the thread, leaving a long end to tighten the hole.
Pull off the hole with a needle.
For tightening we use a reinforced thread. Cut off the long thread, fold it in half and thread it into the needle.
We insert the needle into the head from behind, and draw it out at one eye on the right approximately in the middle in height. Pull the thread, leaving the end 5-6cm outside.
Next, we introduce the needle from the opposite side of the eye at the same level, and bring it to the original point. Pull the thread.
Holding the threads by both ends, pull up a little (the thread should hide under the eye!). We fix it with 2-3 knots and cut it off. The ends of the thread do not need to be hidden.
Repeat for the second eye.
Straighteners
We insert the needle into the head from below, and remove it from one of the eyes from the inner side from below. Pull the thread, leaving the end 5-6cm outside.
Next, we introduce the needle from the inside of the eye from above, and bring it to the original point. Pull the thread.
Holding the threads by both ends, pull up a little (the thread should hide under the eye!). We fix it with 2-3 knots and cut it off. The ends of the thread do not need to be hidden.
Repeat for the second eye.
We use white thread to embroider the whites of the eyes (I always use white or milky YarnArt Jeans).
Cut off the long thread and thread it into the needle.
We insert the needle into the head from behind, and draw it out from one of the eyes from the outside above the eye approximately in the middle. Pull the thread, leaving the end 5-6cm outside.
Next, we introduce the needle from the bottom of the eye at the same level, and bring it to the original point. Pull the thread.
Holding the threads by both ends, pull up a little (the thread should not hide under the eye!). If the thread does not fit as it should, but strives to move out, then we fix it by dropping a small drop of transparent glue on the edge of the eye (VERY CAREFULLY!). We fix it with 2-3 knots and cut it off. The ends of the thread do not need to be hidden.
Repeat for the second eye.
face design
For cilia embroidery we use brown or black thread.
Cut off the long thread and thread it into the needle.
We insert the needle into the head from behind, and draw it out from the inside of one of the eyes approximately in the middle. Pull the thread, leaving the end 5-6cm outside.
Next, we introduce the needle from the outside, stepping back 1-2sc from the eye.
We introduce to the original point. Pull the thread.
Holding the threads by both ends, pull up a little (the thread should not hide under the eye!). If the thread does not fit as it should, but strives to move out, then we fix it by dropping a small drop of transparent glue on the edge of the eye (VERY CAREFULLY!). We fix it with 2-3 knots and cut it off. The ends of the thread do not need to be hidden.
Repeat for the second eye.
For eyebrow embroidery we use brown thread.
We outline the most successful position of the eyebrows and embroider.
We knit with textured yarn crochet 2.5mm.
1 row – 6sc into magic ring (6)
2nd row – 6 * inc (12)
3 row – (1sc, inc) * 6 (18)
4 row – (2sc, inc) * 6 (24)
5 row – (3sc, inc) * 6 (30)
6 row – (4sc, inc) * 6 (36)
7 row – (5sc, inc) * 6 (42)
8 row – 42sc (42)
9 row – (13sc, inc) * 3 (45)
10 – 12 rows (3 rows) – 45sc (45)
Fasten and cut the thread.
Sew the pad to the head. If necessary, add a little bit strap under the lining.
head pad
ears
2 details
We knit with textured yarn crochet 4mm.
1 row – 10ch, then we knit from the second from the hook of the loop 8sc, 3sc in the last loop, 8sc on the other side, 1ch, turn (19)
2nd row – 3sc, 3hdc, 2dc, 3inc from dc, 2dc, 3hdc, 3sc (22)
Fold in half and knit 2sc, joining sides.
Fasten and cut the thread.
Knit the second part in the same way.
Sew on to the head.
tail
We begin to knit with textured yarn crochet 2.5mm.
1 row – 6sc into magic ring (6)
2nd row – (inc, 1sc) * 3 (9)
3 row – 9sc (9)
Change the thread to a smooth one.
4 row (crochet 2.5mm) – 9sc (9)
5 – 12 rows (8 rows crochet 2.0mm) – 9sc (9)
Fold in half and work in 4sc, joining sides.
Fasten and cut the thread, leaving a long end for sewing.
We try on the tail, fix and sew.
We try on the head to the body and fix it (for fixing, I usually use thin knitting needles). My neck turned out to be very densely filled, if you have concerns that the head will not hold, then you can insert a frame inside the neck (a sushi stick, for example).
For sewing on the head, we will use the thread left when knitting the body.
Sew on, grabbing 1sc each on the neck, then on the head. Add filler to the neck if required.
We fix the thread and hide the end inside the toy.
shorts
We knit with YarnArt Jeans yarn crochet 2.5 mm in rotary rows.
1 row – 40ch. Next, we count 4 loops from the hook and from the 5th loop we knit 36sc, 1ch, turn (36)
2 row – 36sc, 1ch, turn (36)
3 row – (5sc, inc) * 6, 1ch, turn (42)
4 row – 42sc, 1ch, turn (42)
5 row – (6sc, inc) * 6, 4ch, turn (52)
6 row – we count 4 loops from the hook and knit from the 5th 48sc, turn (48)
7 row – skip 1 loop and knit in the 2nd 2sl-st, 42sc, 6ch, sl-st in the first of 42sc, 1ch, turn (48)
8-13 rows (6 rows) – 48sc, 1ch, turn (48)
Try it on, mark the division into legs with markers (one leg = 24sc).
For the first leg
Row 14 – knit up to 1 marker (I got 21sc), 5ch, connect to the loop marked with the second marker and knit to the end of the row (I got 3sc), 1ch, turn (29)
15 row – we make a strapping of the psc leg, while knitting sl-st along ch.
Cut the thread and close the knitting. We fix and hide the thread.
For the second leg
We fasten the thread near the ch chain (do not forget that we have rotary rows! Follow the drawing!)
14th row – knit sc without grabbing the ch, sl-st chain into the first loop of the ch, 1ch chain, turn (24)
15 row – we make a strapping of the psc leg, while knitting sl-st along ch.
Cut the thread and close the knitting. We fix and hide the thread.
Sew on buttons.
scarf
We knit with YarnArt Jeans yarn crochet 2.5mm.
We dial 121ch. Next, knit from 2nd st from hook 119sc, 3sc into the last st, 118sc on the back of the chain from ch, 2sc into the last st.
Cut off the thread, close the knitting and hide the threads.
bows
We knit with YarnArt Jeans yarn crochet 2.5mm.
Form an amigurumi ring and knit 3ch, 5dc, 3ch, sl-st into an amigurumi ring, 3ch, 5dc, 3ch, sl-st into an amigurumi ring.
We fasten the thread and cut off the long end for sewing.
Sew on bows.
