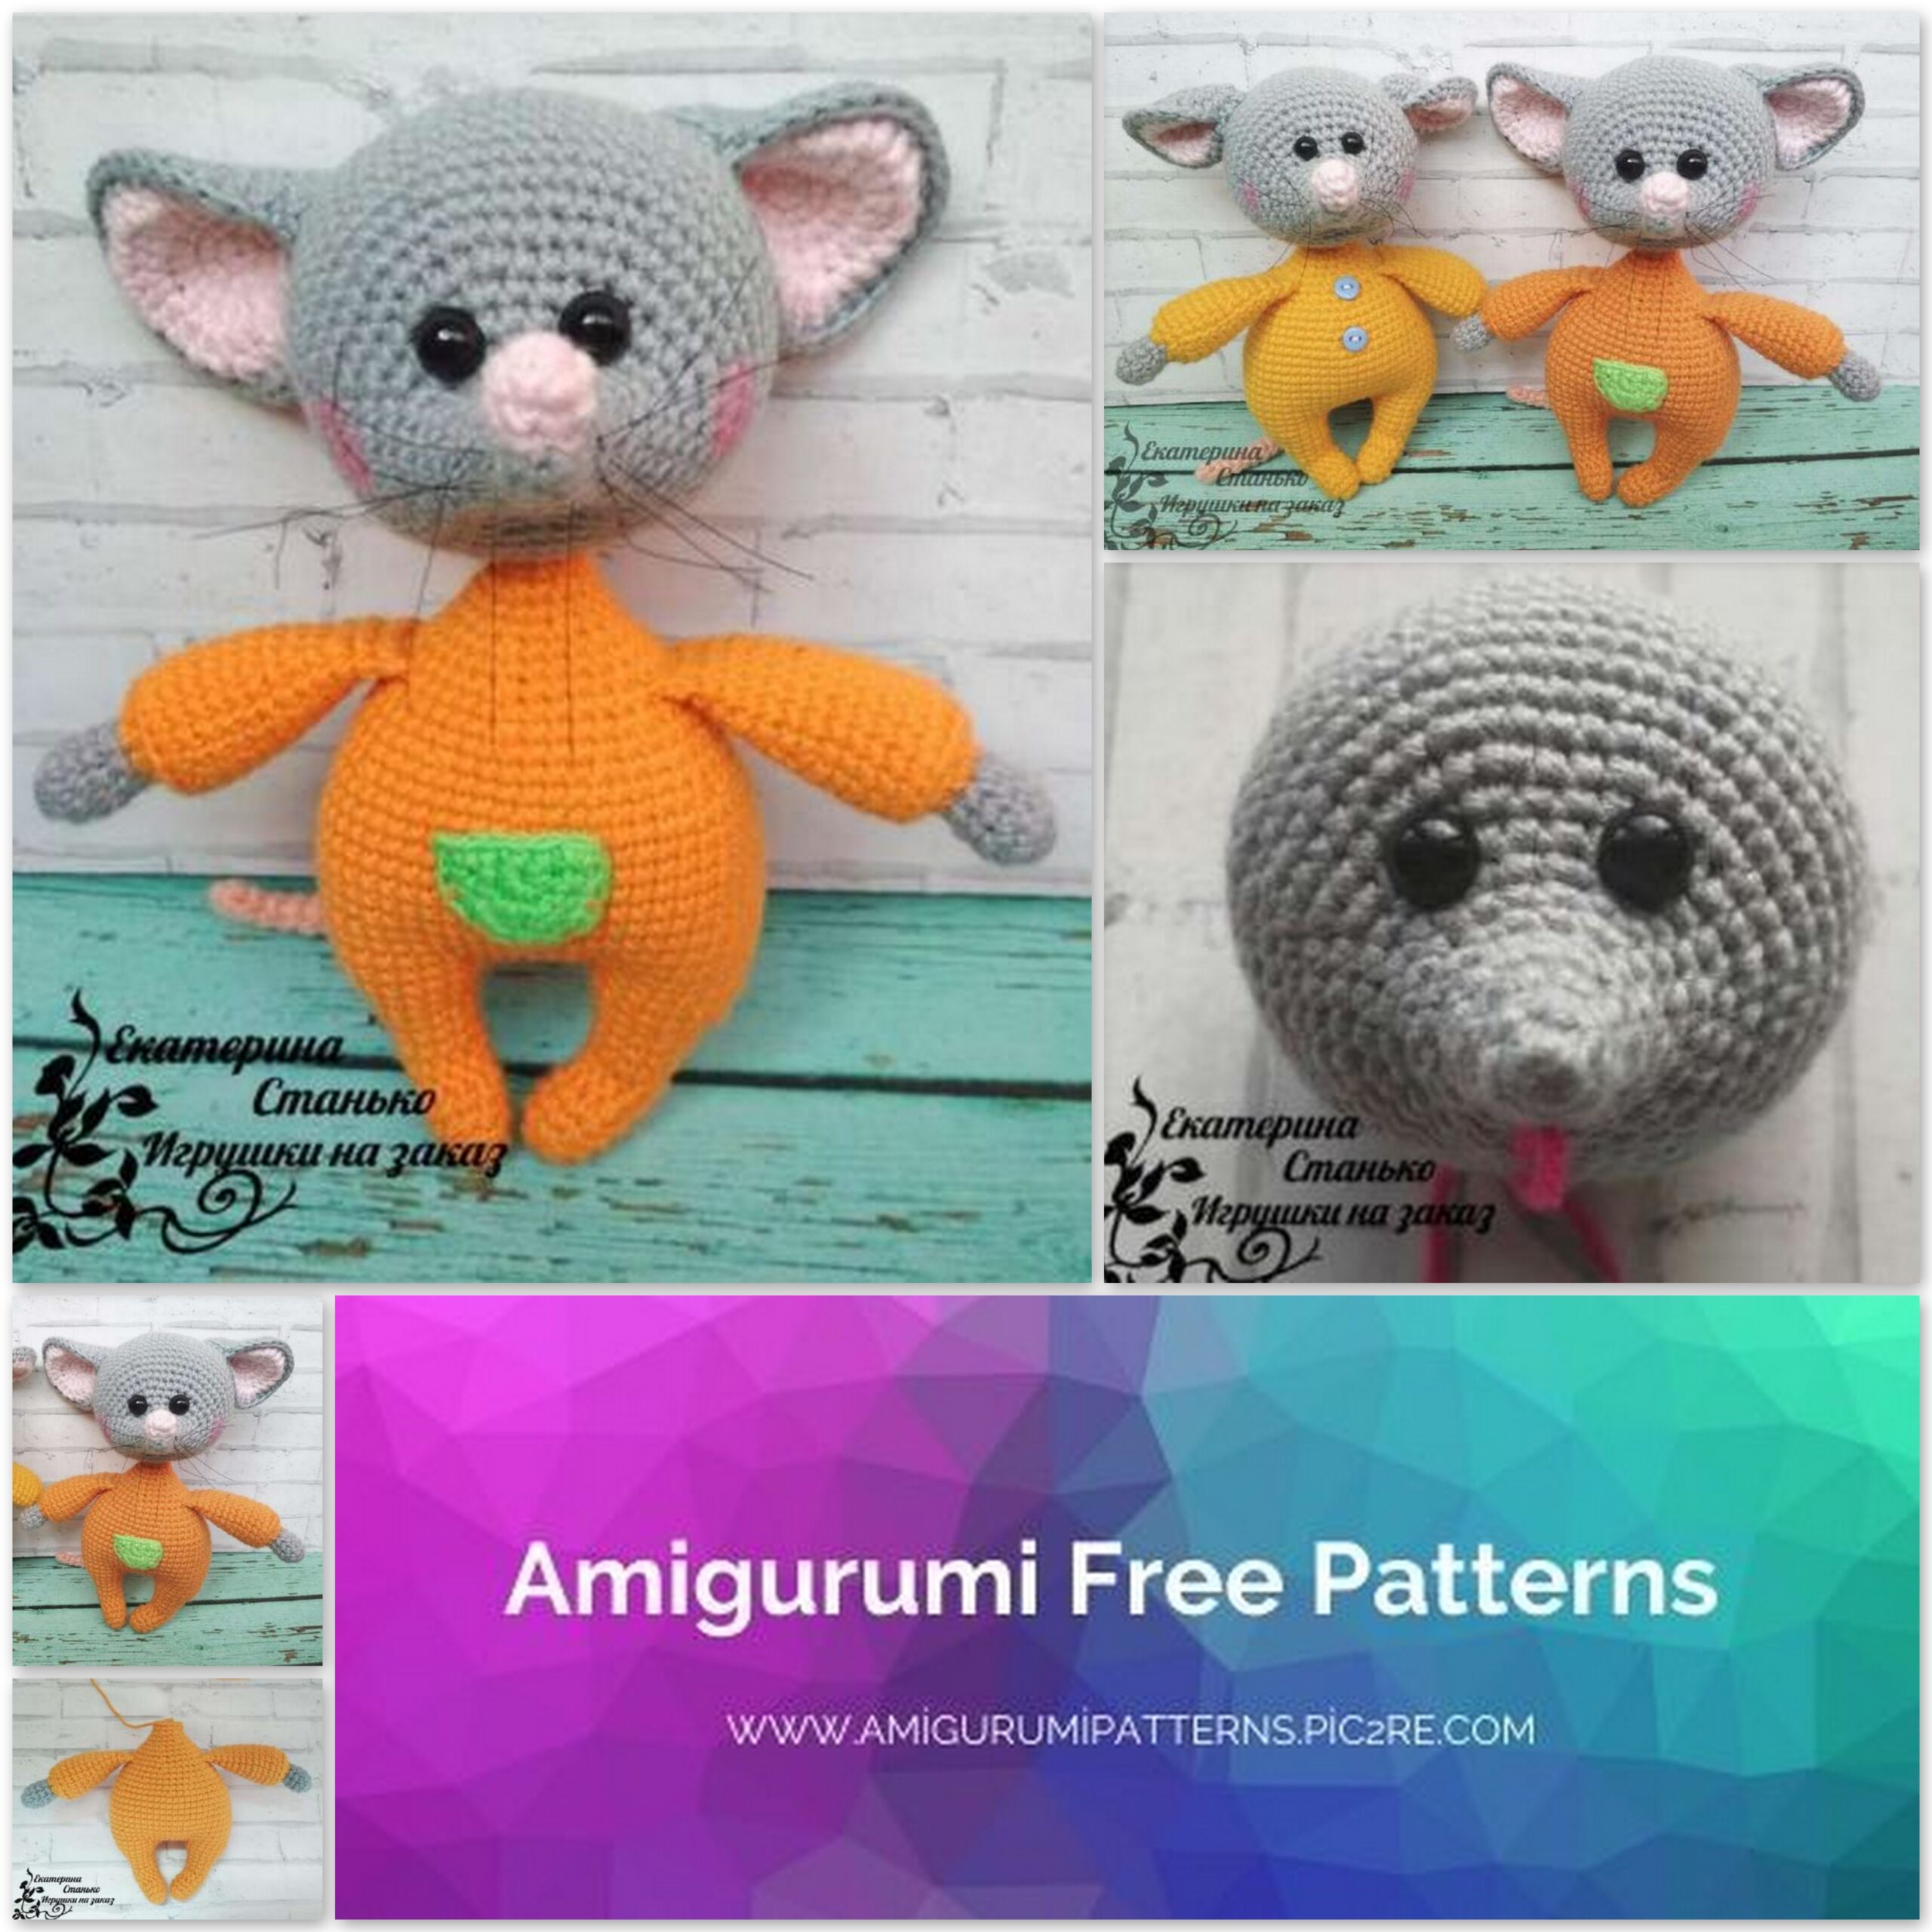
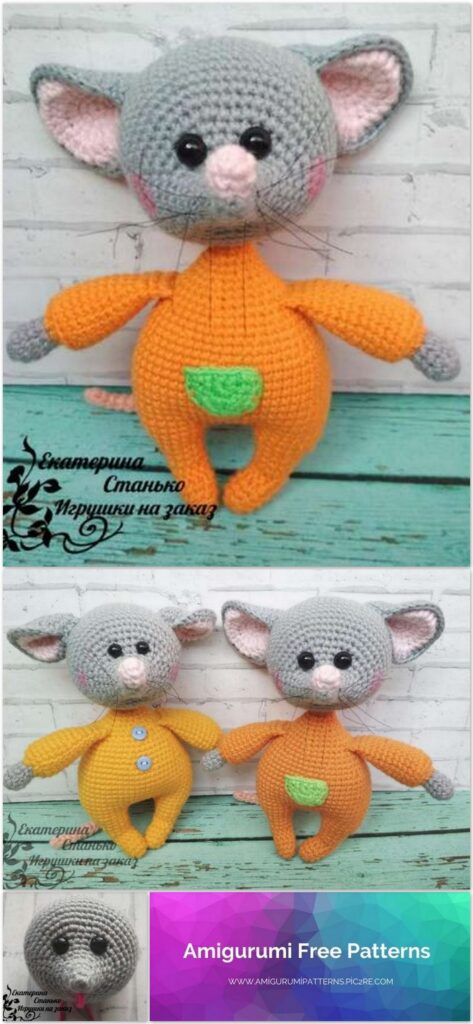
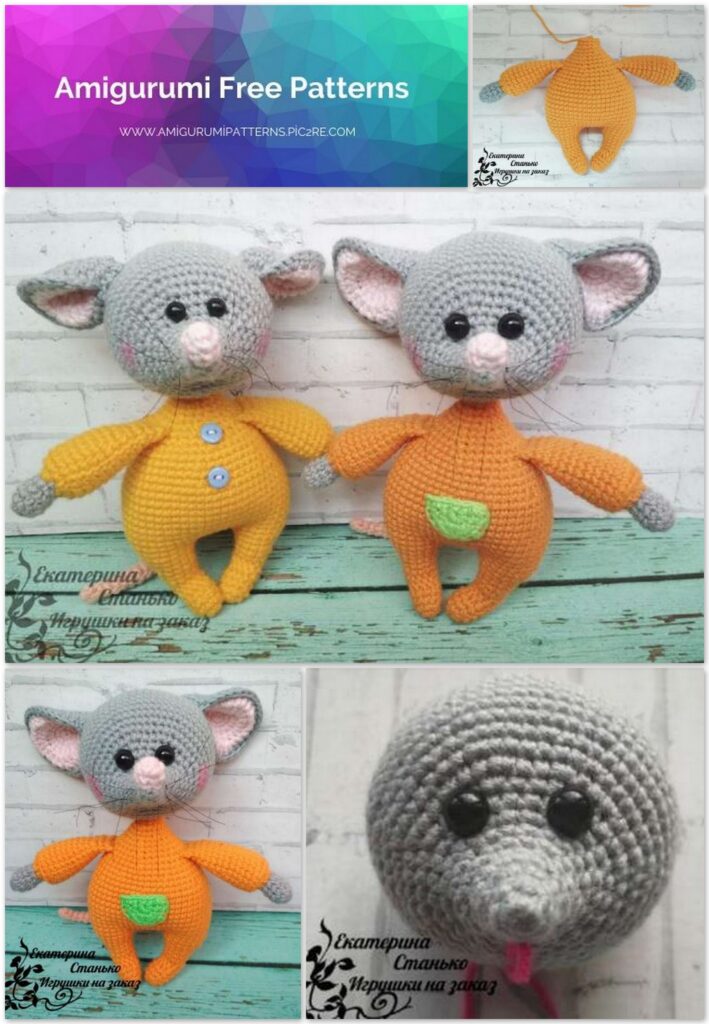
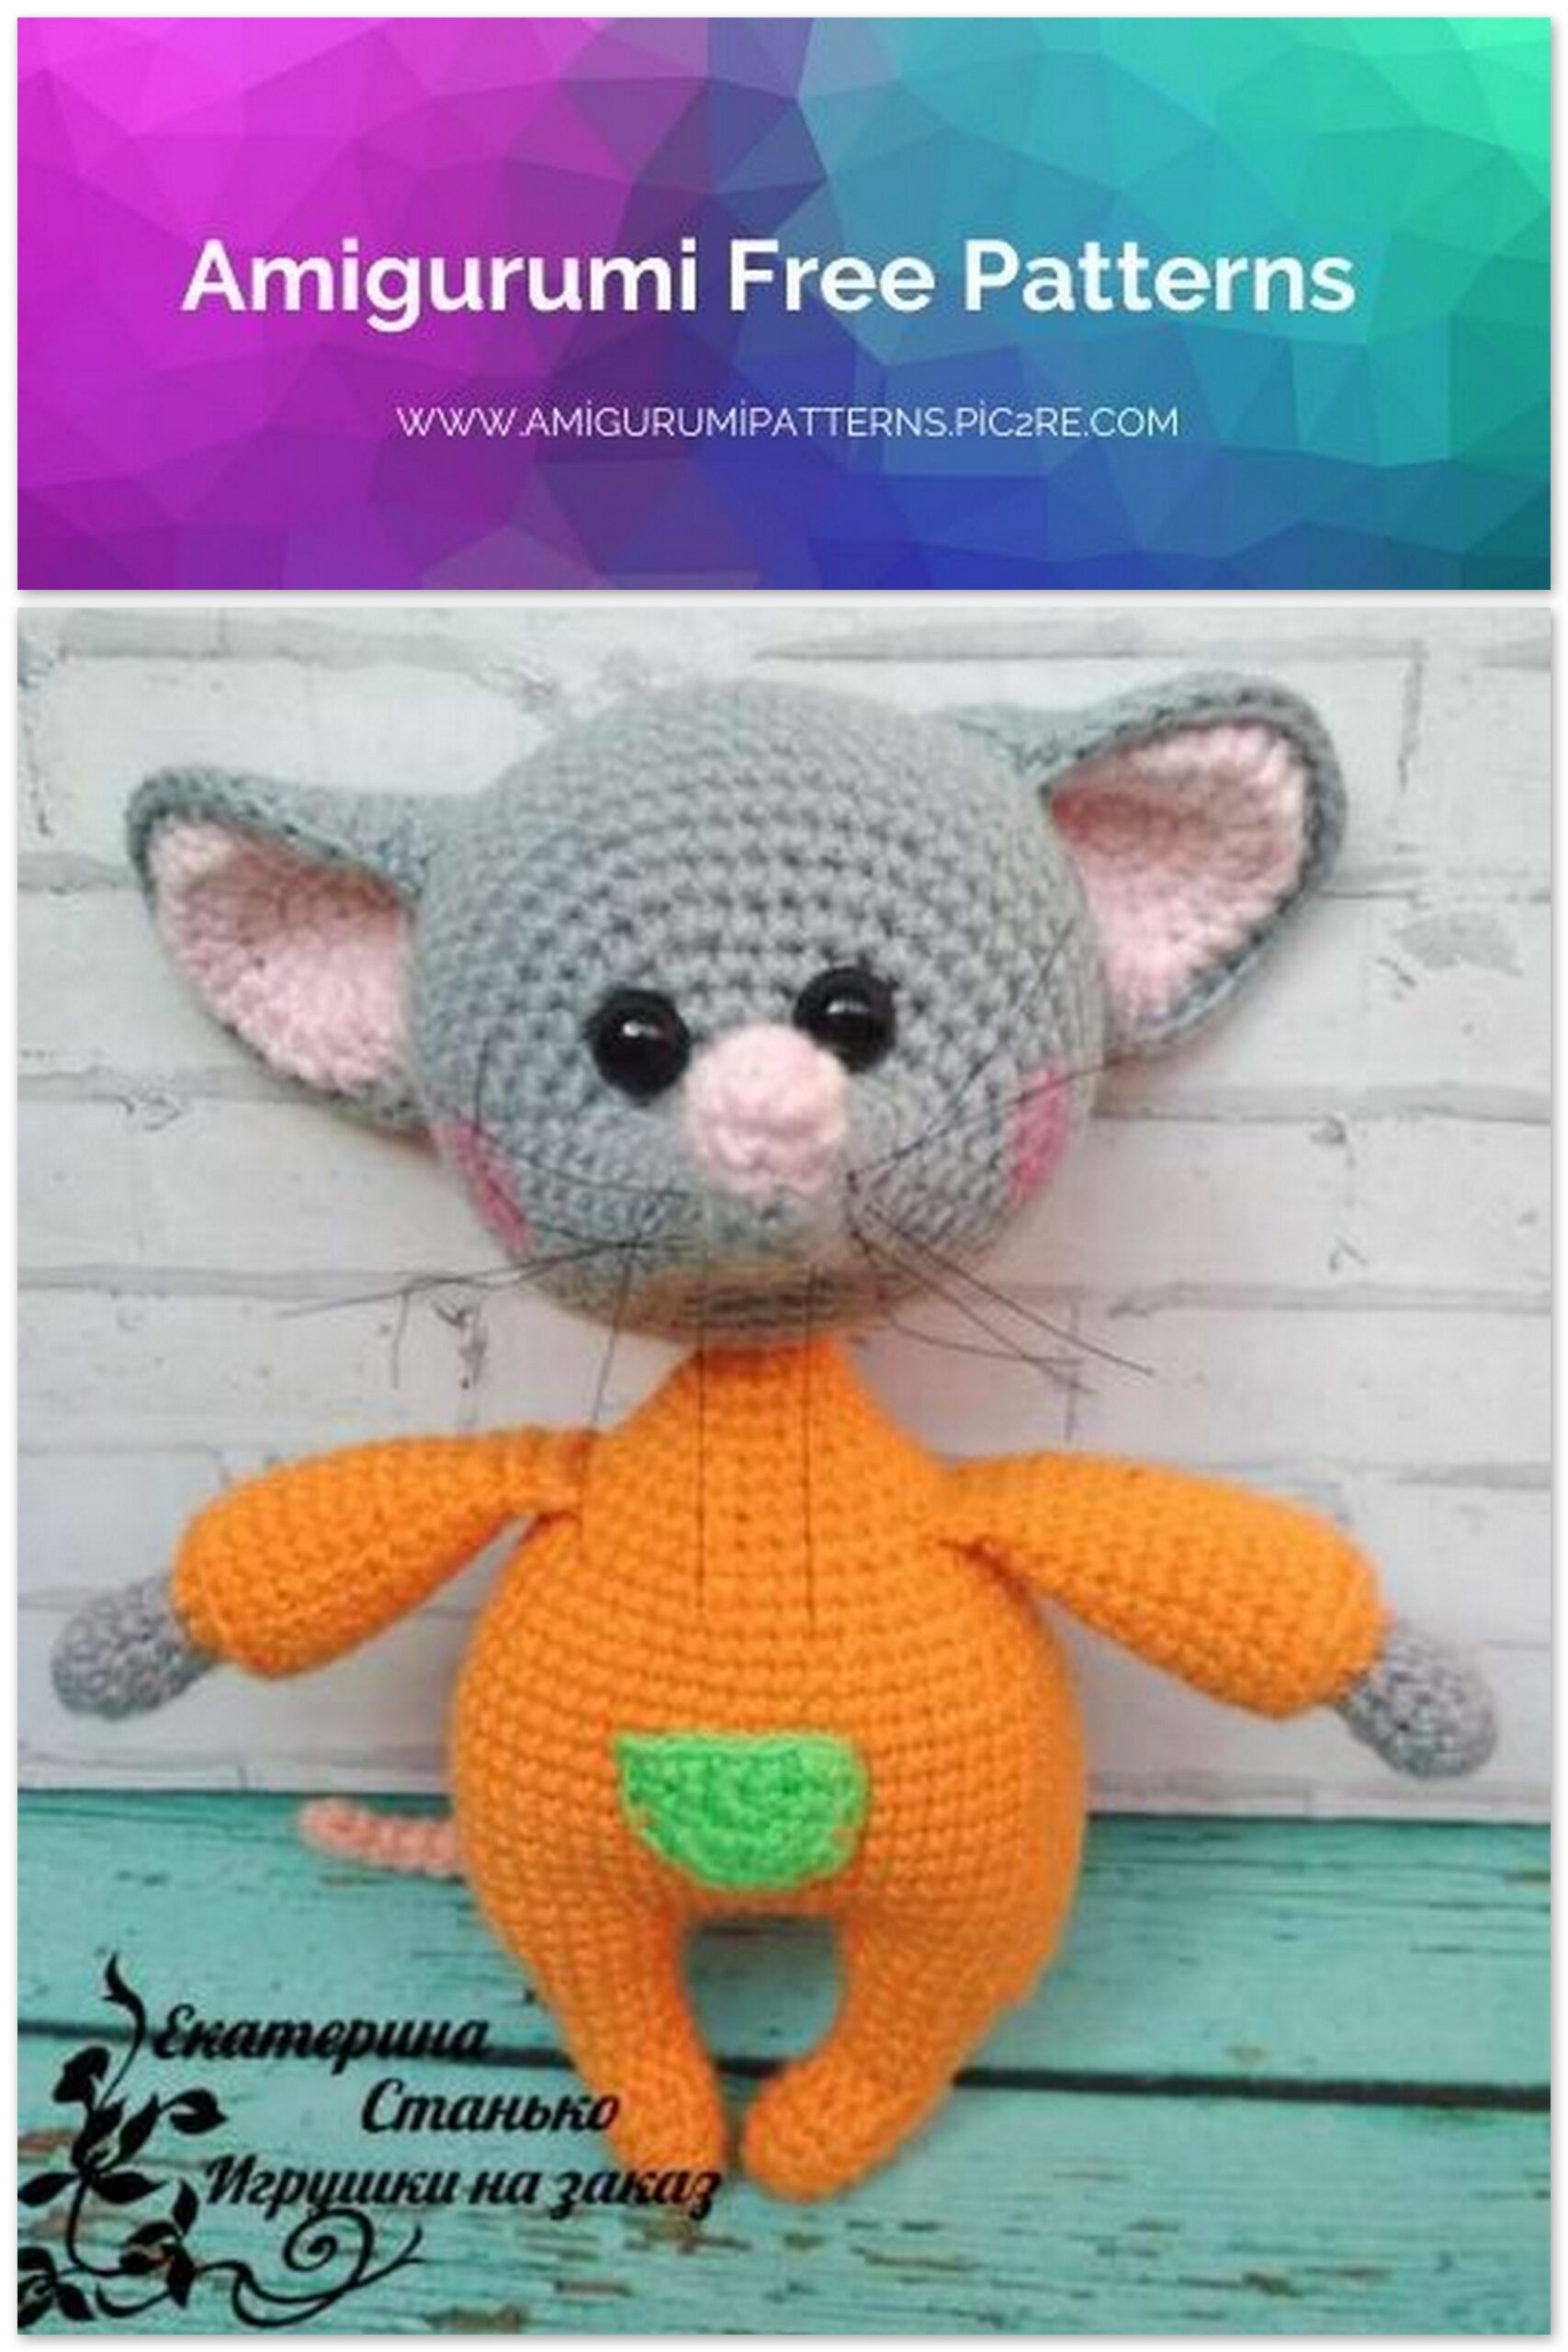
Amigurumi Mouse Chip Free Pattern
Pinterest Offical Page : amigurumipatterns.pic2re.com
Facebook Group: amigurumipatterns.pic2re.com
Facebook Offical Page: amigurumipatterns.pic2re.com
Mouse Chip
You can browse our website for Amigurumi mouse chip and more free crochet patterns.
Finished toy size
(when using the materials indicated by me) – 14 cm
Difficulty level – easy
Necessary materials :
yarn of three colors – gray, pink and any color for overalls. I have gazzal baby cotton 50g / 165m
filler, monofilament black or white on the antennae
eyes
hook, sewing needle
Abbreviations:
ch – air loop
sc – single crochet
hdc – half double crochet
inc – increase
inc hdc – inc with crochet half-columns
dec – decrease
Handles (2pieces)
We start with gray yarn
1r. 6 sc into magic ring
2p. (sc, inc) * 3 times
3-4r. 9sc
5r. (sc, dec) * 3 times
Changing the thread to the color of the jumpsuit
6p. 6inc
7p. (sc, inc) * 6 times
8 r.. Back loop 18sc
9-12r. 18sc
13r. (dec, 7sc) * 2 times
14 r.. 16sc
15 r.. (dec, 6sc) * 2 times
16 r.. 14sc
17 r.. (dec, 5sc) * 2 times
18 r.. 12sc
19 r.. Fold in half and knit 6sc, fasten and trim thread
Tail
1r. 4sc into magic ring
2-4 p. 4sc
5r. İnc, 3sc
6-8 r.les. 5sc
9p. İnc, 4sc
10-12r. 6sc
13r. İnc, 5sc
14-18r. 7sc
19 r.. İnc, 6sc
20-24r. 8sc
25 r.. İnc, 7 sc
26r. 9sc
27r. (2sc, dvd) * 3 times
Fasten the thread and leave for sewing
Legs (2pieces)
1r. 6 sc into magic ring
2p. İnc, sc, 2inc, sc, inc (10)
3-4r. 10sc
5-7r. Hdc, 5sl-st, 4hdc
8 r.. 10sc
9p. Sc, inc, 4sc, inc, 3sc
10 r.. 12sc
11r. 2Sc, inc, 5sc, inc, 2sc, inc
12r. Sc, inc, 8sc, inc, 2sc, inc, sc
3sc to shift the right leg and for the left leg additionally 10sc knit
Body
Connect the legs
1r. from the right leg 3v.p, 18sc along the left leg, 3sc in. n, 18sc on the right leg, 3sc on ch
2p. İnc, 3sc, inc, 14sc, inc, 14sc, inc, 3sc, (inc, sc) * 2 times [48]
3p. 2sc, (inc, 7sc) * 5 times, inc, 5sc
4-6 r.. 54sc
7p. (3sc, inc) * 2 times, 35sc, inc, 3sc, inc, 4sc, inc, 1sc
8-10r. 59sc
11r. (3sc, dec) * 2 times, 35sc, dec, 3sc, dec, 4sc, dec, 1sc
12r. 54sc
13r. (dec, 7sc) * 6 times
14 r.. 48sc
15 r.. (dec, 6sc) * 6 times
16 r.. 42sc
17 r.. (5sc, dec) * 6 times
We knit handles
18 r.. 6sc, 6sc with hand, 12sc, 6sc with hand, 6sc
19 r.. 2sc, dec, (4sc, dec) * 5 times, 2sc
20 r.. (dec, 4sc) * 6 times
21 r.. 30sc
22 r.. (dec, 3sc) * 6 times
23 r.. 1sc, (inc, 2sc) * 5 times, inc, 1sc
24 r.. 18sc
25 r.. (dec, 1sc) * 6 times
26r. 12sc
Fasten the thread, leave for sewing
Head with gray yarn, marker at the bottom
1r. 6 sc into magic ring
2p. 6sc
3p. (inc, 2sc) * 2 times
4p. 2sc, 4inc, 2sc
5r. 12sc
6p. (3sc, inc) * 3 times
7p. 2sc, (inc, 4sc) * 2 times, inc, 2sc
8 r.. (5sc, inc) * 3 times
9p. 3sc, (inc, 6sc) * 2 times, inc, 3sc
10 r.. 4sc, (inc, 2sc) * 5 times, inc, 4sc
11r. 4sc, (inc, 3sc) * 5 times, inc, 5sc
12r. 10sc, (inc, 2sc) * 5 times, inc, 10sc
13r. 3sc, (inc, 6sc) * 5 times, inc, 3sc
14 r.. (7sc, inc) * 6 times
15 r.. 4sc, (inc, 8sc) * 5 times, inc, 4sc
16-24 r.. 60sc?
25 r.. (7sc, dec) * 6 times
26r. 3sc, (dec, 6sc) * 5 times, dec, 3sc
You can start stuffing, and if you use safe eyes, then insert between 10 and 11 rows, 6sc between them
27r. (5sc, dec) * 6 times
28r. (4sc, dec) * 6 times
29r. (3sc, dec) * 6 times
30r. (2sc, dec) * 6 times
31r. (sc, dec) * 6 times
32 r.. 6dec
Tie the hole, fasten the thread and hide
Spout pink
1r. 6 sc into magic ring
2p. (İnc, sc) * 3 times
3p. (dec, sc) * 3 times
Fasten the thread and leave for sewing
Ears 4 parts: 2 pink two gray
Cut the thread on the pink parts. And there is no gray, we will make the strapping
1r. 6 sc into magic ring
2p. 6inc
3p. (inc, sc) * 3 times, (inc hdc, hdc) * 3 times
4p. (2sc, inc) * 3 times, (2 hdc, inc hdc) * 3 times
5r. (inc, 3sc) * 3 times, (inc hdc, 3 hdc) * 3 times
We put the parts together so that the wrong sides are inside, and we make the strapping with gray yarn
(4sc, inc) * 3 times, (4 hdc, inc hdc) * 3 times
We leave the thread for sewing
1r. 6 sc into magic ring, ch turn
2p. 2sc, 2inc hdc, 2sc, ch turn
3p. sc, inc, sc, 2inc, sc, inc, sc
Without turning, we make sc along the “edge” of the pocket, fasten the thread and leave it for sewing
Registration
We design the mouse’s head: fold the ears a little at the base and sew to the head as you like, either lower or higher. Sew the pink nose so that it looks up without stuffing. We sew on the overalls or buttons or make a pocket Now we need to make tightening on the muzzle. We take 3 glasses: in the area of the eye (if you used safe eyes, as I did, then we take the points right under the eyes) and the 3rd point in the area of the mouth.
We introduce the needle at point 3 and withdraw it to the 1st, leaving the long end of the thread, retreat 1sc and withdraw the needle at the 3rd point, tighten it a little. Then we do the same with the 2nd point. We make knots in the area of the mouth and hide the thread.
With the help of monofilament, we make antennae for the mouse, and you can also make blush.
Sew on the head, tail, sew on the overalls or buttons or a pocket. Your little mouse is ready