Amigurumi Christmas Tree Free Pattern
Pinterest Offical Page : amigurumipatterns.pic2re.com
Facebook Group: amigurumipatterns.pic2re.com
Facebook Offical Page: amigurumipatterns.pic2re.com
We continue to share amigurumi new year patterns. You can browse our website for the amigurumi christmas tree free pattern.
Legend:
p. – loop
ch – air loop
sc – single crochet
inc – increase (we knit 2 single crochets in one loop)
dec – decrease (we knit 2 single crochets together)
SL-ST – connecting post
DC – column with 1 crochet
(…) * n- repeat the specified number of times in brackets
Herringbone base
Yarn Pekhorka children’s novelty color 742
1.6sc into magic ring (6)
2.6 inc (12)
3. (1sc, inc) * 6 (18)
4.1sc, inc (2sc, inc) * 5, 1sc (24)
5. (3sc, inc) * 6 (30)
6.2sc, inc (4sc, inc) * 5, 2sc (36)
7. (5sc, inc) 6 times (42)
8.3sc, inc (6sc, inc) * 5, 3sc (48)
Cut a circle out of dense plastic to fit the bottom.
9.for back p / n 48sc (48)
10-11. 48sc (48)
12.for back p / n 48sc (48)
13.3sc, dec, (6sc, dec) * 5, 3sc (42)
14-15. 36sc (42)
16.for back p / n 42sc (42)
Insert the bottom of plastic, knit further
17. (5sc, dec) * 6 (36)
18-19. 36sc (36)
20.for back p / n 36sc (36)
21.2sc, dec, (4sc, dec) * 5, 2sc (30)
22-23. 30sc (30)
24.for back p / p 30sc (30)
25. (3sc, dec) * 6 (24)
26-27. 24sc (24)
28.for back p / n 24sc (24)
29.1sc, dec, (2sc, dec) * 5, 1sc (18)
Do not forget to put filler in the course of knitting.
30-31. 18sc (18)
32.for back p / n 18sc (18)
33. (1sc, dec) * 6 (12)
34-35. 12sc (12)
36.for back p / n 12sc (12)
37. (2sc, dec) * 3 (9)
We put more filler, then we knit the top, do not put the filler in the top.
38-41. 9sc (9)
42. (1sc, dec) * 3 (6)
43-50. 6sc (6)
Pull the hole, hide the thread.
Next, we attach the yarn, we knit for the remaining p / p at 36,32,28,24,20,16:
(SL-ST, 3ch, 2DC, 3ch, SL-ST) – in one loop, skip one loop. So we knit to the end of the row.
For the remaining p / p 12 rows we knit according to the scheme:
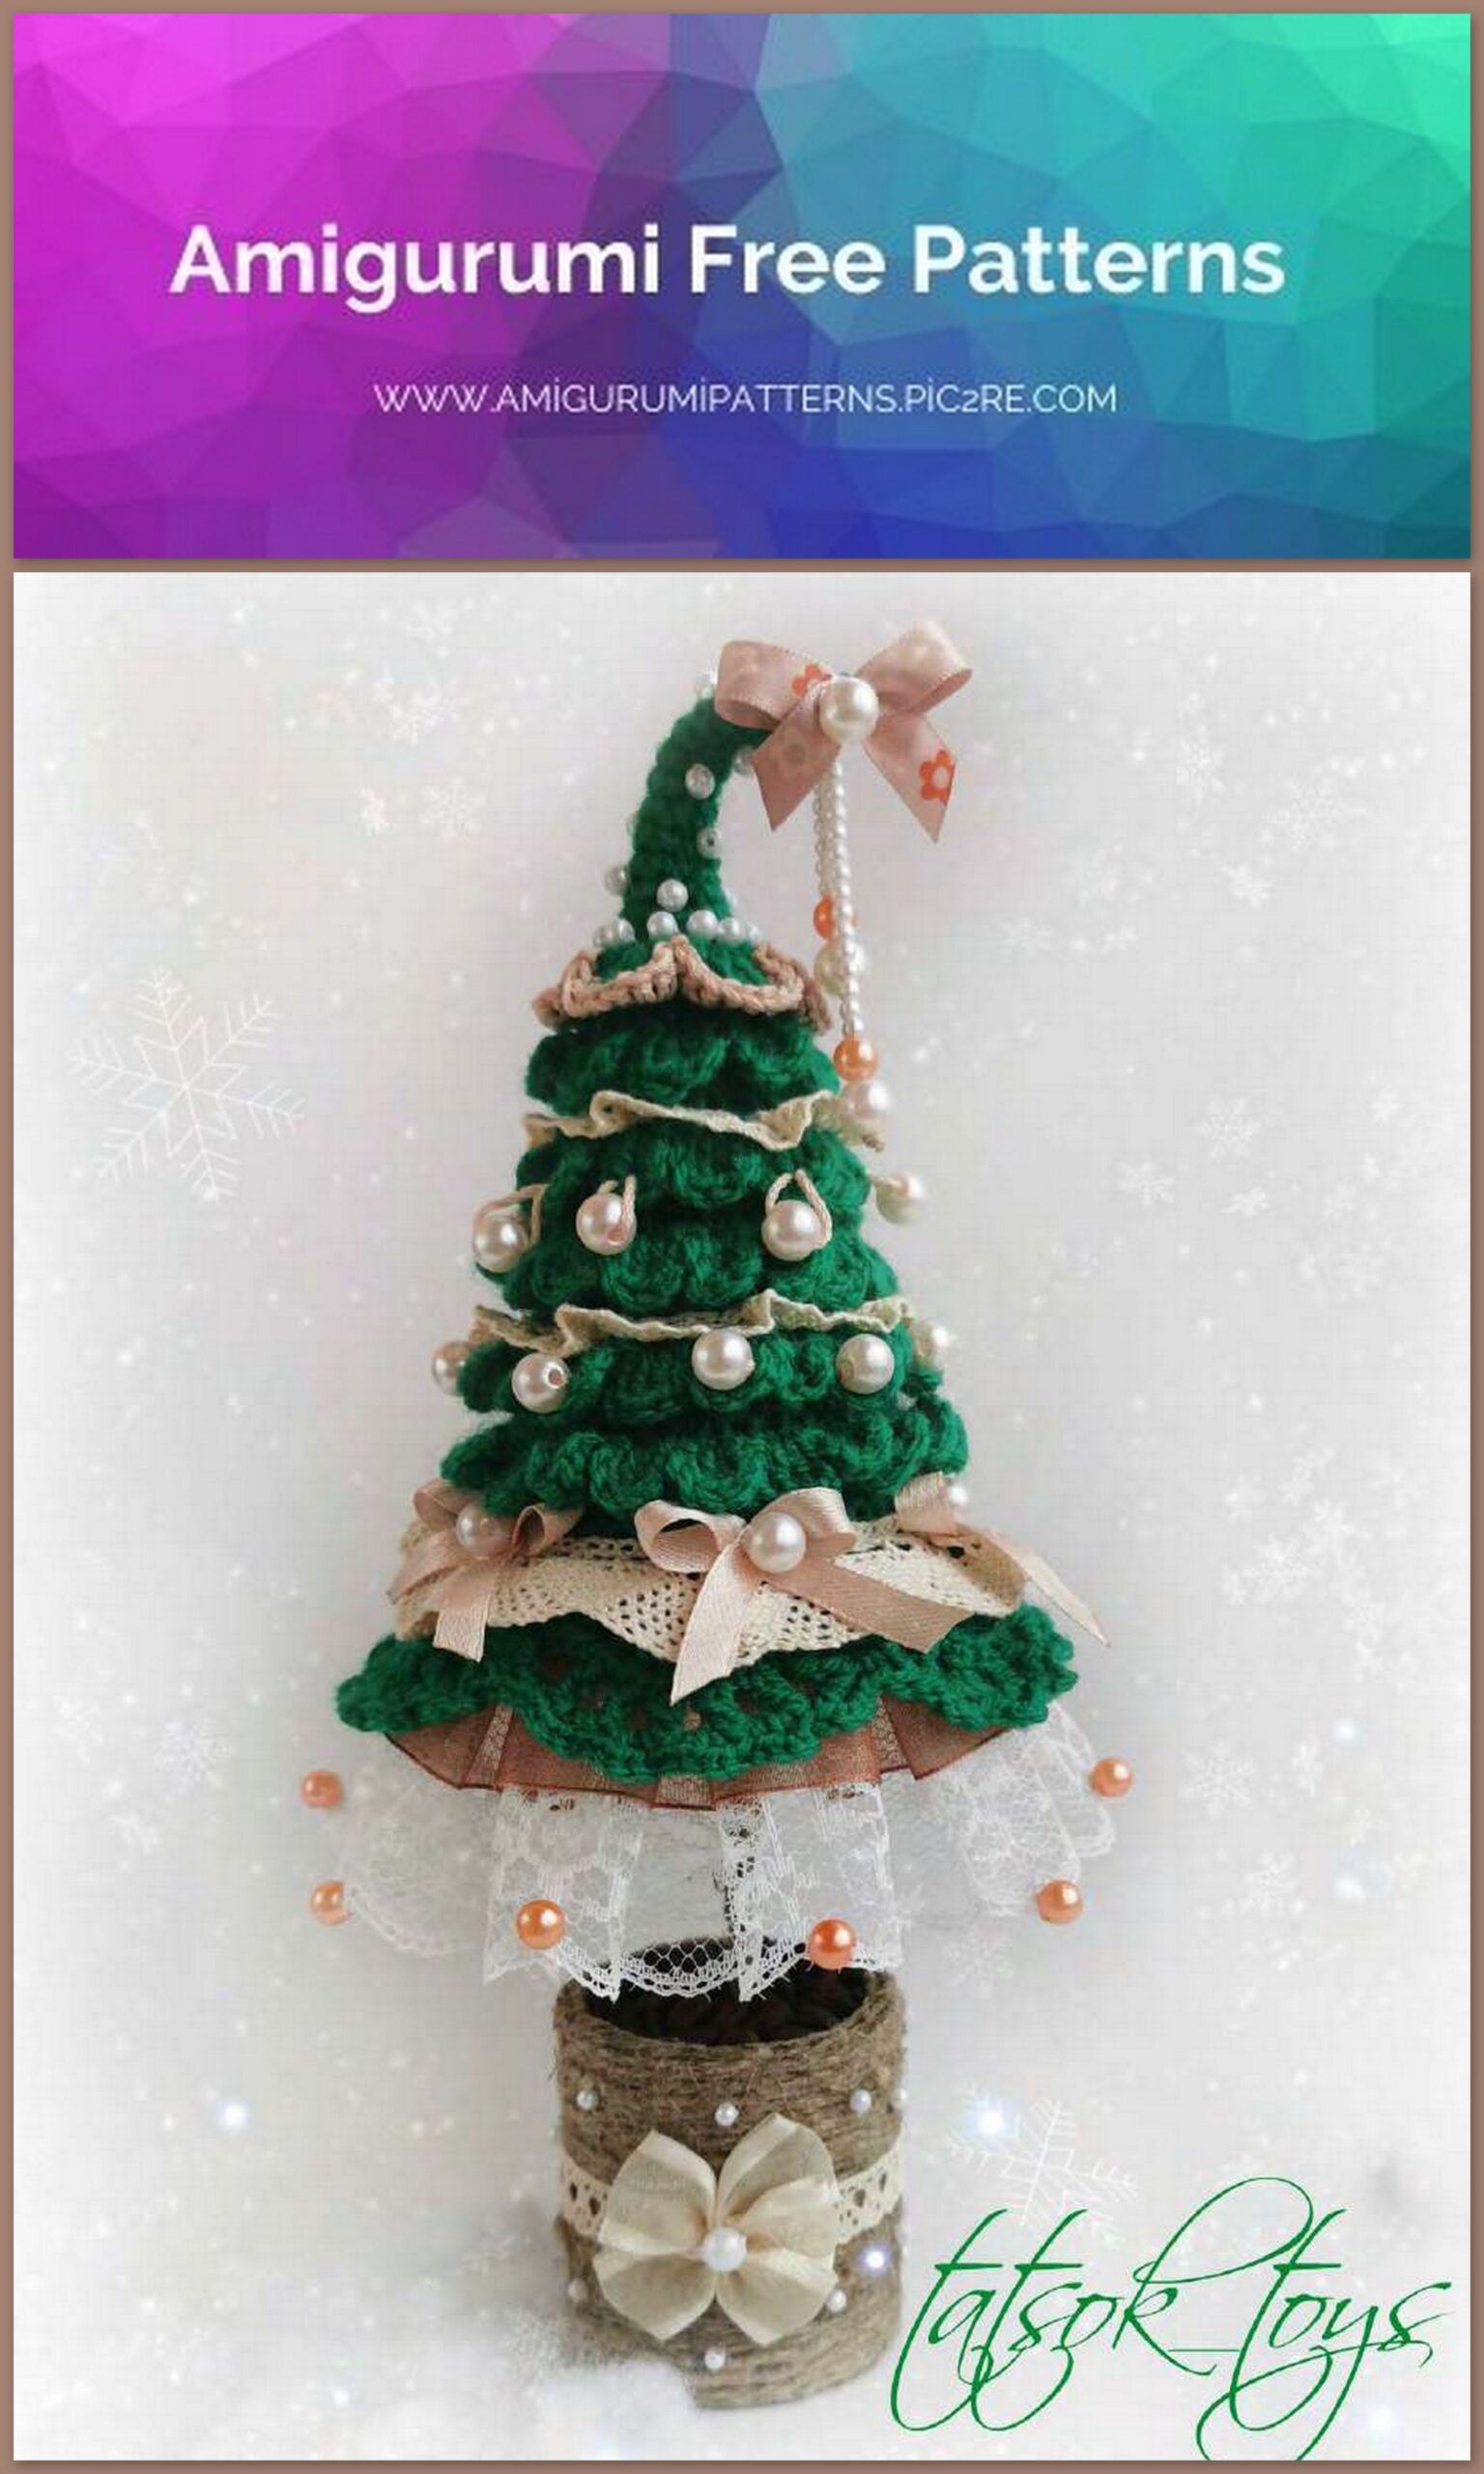
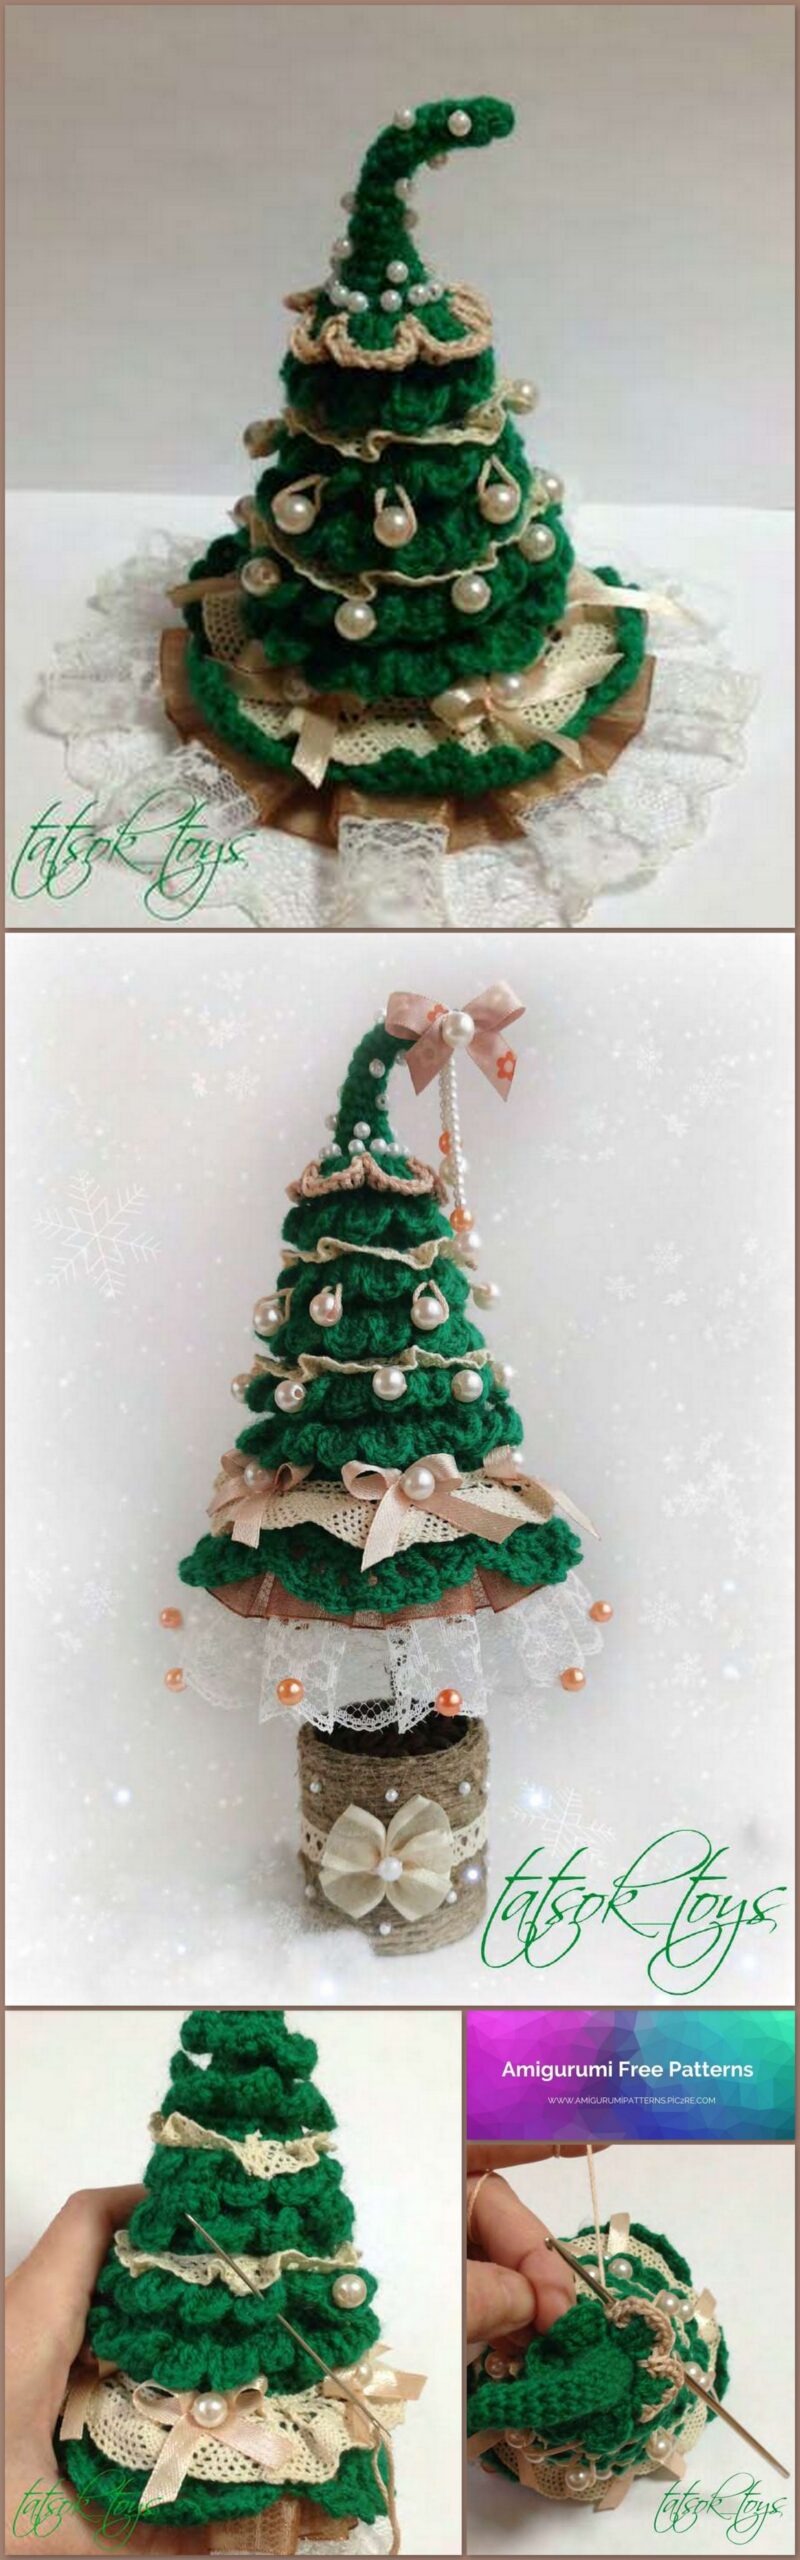


We decorate our Christmas tree.
Sew cotton lace between the last two rows (lace width 2cm), after about 3.5cm we make small folds.
Now skip the distance between the next rows. Sew cotton lace again between the next two rows, making folds (lace width 1cm). AND
skip the distance between the rows again, and sew lace again between the next rows.
Sew lace on the bottom (I have it ready, take any)
Make bows (5pcs) from a satin ribbon and sew along the bottom row of lace where
made folds.
Sew beads across a row.
Sew on the beads after another row, leaving loops, the beads seem to hang.
Tie the topmost row of the ruff with yarn in color sc, making sc in each loop.
Sew beads on the top of the head.
Decorate the top as desired. I made a bow, gathered the beads on a thread and sewed on the very top.
Sew beads on the bottom lace.
Stand.
We make delivery from any available material.
I took just such a middle left from double-sided tape.
We cut out a circle of plastic to the size of the bottom, glue it.
Cut off a piece of wire about 24cm. If you want the leg to be shorter or longer, cut the wire to the correct size. We coat the wire with glue the moment the crystal and glue the twine to the wire. We leave to dry, but for now we make the stand further.
We glue the twine first to the bottom, and then along the entire stand.
We decorate the stand to your taste.
We twist and bend the wire on both sides (see photo). I got a 10cm leg.
Glue one side inside the stand. For strength and stability, you can put plasticine.
Glue the other side of the leg to the bottom of the Christmas tree. I glued the leg for a super moment.
Cut 3-4 circles according to the size of the stand (see photo), put inside the stand, glue the last circle.
Lubricate the last circle with glue, add coffee beans.
Here is such an interior Christmas tree I got.