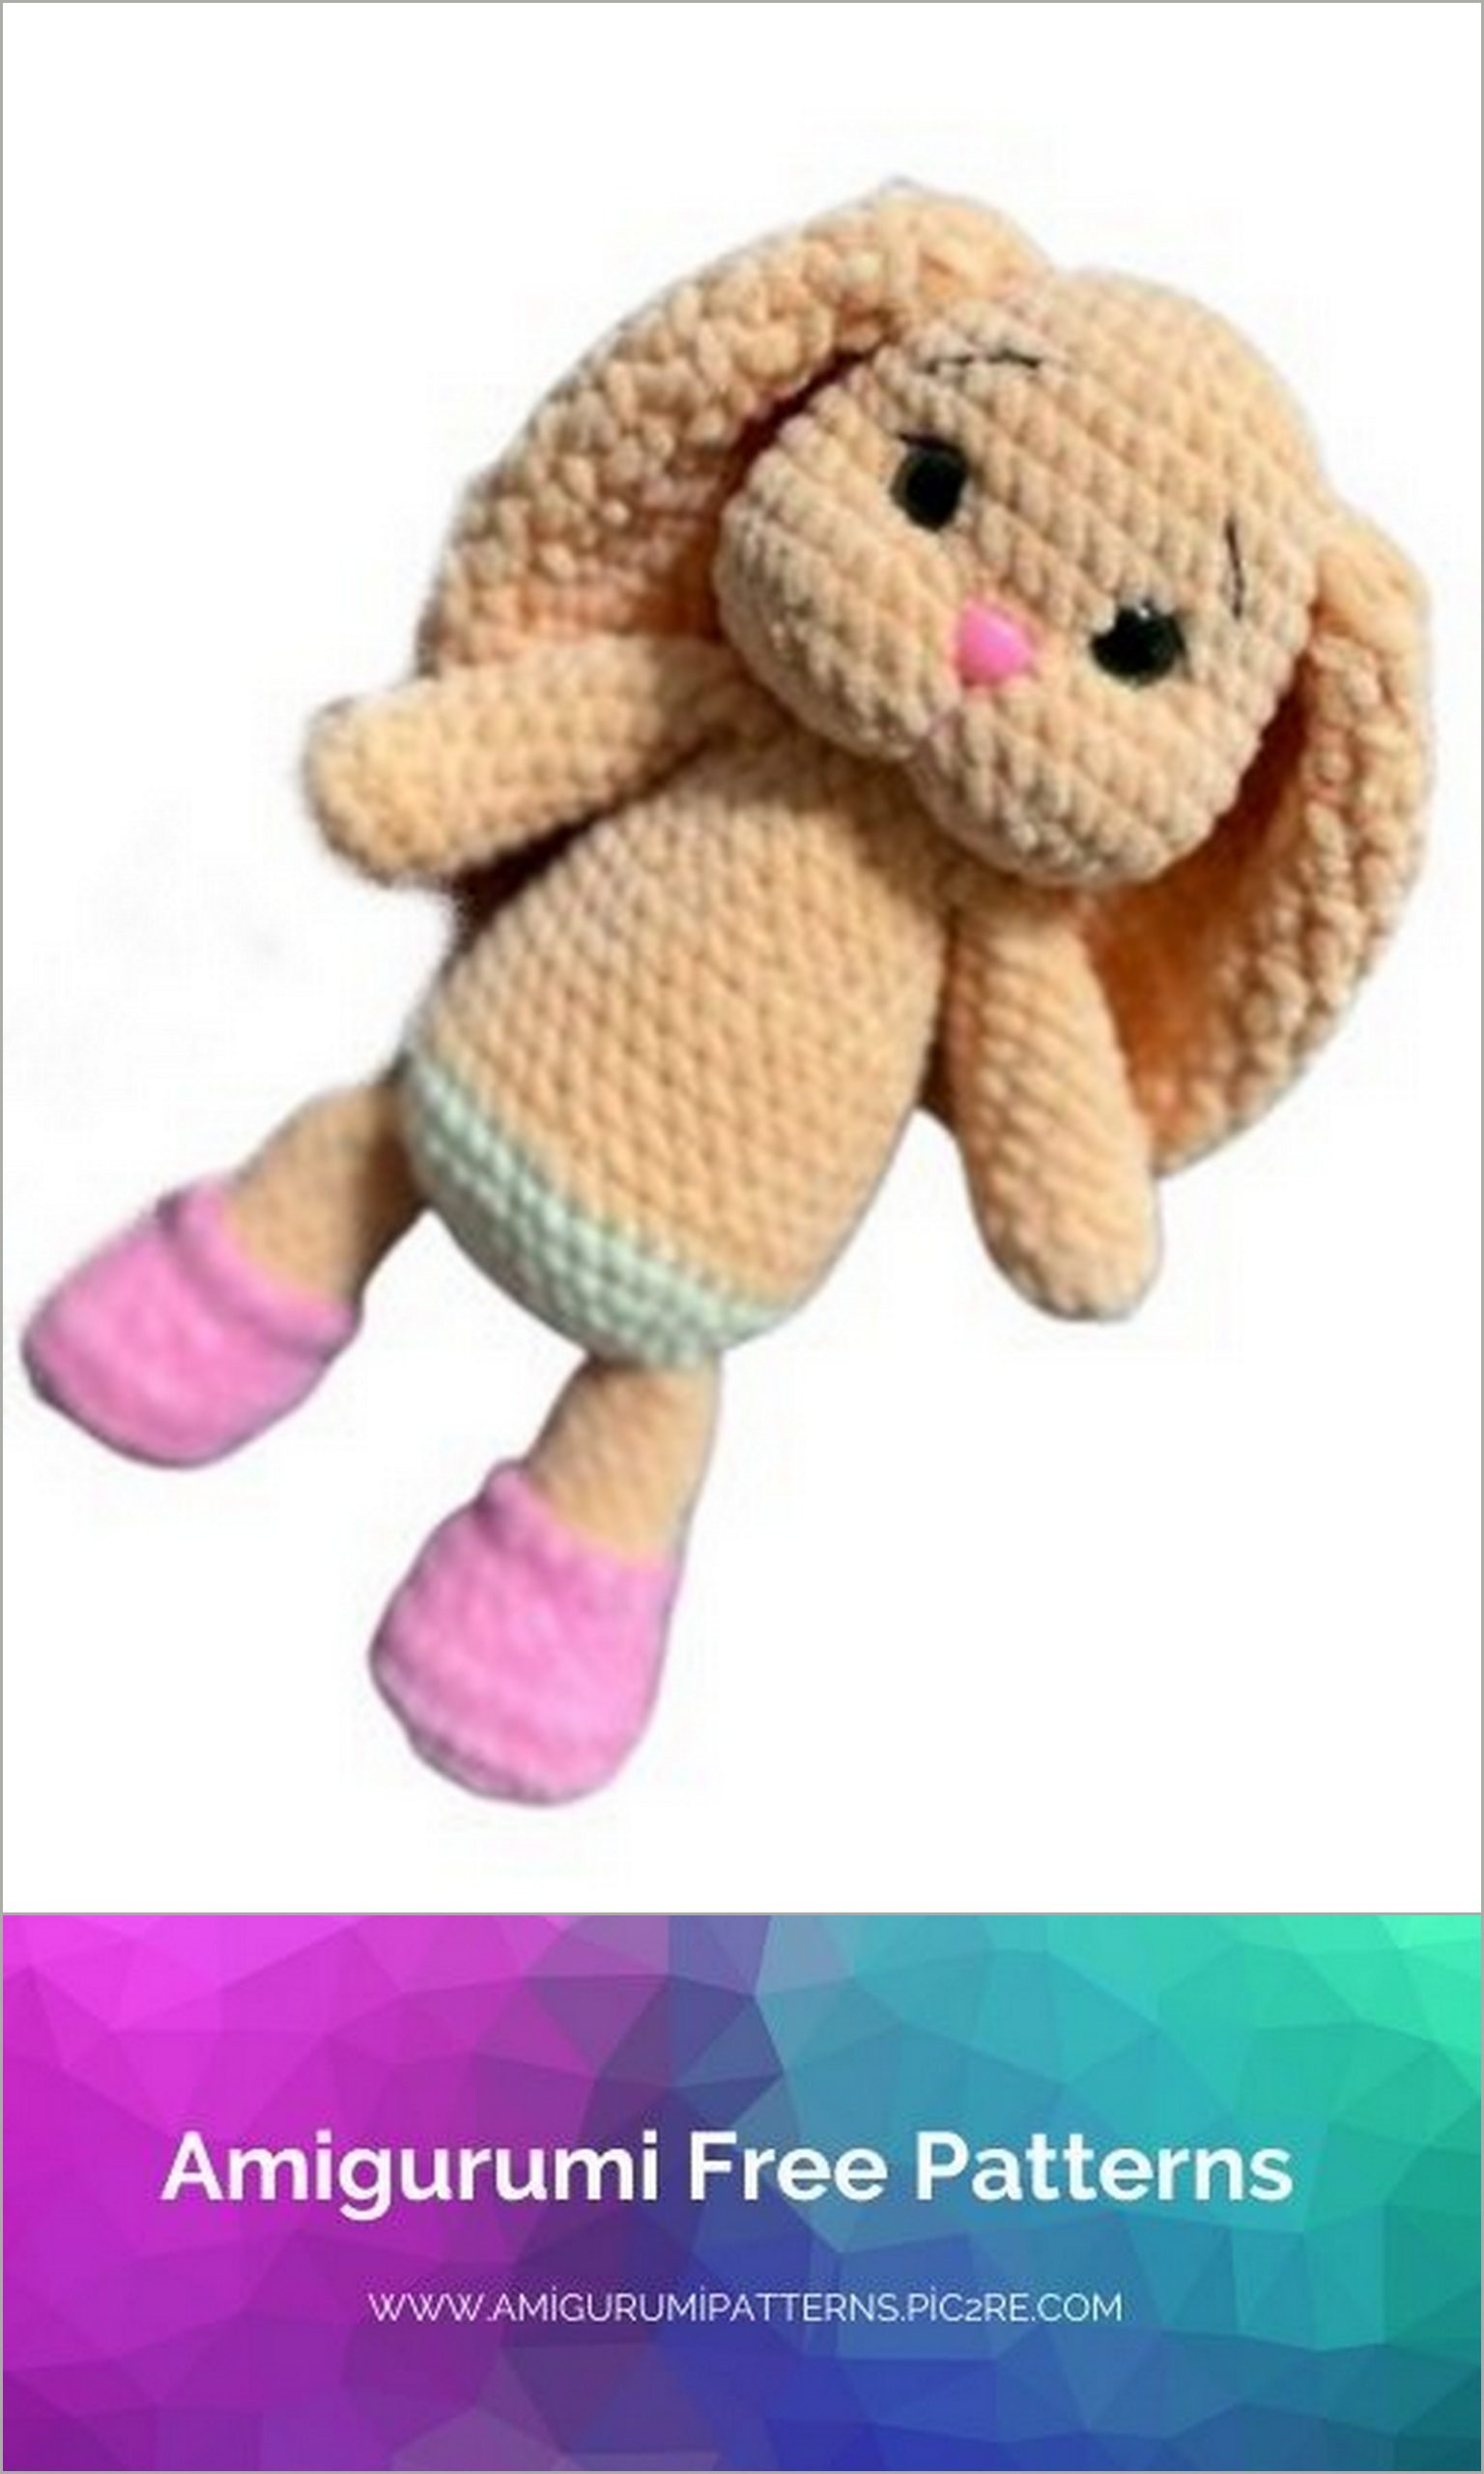
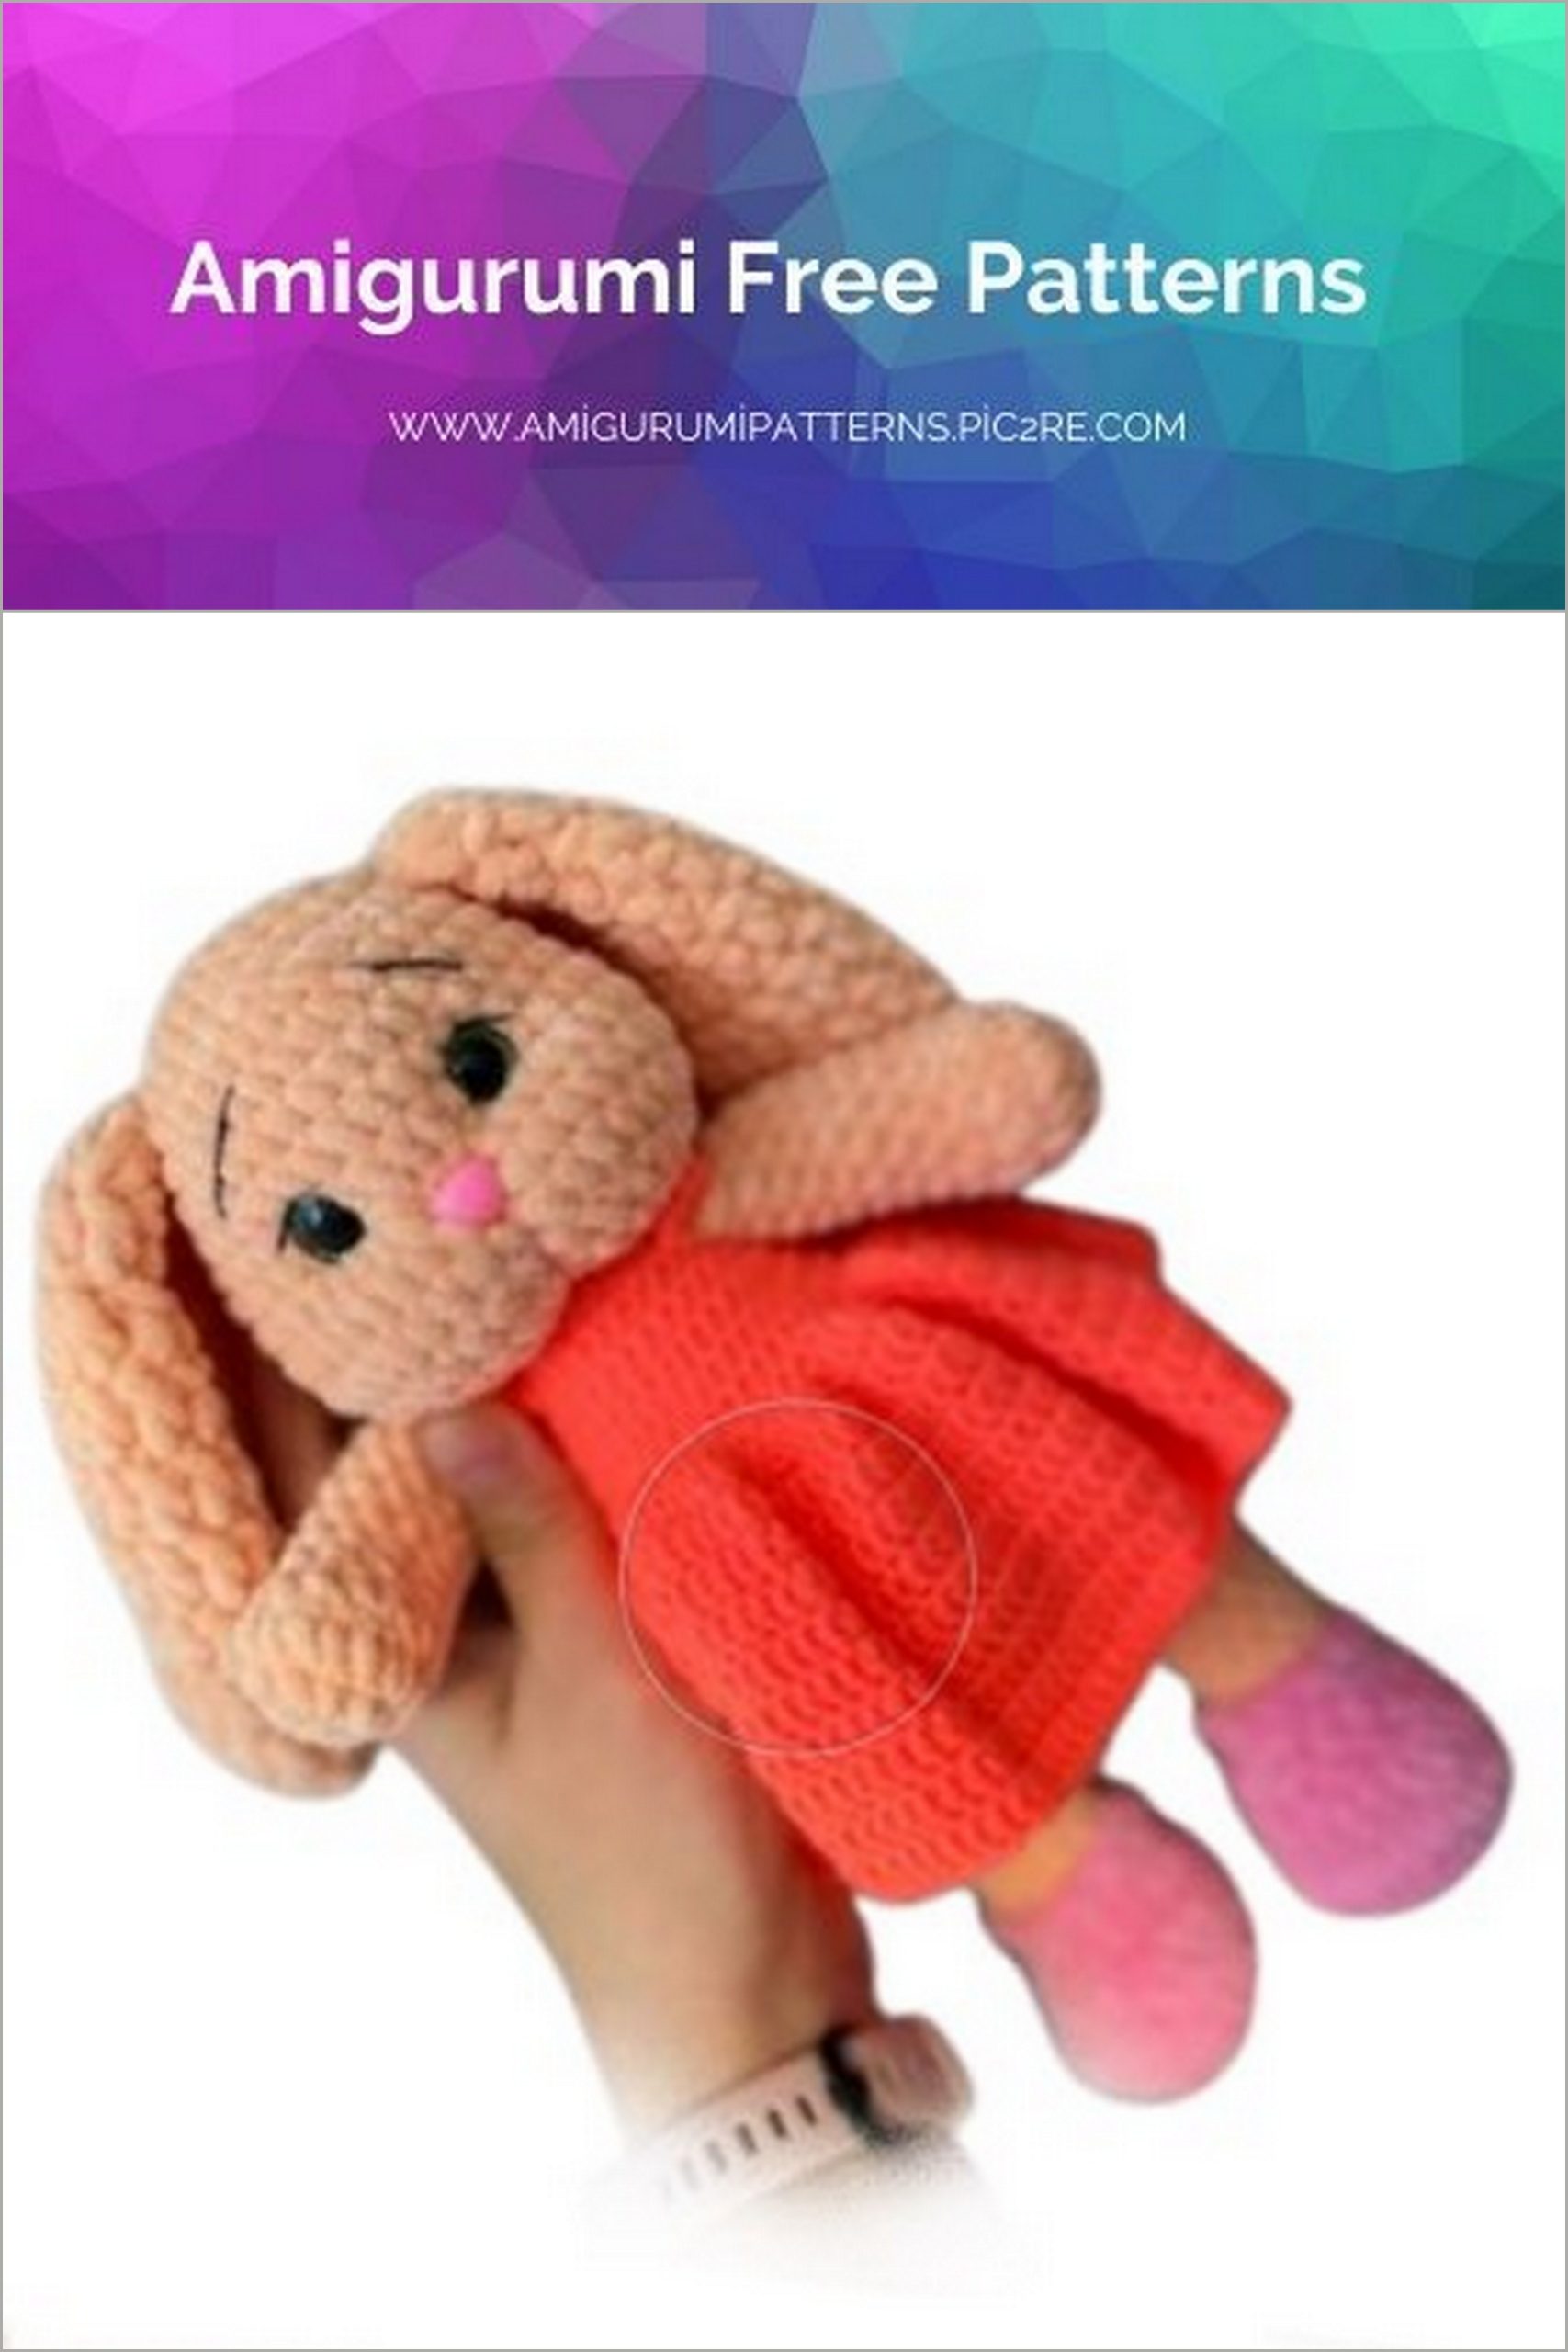
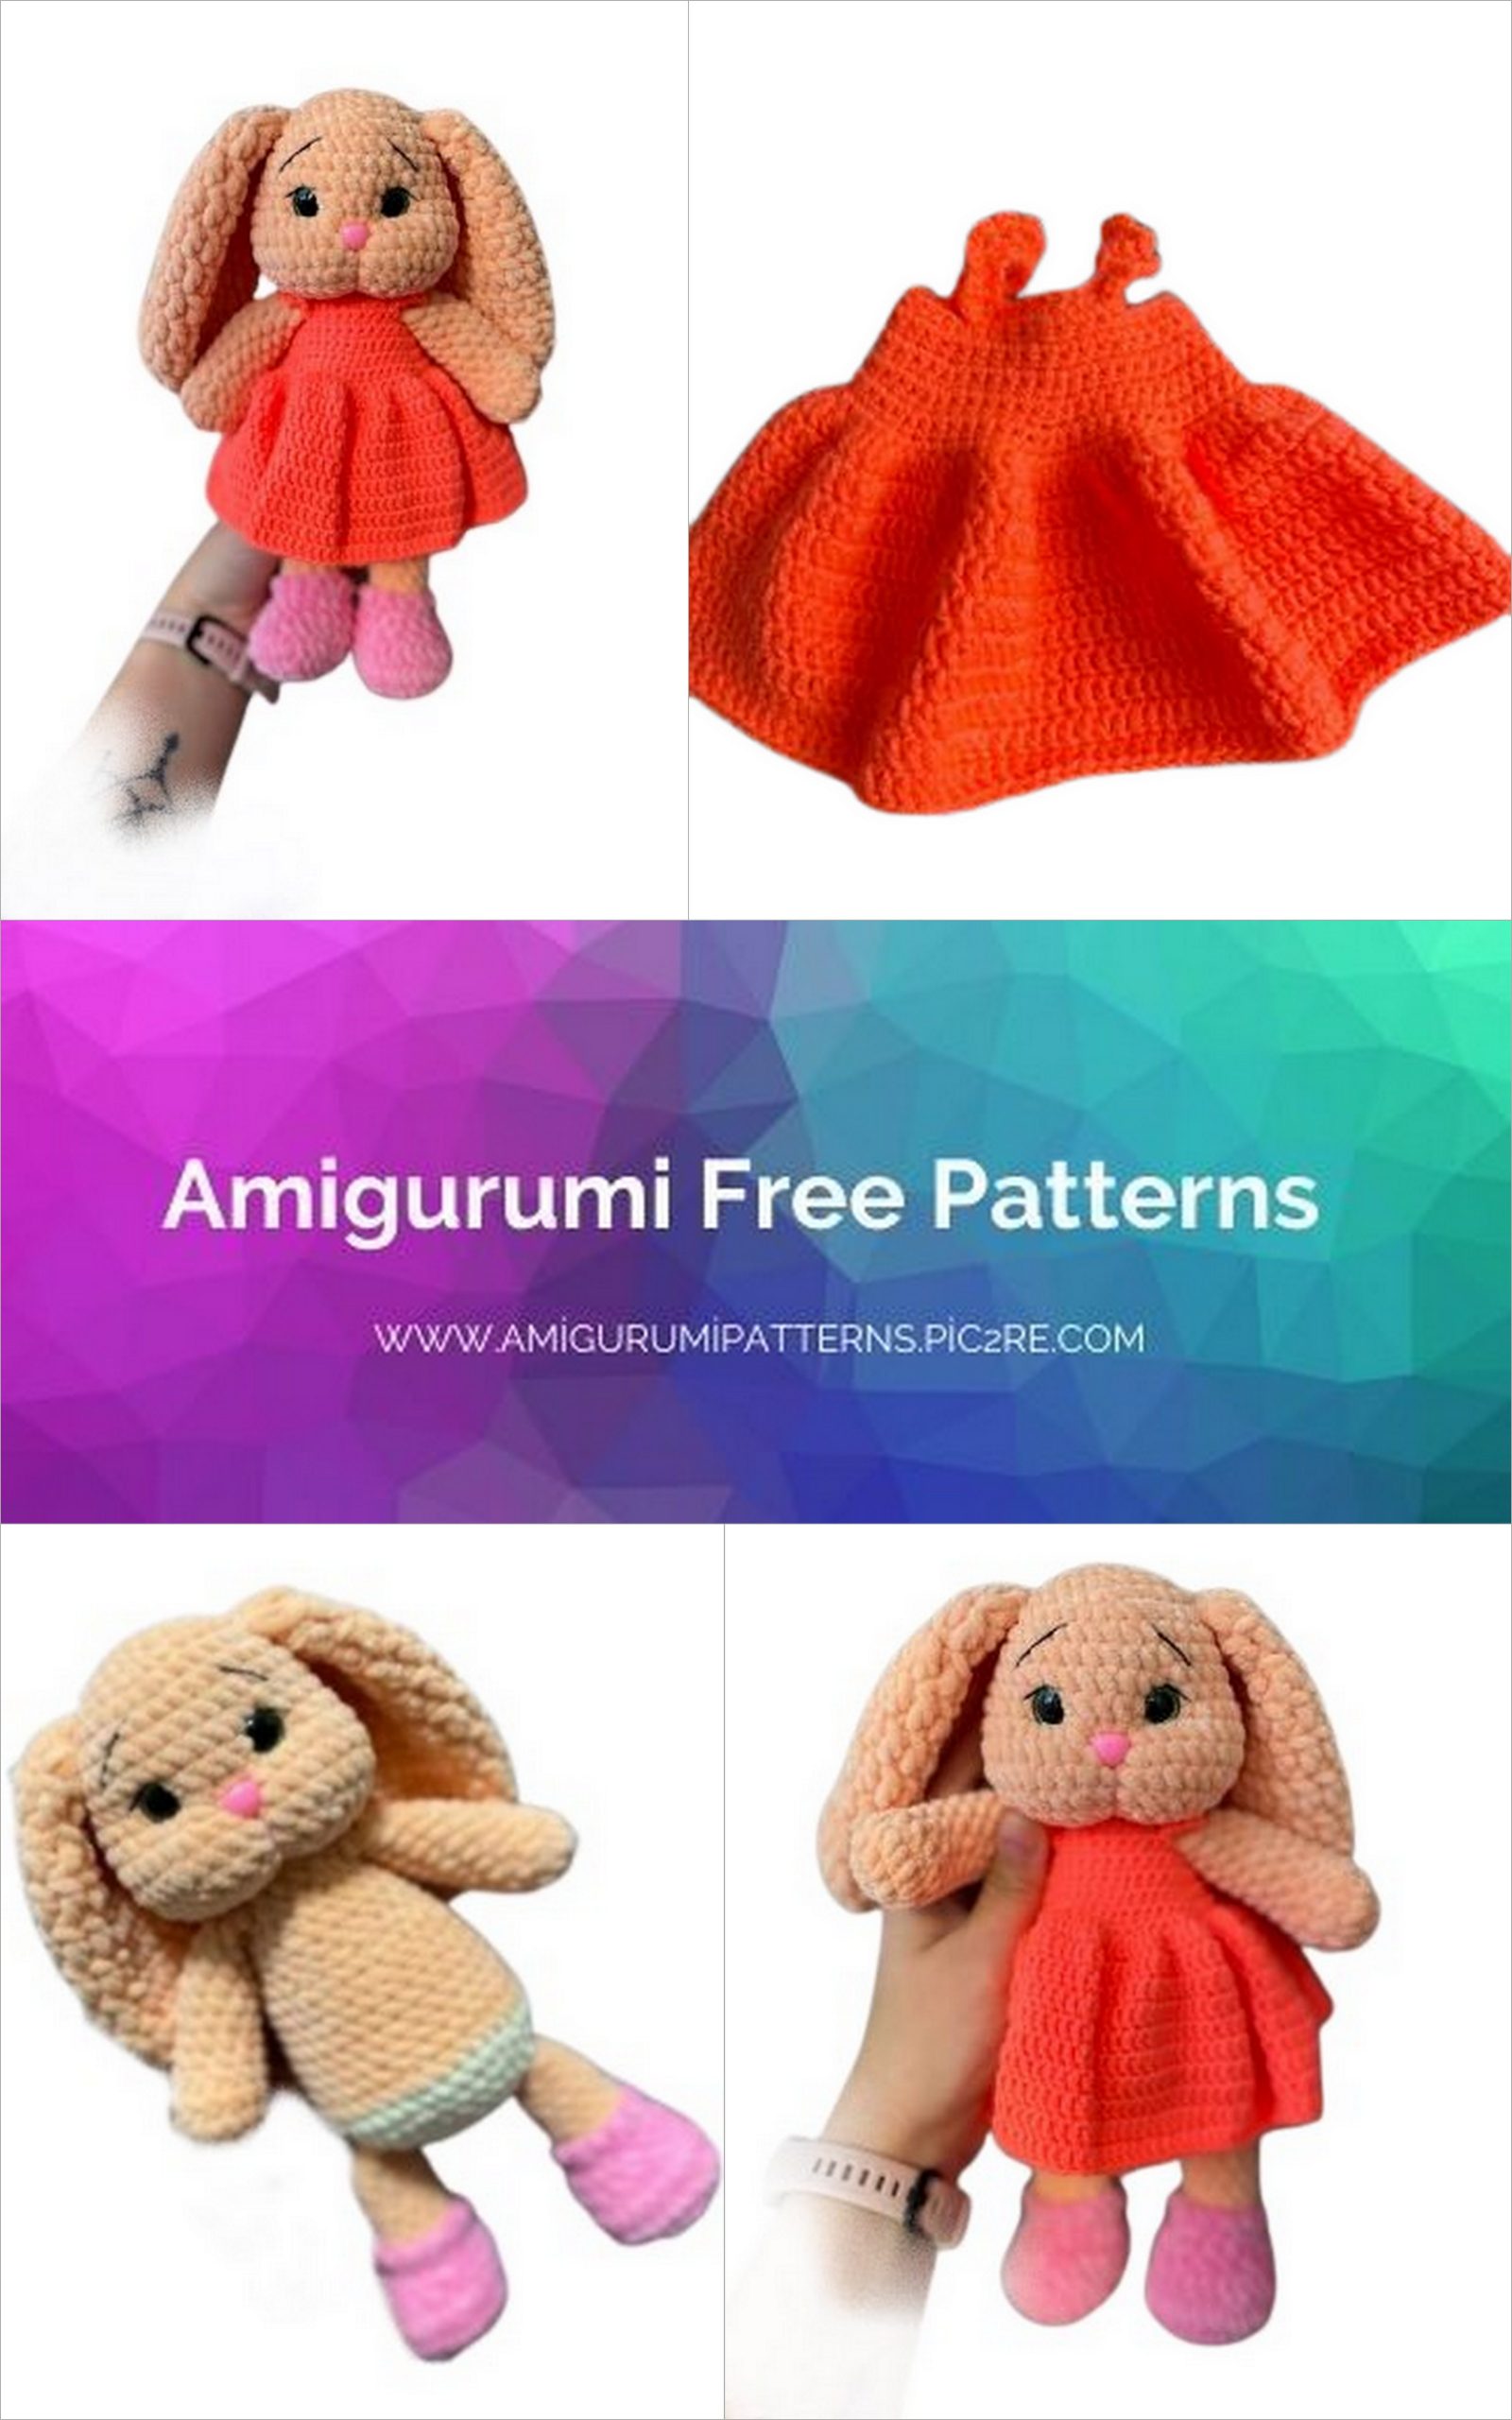
Amigurumi Bunny Stesha Free Pattern
Pinterest Offical Page : amigurumipatterns.pic2re.com
Facebook Group: amigurumipatterns.pic2re.com
Facebook Offical Page: amigurumipatterns.pic2re.com
Bunny Stesha
Necessary materials:
– YarnArt Dolce yarn in the main color (773), a little more than half a skein.
– WolanS Bunny Baby yarn for socks (06) and panties (02),
– Pekhorka yarn Children’s novelty, for dresses (351),
-eyes on a 12 mm safety mount,
– spout 4*11 mm,
– buttons 2 pcs,
-filler,
– hook 3.5 mm and for clothes 2 mm,
-scissors,
-glue,
– sewing needle
– threads for decorating and tightening the muzzle
Legend:
CH-air loop,
SC single crochet,
İNC – increase,
Decrease DEC
DC-column with one crochet,
SL-ST-connecting post,
BLO- for the back half-loop.
Head:
1) 6 sc into magic ring,
2) 6 inc.- 12 sc,
3) ( 1 sc, inc) * 6- 18 sc,
4) ( 2 sc, inc) * 6- 24 sc,
5) (3 sc, inc) * 6- 30 sc,
6) ( 4 sc, inc) * 6- 36 sc,
7-10) 36 sc – 4 rows,
11) 2 sc, ( 2 sc, inc)*4, 6 sc,( inc, 2 sc)*4, 4 sc-44 sc,
12-14) 44 sc – 3 rows,
15) 2 sc, ( 2 sc, dec)*4, 6 sc, ( dec, 2 sc)*4, 4 sc-36 sc,
16) ( 4 sc, dec) * 6- 30 sc,
17) ( 3 sc, dec) * 6- 24 sc,
18) ( 2 sc, dec) * 6-18 sc,
19) (1sc,dec)*6-12sc,
20) 6 reductions, pull off the hole. Hide the thread.
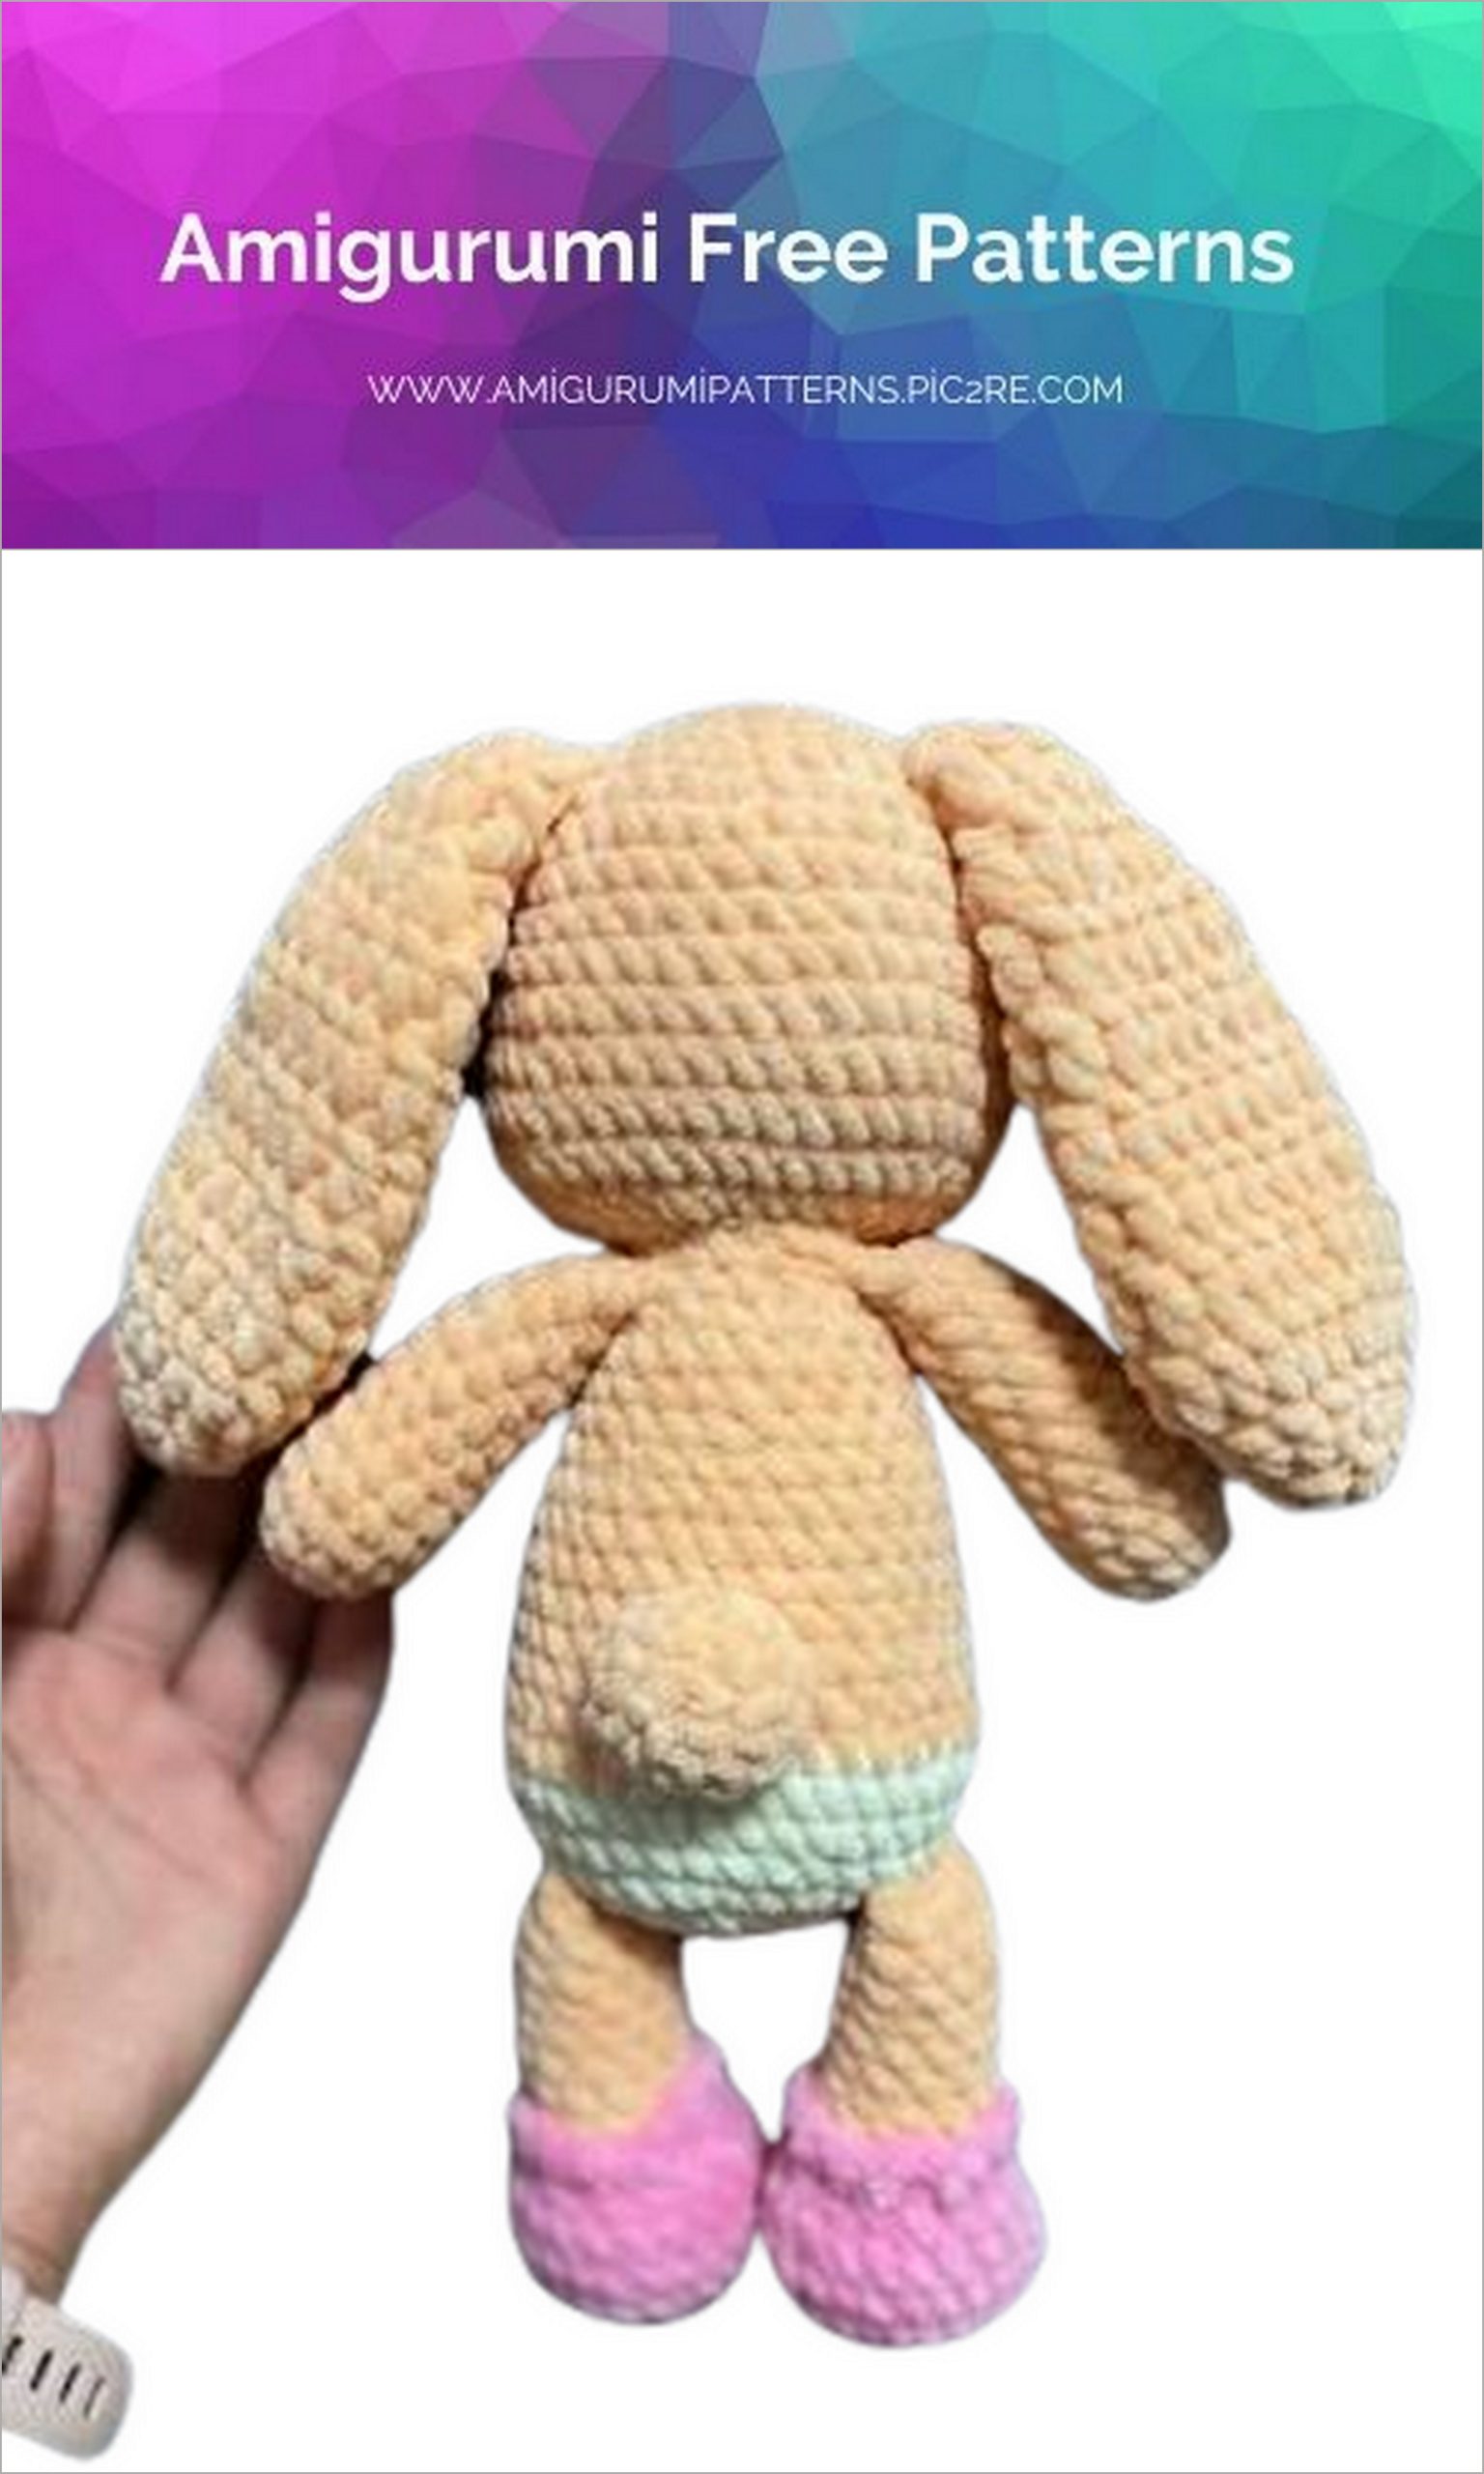
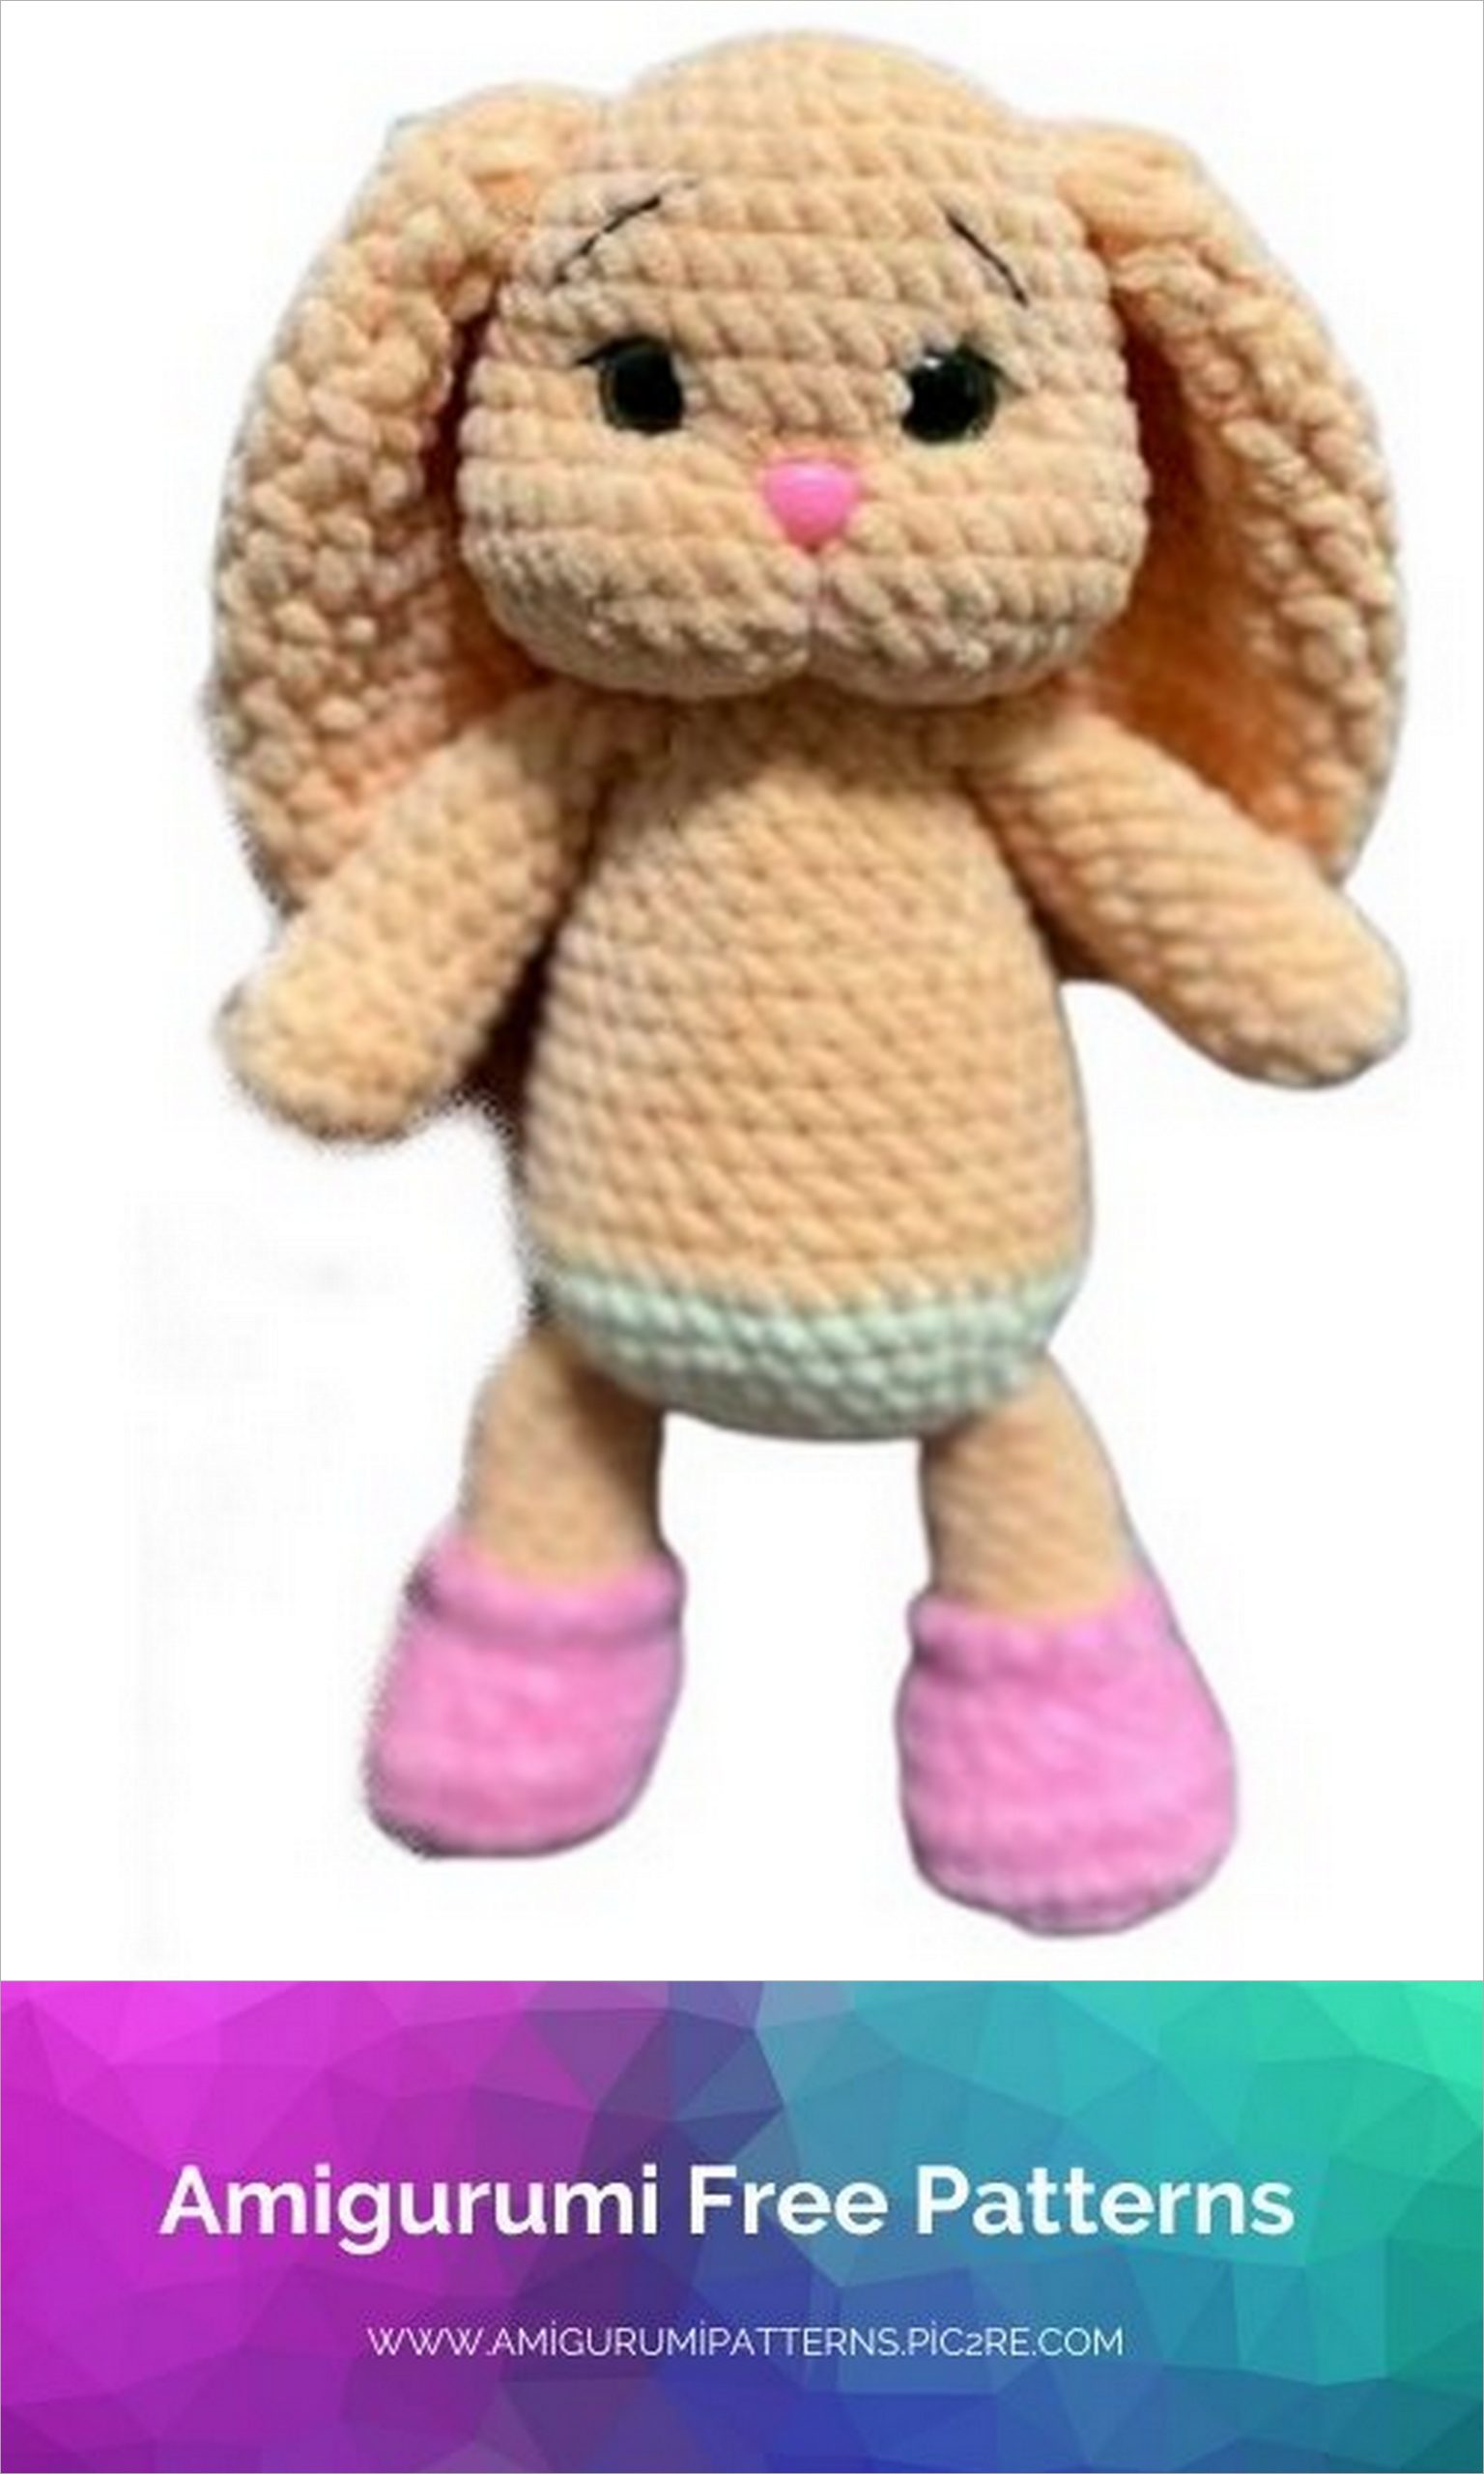
We insert the eyes between 10-11 rows, the distance between the legs is 6 sc.
Drawstring:
Tightening (continued):
We make a tightening, as in the photographs, after we have pulled it off, we glue the spout. And we make arrangements. We embroider arrows, eyebrows.

Legs (2 parts):
We start with an additional color.
1) 8 sc into magic ring,
2) 8 inc.- 16 sc,
3) ( 1 sc, inc) * 8- 24 sc,
4) ( 2 sc, inc) * 8- 32 sc,
5) 6 sc, ( 1 sc, dec) * 6, 8 sc – 26 sc,
6) 8 sc, 6 decreases, 6 sc – 20 sc,
7) dec, 16 sc, dec- 18 sc,
8) ( 1 sc, dec) * 6- 12 sc, make a shift
threads on the main color,
9) BLO 12 sc,
10-16) 12 sc (7 rows).
Fill to the middle.
Fold in half (if necessary, knit bias loops) and knit 6 sc behind both walls.
Return to the 7th row, attach the thread to the loops that turned out when knitting and knit 12 sc.
Handles (2 parts):
1) 6 sc into magic ring,
2) 6 inc.- 12 sc,
3) ( 1 sc, inc) * 6- 18 sc,
4) 6 sc, 3 dec, 6 sc – 15 sc,
5) 5 sc, 3 dec, 4 sc – 12 sc,
6-13) 12 sc (8 rows).
Fill to the middle.
Fold the handle in half and knit 6 sc for both rows.
Tail:
1) 6 sc into magic ring,
2) 6 inc.- 12 sc,
3-4) 12 sc (2 rows)
Fill a little.
Leave the end for sewing.

Ears (2 parts):
We knit the ears with single crochets. Increases and decreases are also done by DC.
1) 8 DC into magic ring,
2) 8 inc. from DC-16 DC,
3) ( 1 DC, inc. of DC)*8- 24 DC,
4-8) 24 DC (5 rows).
I got 5 rows of weak viscous, if you knit tightly, then you need to add 3-4 more rows so that the ears are not short.
9) ( 1 DC, dec. from DC)*8- 16 DC,
10) 16 DC,
11) 8 dec. from DC-8 DC,
Make SL-ST.
Fasten the thread, leave the end for sewing.
Body:
We knit with an additional color (the color of the panties).
1) 8 sc into magic ring,
2) 8 inc.- 16 sc,
3) ( 1 sc, inc) * 8- 24 sc,
4) ( 2 sc, inc) * 8- 32 sc,
Next, knit the legs.
5) 3 sc, 6 sc with leg, 10 sc,
6 sc with leg, 7 sc – 32 sc,
6) (3 sc, inc) * 8- 40 sc,
7) 40 sc.
We make a change of thread to the main color.
8) 40 sc,
9) ( 3 sc, dec) * 8- 32 sc,
10-15) 32 sc (6 rows),
Body (continued):
16) ( 2 sc, dec) * 8- 24 sc,
17-19) 24 sc (3 rows),
20) ( 2 sc, dec) * 6- 18 sc,
21) 2 sc, 6 sc with handle, 4 sc, 6 sc with handle – 18 sc,
22) ( 1 sc, dec) * 6- 12 sc.
Fasten the thread. Leave a long end for sewing on the head.
Assembly:
Sew the head to the body.
Sew on a ponytail.
Sew on the ears.
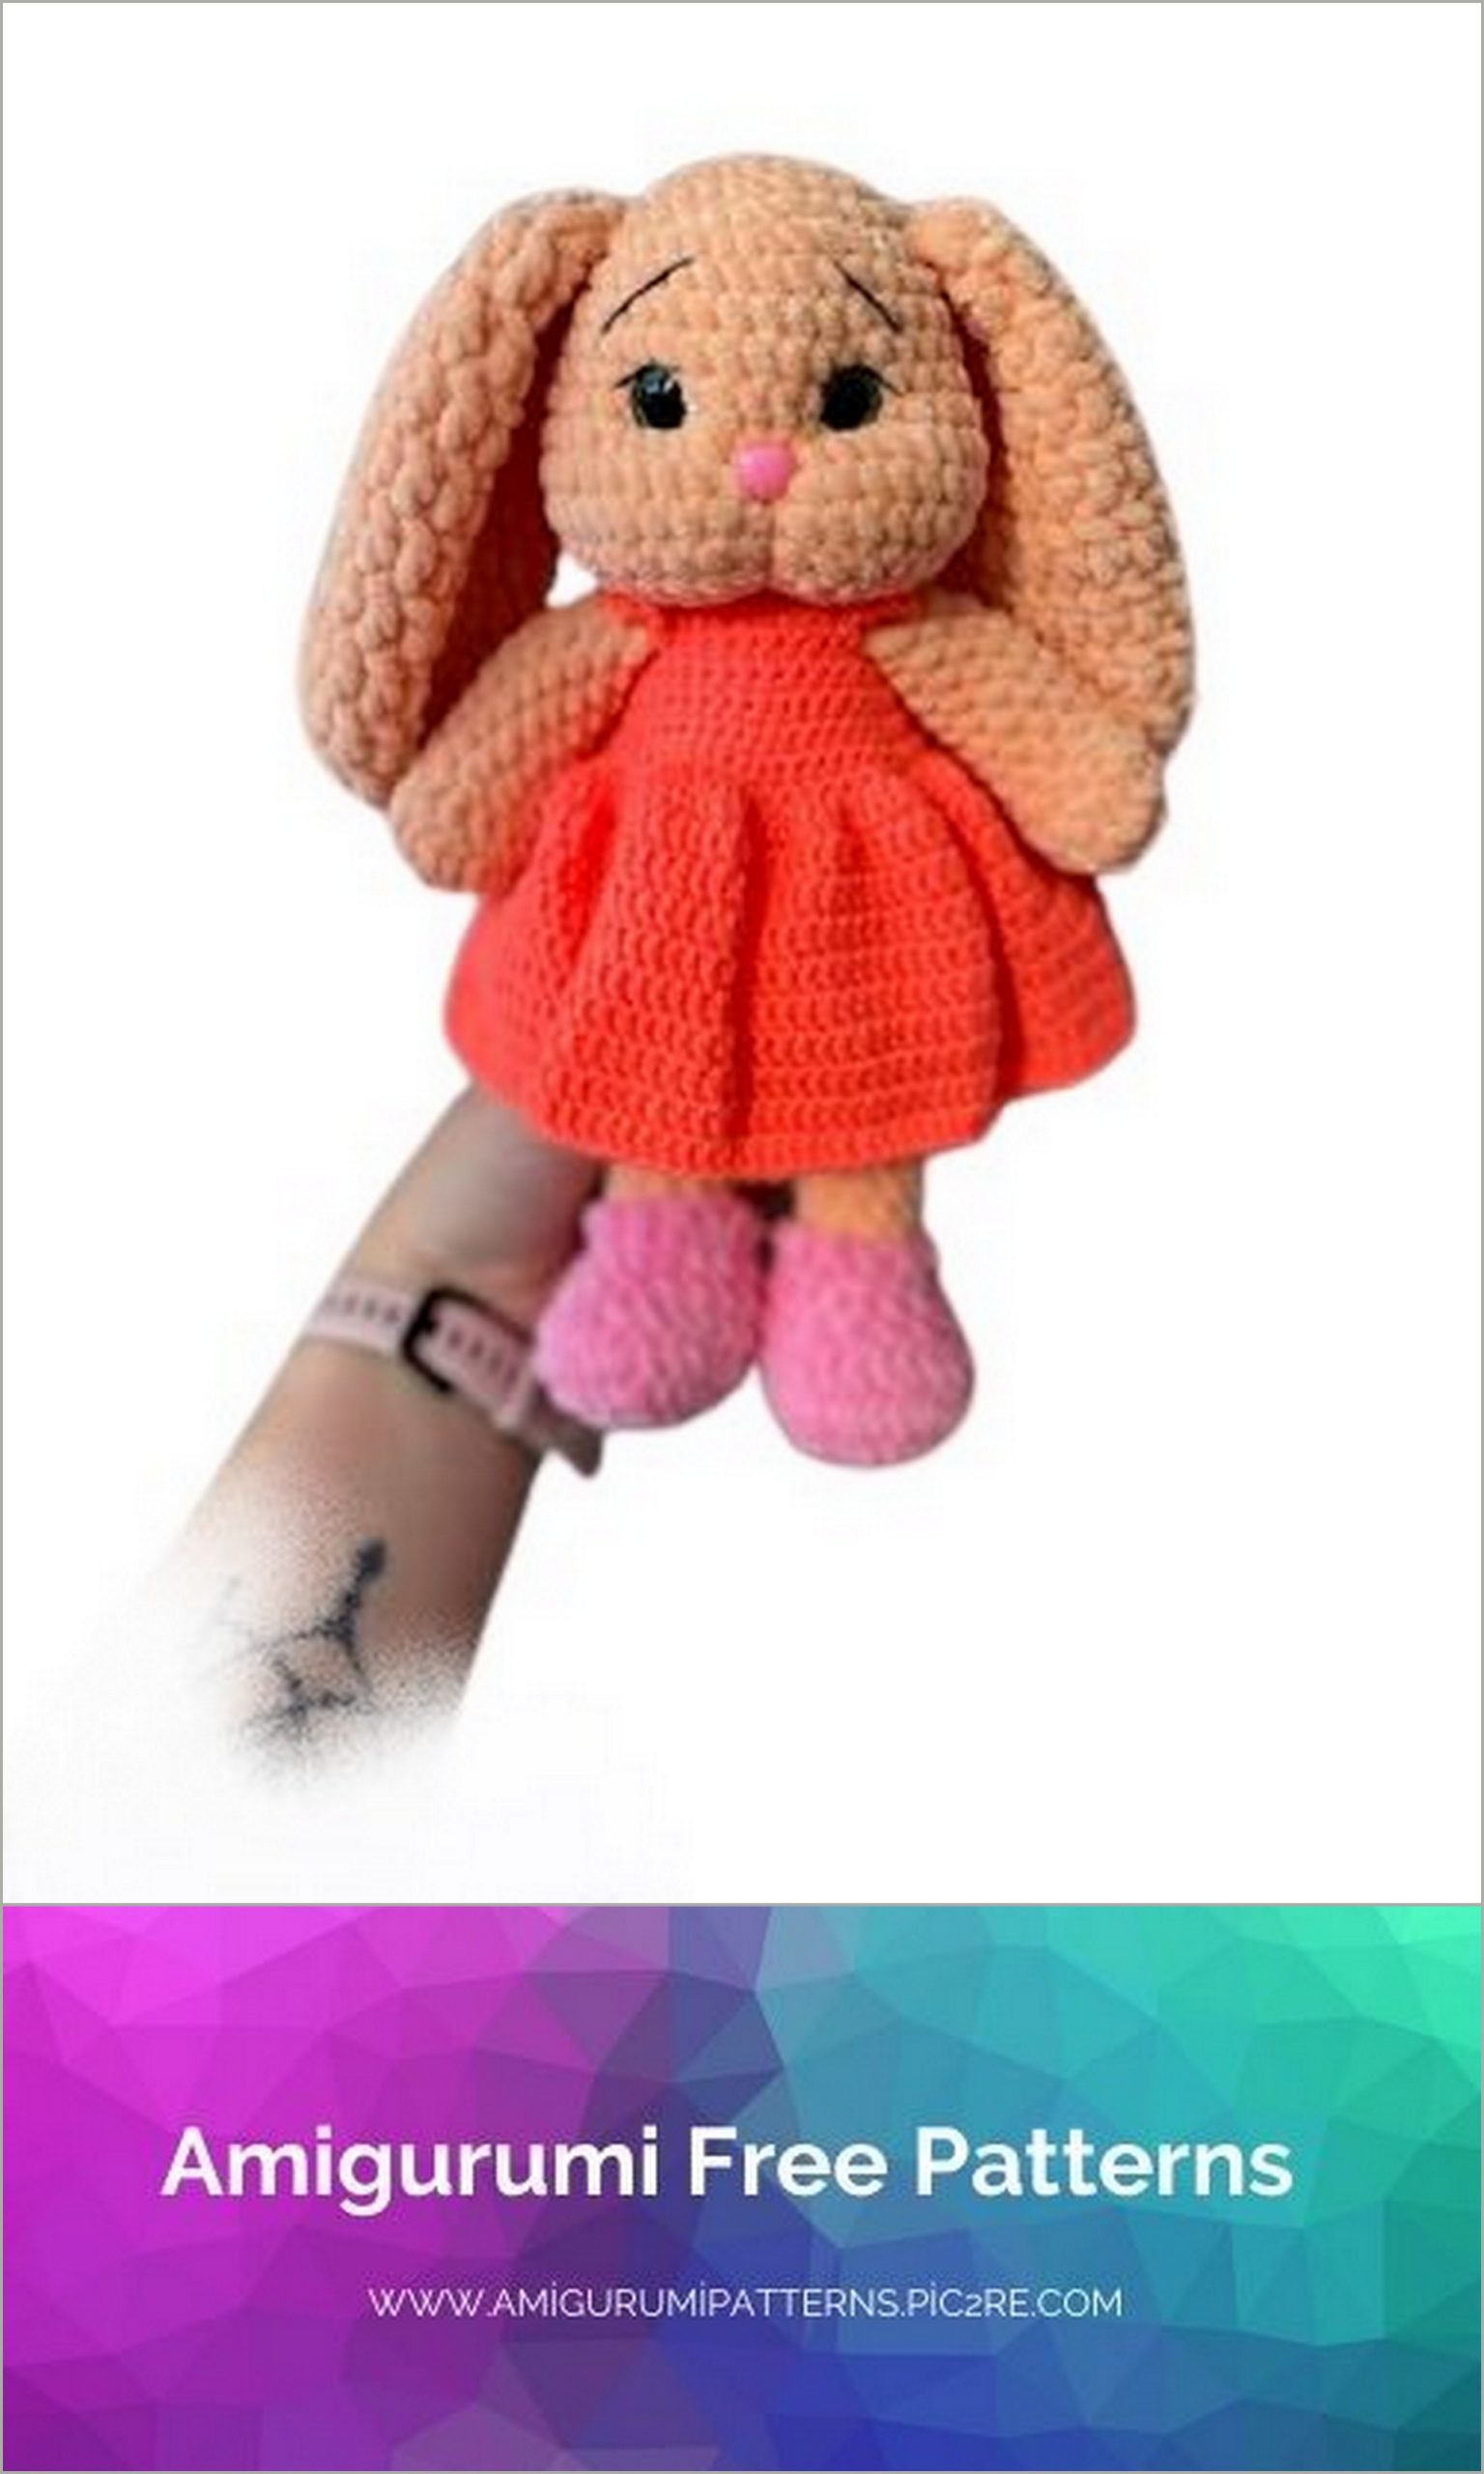
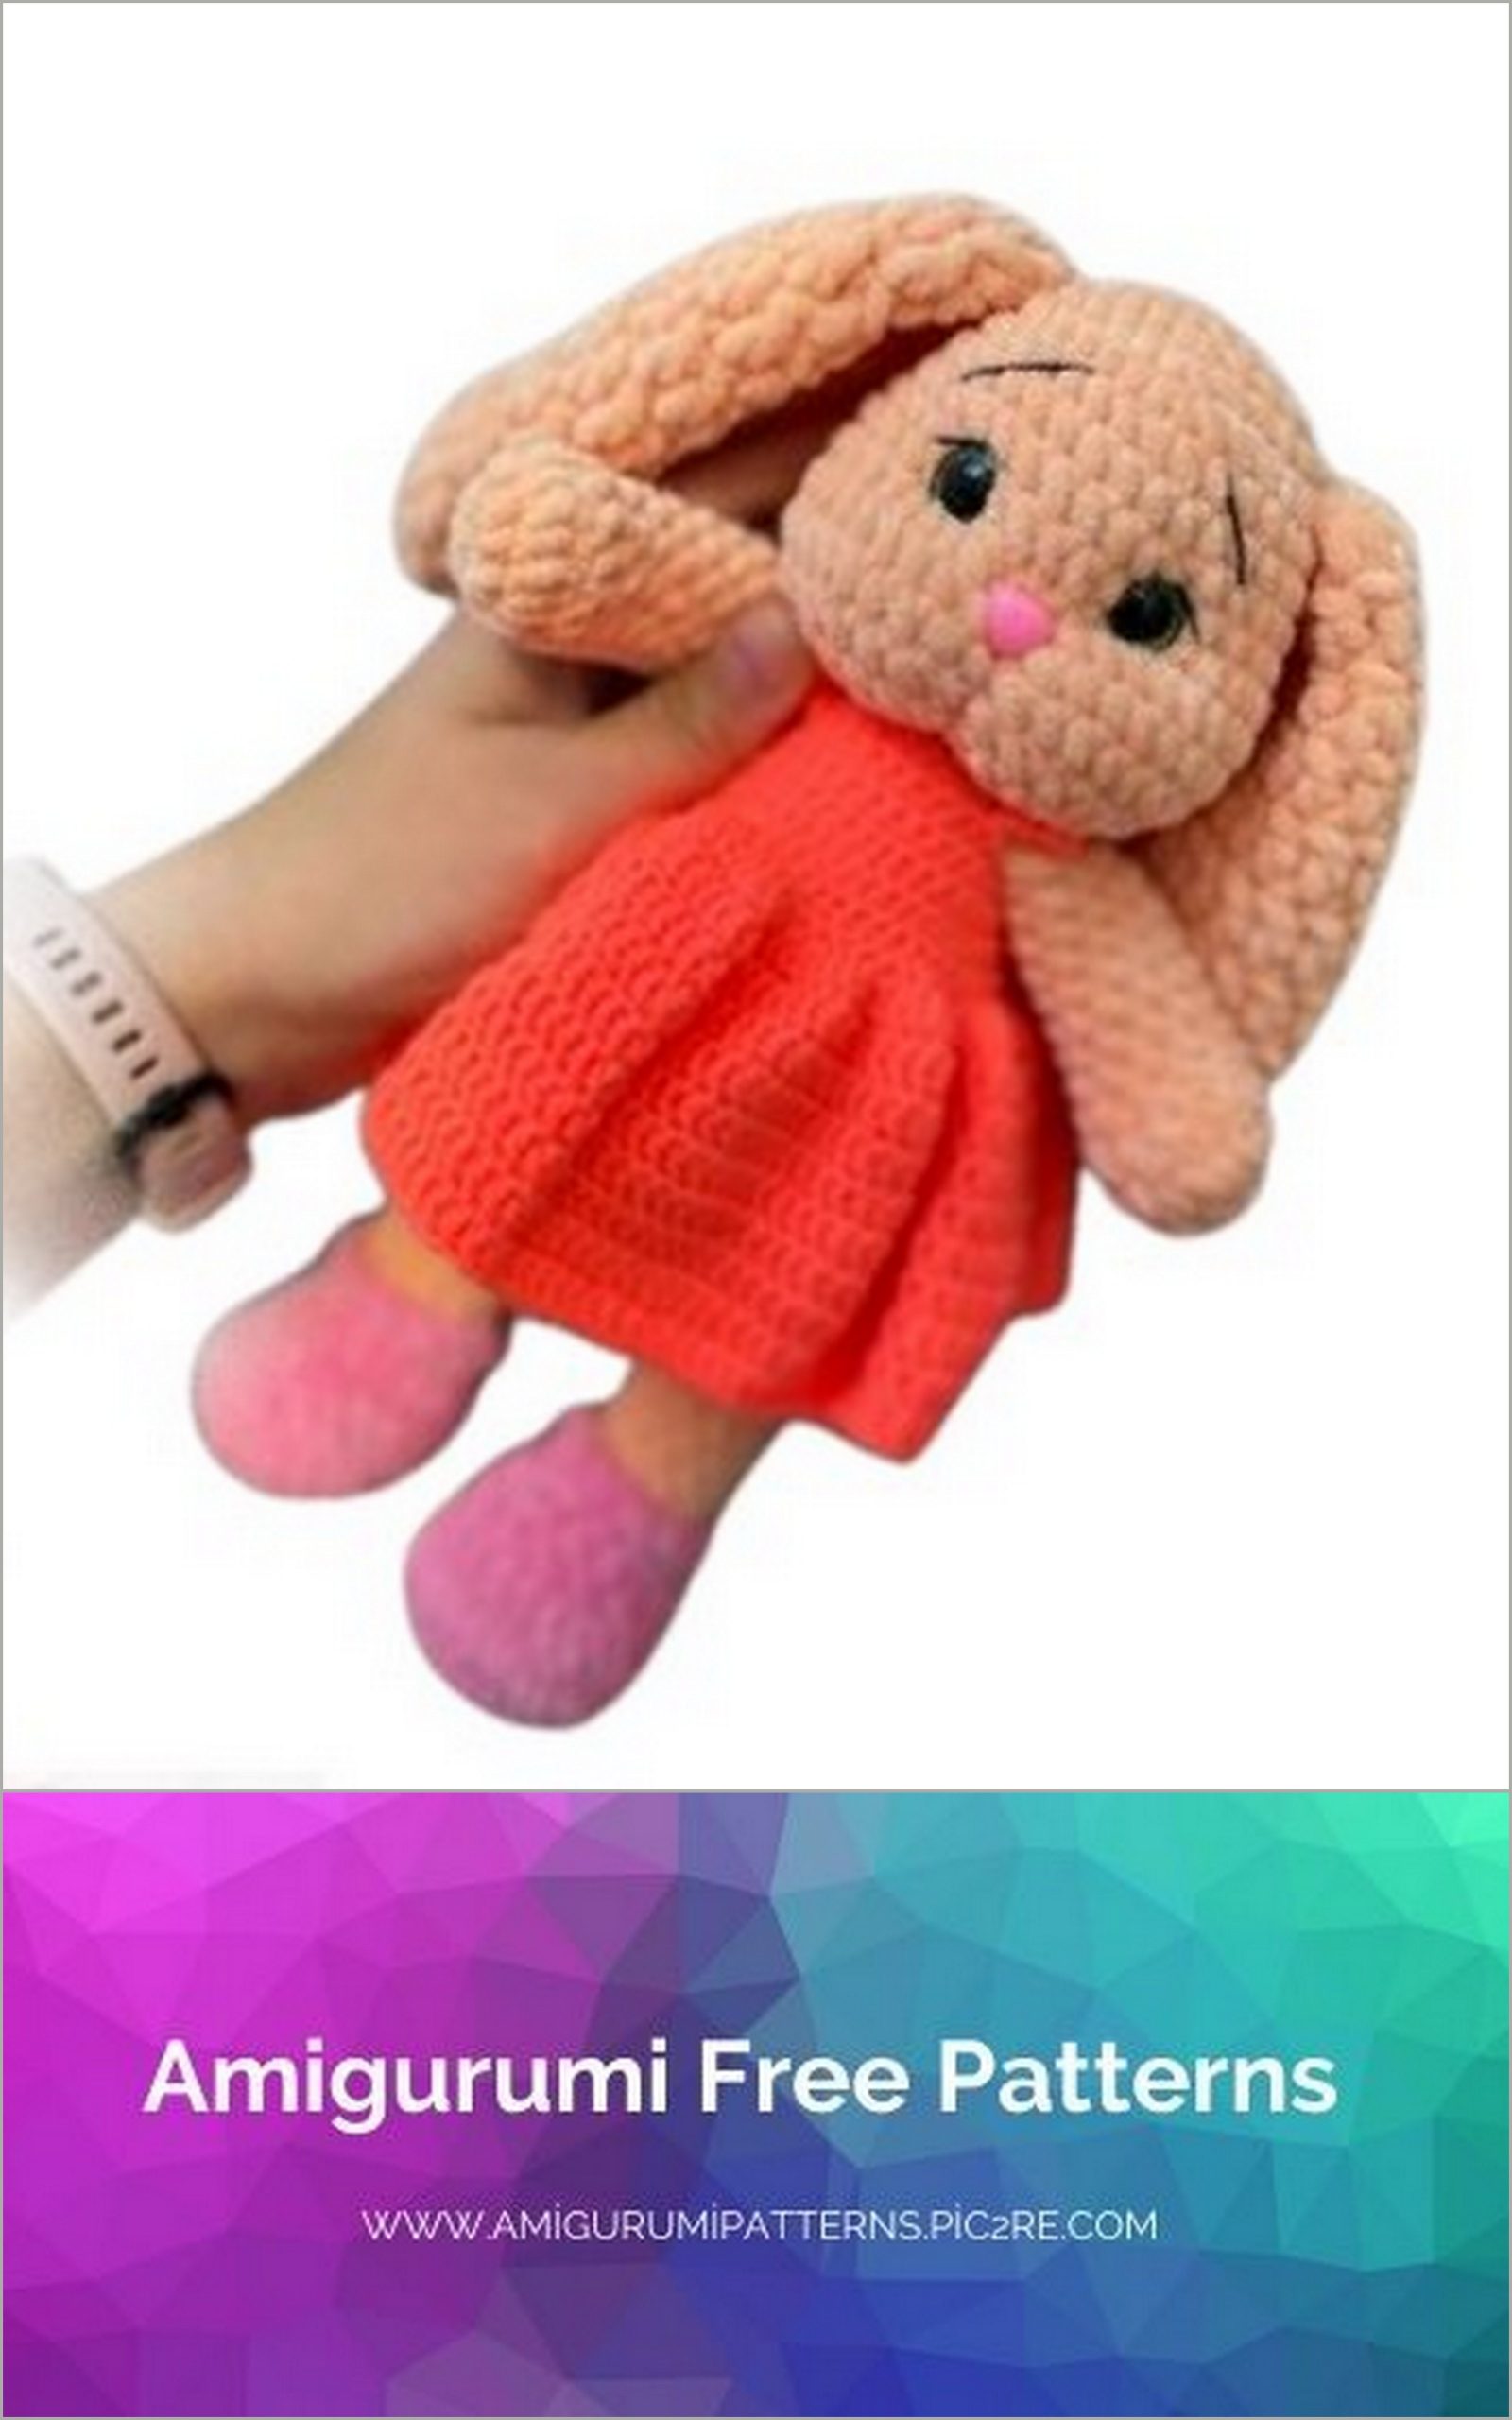
Next, the bunny needs to be dressed.
The dress:
For the dress you will need a 2 mm hook and yarn
Pekhorka Children’s novelty or analogue.
1) Dial a chain of 35 CH,
2) From the 2nd loop from the hook, knit 34 sc, ch,
3) 4 sc, 8 ch, skip 8 sc, 8 sc, 8 ch, skip 8 sc, 4 sc, ch,
4) 34 sc, ch,
5) inc, 32 sc, inc, ch- 36 sc,
6) inc, 34 sc, inc, ch- 38 sc,
7) ( 5 sc, inc)*6, ch-44 sc,
8) 44 sc, ch,
9) ( 6 sc, inc) * 6, ch- 50 sc,
10) 50 sc, ch,
11) ( 7 sc, inc) * 6, ch- 56 sc,
Dress (continued):
12) ( 8 sc, inc) * 6, ch- 62 sc,
13) ( 9 sc, inc)*6, ch-68 sc,
14) 68 inc. from DC, connect into a ring,
15-23) 136 DC (9 rows). Connect the thread, cut and hide.
Next, you need to tie the back and straps.
Attach the thread (where the arrow is in the photo).
1 sc, 4 ch, sl-st, 3 sc, 4 ch, sl-st. You should get 2 holes for buttons.
Next, tie to the end of sc.
Hide the thread, sew on the buttons.
Tie straps.
Attach yarn, 1 sc, 3 ch, 1 sc (I did 10 reps).
Tie the sleeve only from corner to corner, do not tie the bottom.