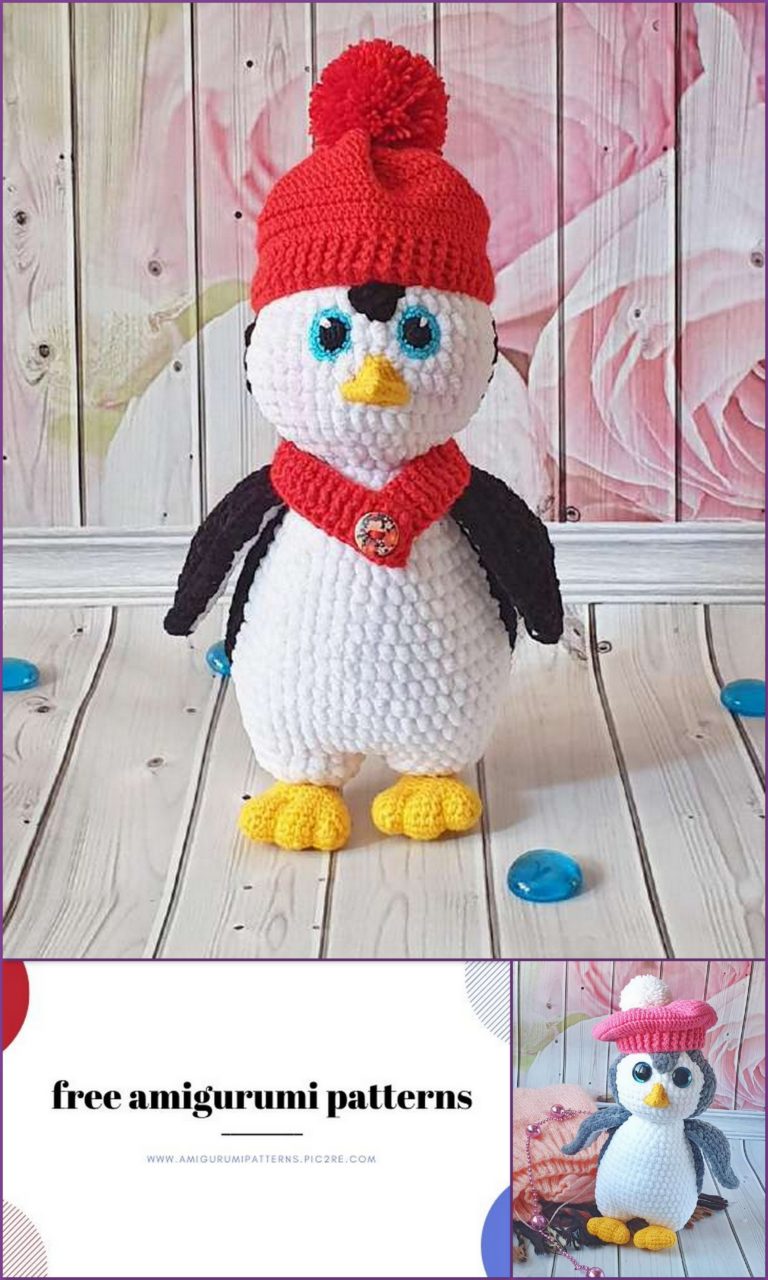
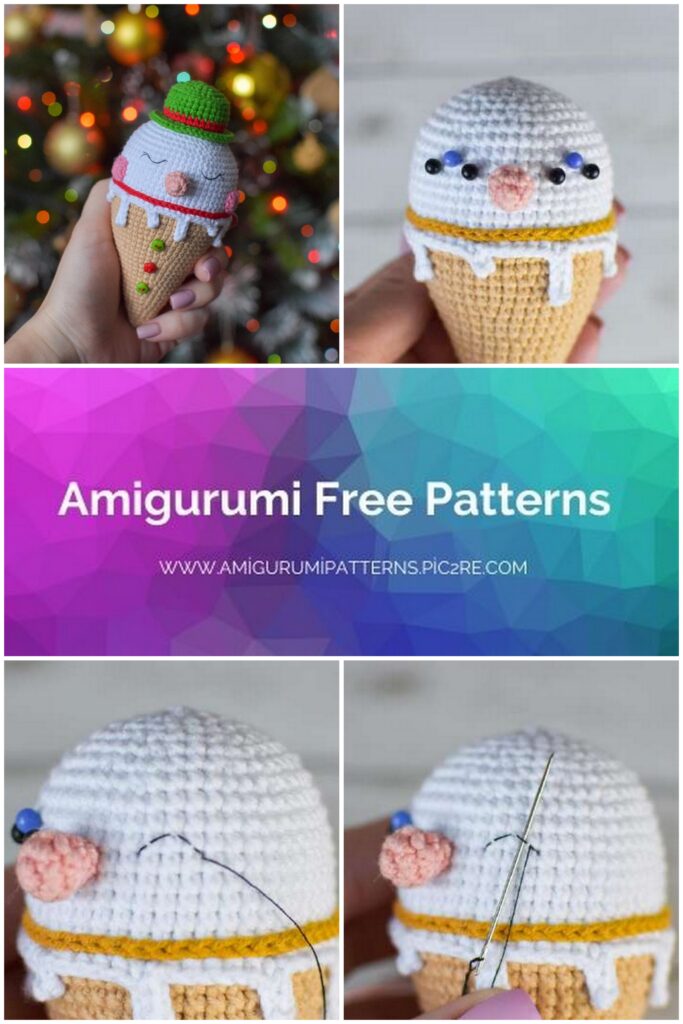
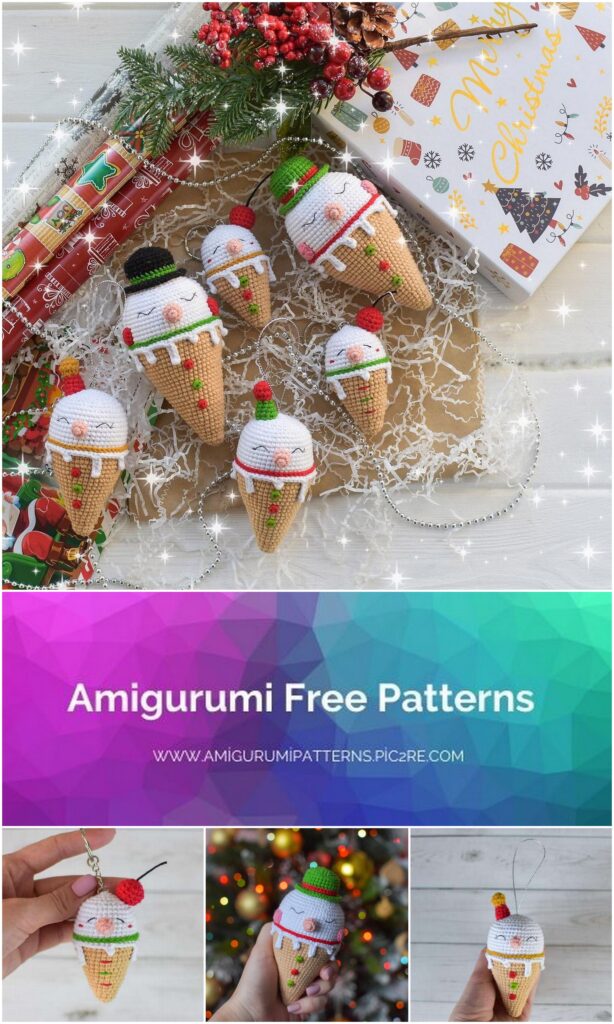
Amigurumi Christmas Ice Cream Free Pattern
Pinterest Offical Page : amigurumipatterns.pic2re.com
Facebook Group: amigurumipatterns.pic2re.com
Facebook Offical Page: amigurumipatterns.pic2re.com
TOOLS AND MATERIALS
1.Yarn
• Alize Cotton Gold (55% cotton / 45% acrylic) 100g / 330m. I used white (55), red (56), light green (126) colors, black (Tweed) (60), pink (33) colors
• Yarn Art Jeans (55% cotton / 45% acrylic) 50g / 160m. I used sand (07), peach (73), mustard (84) colors.
You can use any yarn you like
2. Filler (holofiber, etc.)
3. Hook number 2
4.Black sewing thread to decorate the face
5.Plastic buttons for decoration
6.Glue (I glue smudges and a cherry)
7.Cord for hanging on a Christmas tree
8.Changer for a keychain
9 waxed cherry cord
SYMBOLS
ch – air loop
sl-st – connecting post
sc – single crochet
hdc – half double crochet
inc – increase (2 loops in 1)
dec – decrease (2 loops together)
blo – back half loop
flo – front half path
(…) – the number in brackets indicates the number of loops in a row
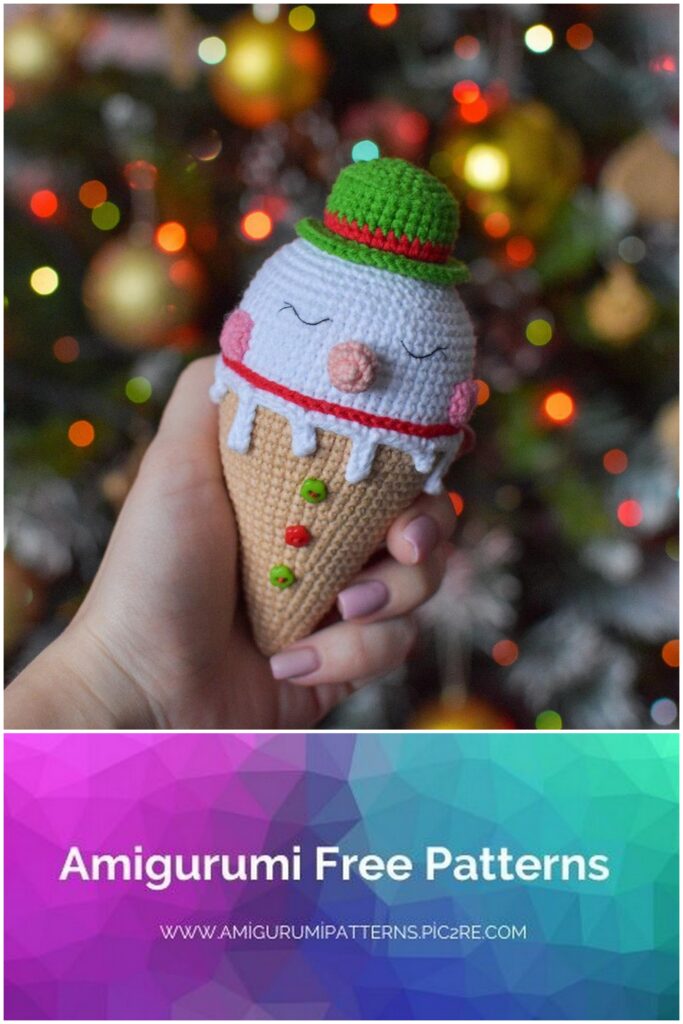
LARGE ICE CREAM
We knit the toy from the bottom up, i.e. moving from the cup to the ice cream. We start knitting with a sand-colored thread, fill the part tightly as we knit.
1st row: 6 sc into magic ring
2nd row: 6 inc (12)
3-4 row: 12 sc (2 rows)
5 row: (1 sc, inc) * 6 (18)
6-7 row: 18 sc (2 rows)
8 row: 1 sc, inc, (2 sc, inc) * 5, 1 sc (24)
9-10 row: 24 sc (2 rows)
11 row: (3 sc, inc) * 6 (30)
12-13 row: 30 sc (2 rows)
14th row: 2 sc, inc, (4 sc, inc) * 5, 2 sc (36)
15-16 row: 36 sc (2 rows)
17 row: (5 sc, inc) * 6 (42)
Row 18-19: 42 sc (2 rows)
20 row: 3 sc, inc, (6 sc, inc) * 5, 3 sc (48)
Row 21-22: 48 sc
23 row: (7 sc, inc) * 6 (54)
24-25 row: 54 sc (2 rows)
26 row: 4 sc, inc, (8 sc, inc) * 5, 4 sc (60)
27-28 row: 60 sc
Change the thread to white
Row 29: 60 sc
30 row: 60 sc for blo
Row 31-38: 60 sc (8 rows)
Row 39: 4 sc, dec, (8 sc, dec) 85, 4 sc (54)
40 row: (7 sc, dec) * 6 (48)
41 row: 3 sc, dec, (6 sc, dec) * 5, 3 sc (42)
42 row: (5 sc, dec) * 6 (36)
43 row: 2 sc, dec, (4 sc, dec) * 5, 2 sc (30)
44 row: (3 sc, dec) * 6 (24)
45 row: 1 sc, dec, (2 sc, dec) * 5, 1 sc (18)
46 row: (1 sc, dec) * 6 (12)
47 row: 6 dec (6)
We tighten the hole, hide the thread inside the part.
We knit smudges.
To do this, turn the ice cream upside down and attach a white thread to the last free half loop of the 29th row, tied behind a blo. We knit 5 sc, cast on 6 ch, insert the hook into the 2nd loop from the hook and return along the chain, knitting 5 sc, attach the chain with one sl-st to the same base loop from which sc was knitted. Similarly, we continue knitting smudges, i.e. we knit out each smudge from the 5th column. Alternate the length of the smudges at your discretion. I
knitted chains in this way – 5, 3, 4, 2 loops (+1 air loop). We glue or sew on the smudges (I glue them).
We tie the ice cream with one row of sl-st, insert the hook between 29 and 30 rows.
We knit a nose.
1st row: 6 sc into magic ring
2nd row: 6 inc (12)
3rd row: 12 sc
4th row: 6 dec (6)
Cut the thread, leaving a long end for sewing. Sew the nose between the 33rd and 35th rows of the head, fill it.
We embroider eyes. To do this, we first outline the eyes with pins as shown in the photo.
Points 1-2, 4-5 are located between 36 and 37 rows, points 3 and 6 between 35 and 36 rows. Eye width 4 sc, height 1 sc, distance between eyes 6 sc. Now, using a single black thread, we embroider the outline of the eye, while catching the threads of the head (I am using ordinary sewing thread). Then, in order to secure the embroidered outline and make it more dense, we wrap it with the same black thread.
We embroider cilia. I don’t wrap them around, since the stitch in this case is short. You can do as you like. Similarly, we embroider the second eye. We fix the thread, cut it off.
We knit cheeks.
To do this, we collect 2 ch in the amigurumi ring. and knit 10 hdc, close the circle, knit sl-st in the 2nd ch, tighten the ring. Try on the cheeks with pins and sew between 30 and 34 row, as shown in the photo.
We knit a bowler hat.
1st row: 6 sc into magic ring
2nd row: 6 inc (12)
3rd row: (1 sc, inc) * 6 (18)
4th row: 1 sc, inc, (2 sc, inc) * 5, 1 sc (24)
5 row: (3 sc, inc) * 6 (30)
6 row: 30 sc for blo
7-8 row: 30 sc (2 rows)
Change the thread to contrasting
9-10 row: 30 sc (2 rows)
Change the thread to the main one
11th row: (1 sc, inc) * 15 per flo (45)
12 row: 45 sc
Cut the thread, leaving a long end for sewing. Sew the pot to the top of the ice cream, fill it not very tightly as it is sewn on.
We sew buttons to the glass. The big ice cream is ready!
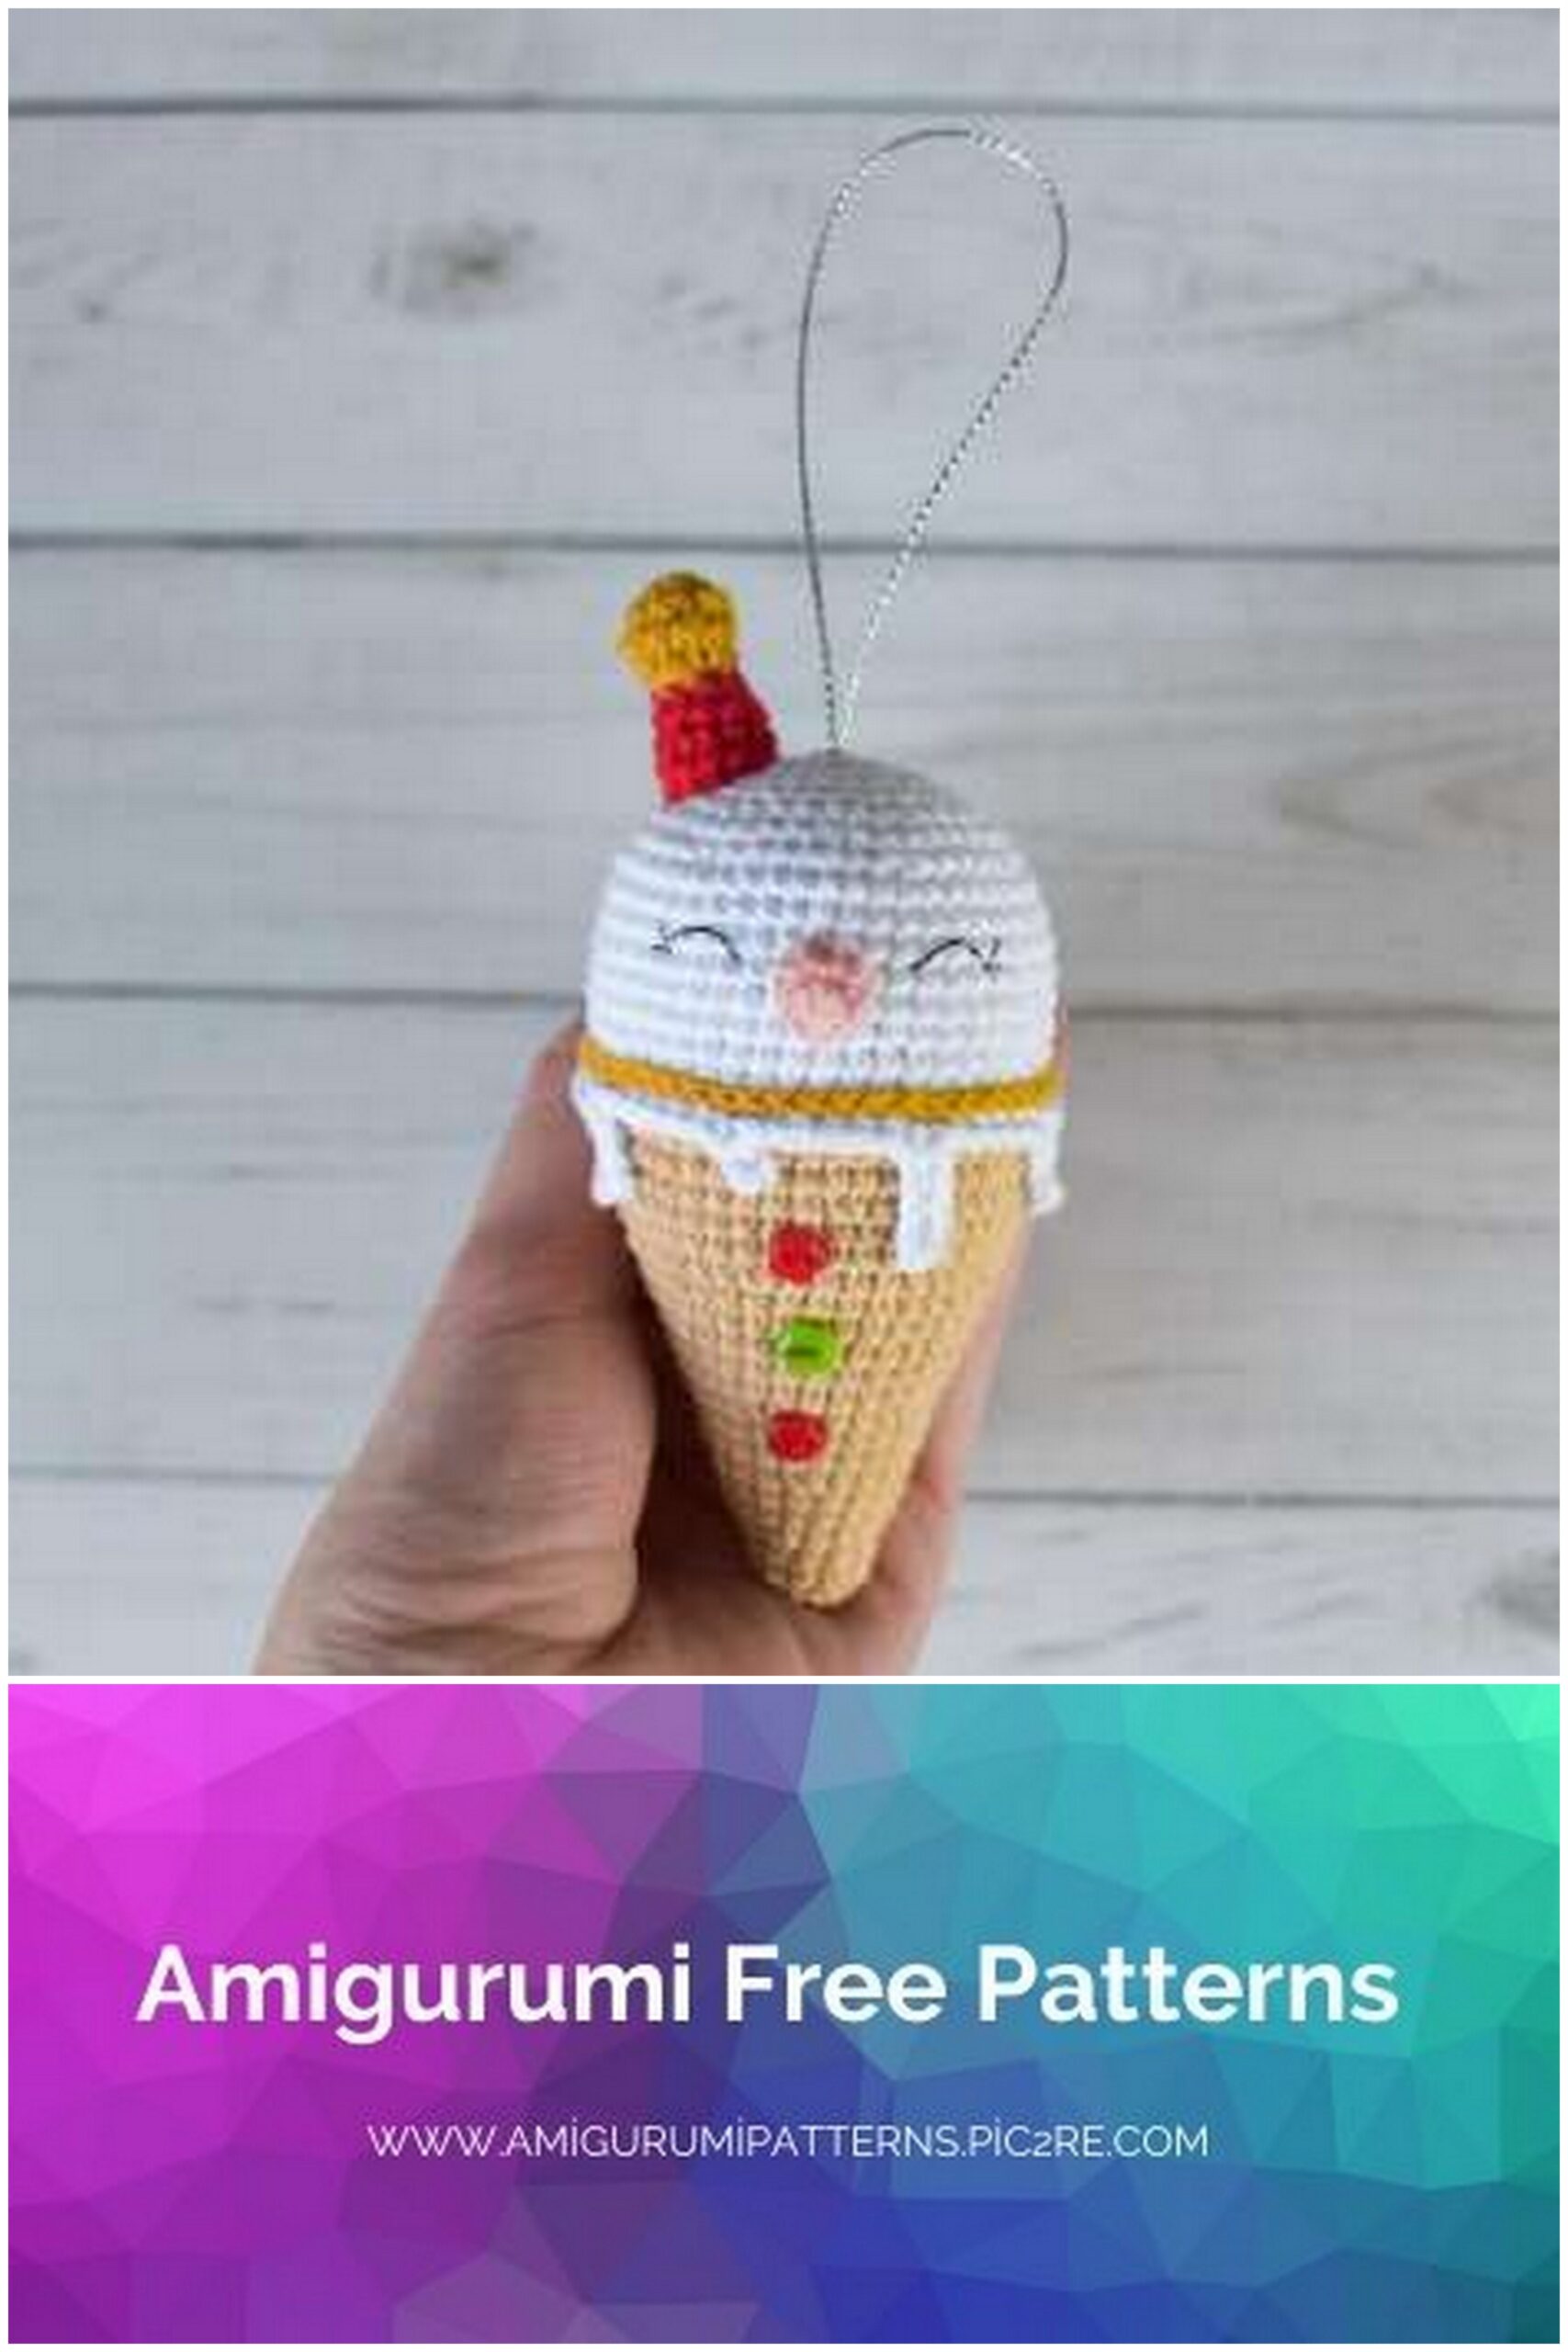
MEDIUM ICE CREAM
(SUSPENSION ON A Christmas tree)
We knit the toy from the bottom up, i.e. moving from the cup to the ice cream. We start knitting with a sand-colored thread, fill the part tightly as we knit.
1st row: 6 sc into magic ring
2nd row: 6 inc (12)
3-4 row: 12 sc (2 rows)
5 row: (1 sc, inc) * 6 (18)
6-7 row: 18 sc (2 rows)
8 row: 1 sc, inc, (2 sc, inc) * 5, 1 sc (24)
9-10 row: 24 sc (2 rows)
11 row: (3 sc, inc) * 6 (30)
12-13 row: 30 sc (2 rows)
14th row: 2 sc, inc, (4 sc, inc) * 5, 2 sc (36)
15-16 row: 36 sc (2 rows)
17 row: (5 sc, inc) * 6 (42)
Row 18-19: 42 sc (2 rows)
20 row: 3 sc, inc, (6 sc, inc) * 5, 3 sc (48)
Row 21-22: 48 sc
Change the thread to white
23 row: 48 sc
24 row: 48 sc for blo
25-31 row: 48 sc (7 rows)
32 row: 3 sc, dec, (6 sc, dec) * 5, 3 sc (42)
33 row: (5 sc, dec) * 6 (36)
34 row: 2 sc, dec, (4 sc, dec) * 5, 2 sc (30)
35 row: (3 sc, dec) * 6 (24)
36 row: 1 sc, dec, (2 sc, dec) * 5, 1 sc (18)
37 row: (1 sc, dec) * 6 (12)
38 row: 6 dec (6)
We tighten the hole, hide the thread inside the part.
We knit smudges.
To do this, turn the ice cream upside down and attach a white thread to the last free half loop of the 23rd row, tied behind the blo. We knit 6 sc, cast on 6 ch, insert the hook into the 2nd loop from the hook and return along the chain, knitting 5 sc, attach the chain with one sl-st to the same base loop from which sc was knitted. Similarly, we continue knitting smudges, i.e.
we knit out each smudge from the 6th column. Alternate the length of the smudges at your discretion. I knitted chains in this way – 5, 3, 4, 2 loops (+1 chain loop). Glue or sew on the smudges (I glue them).
We tie the ice cream with one sl-st row, insert the hook between the 23rd and 24th row.
We knit a nose.
1st row: 5 sc into magic ring
2nd row: 5 inc (10)
3rd row: (3 sc, dec) * 2 (8)
4th row: 1 sc, dec, 2 sc, dec, 1 sc (6)
Cut the thread, leaving a long end for sewing. Sew on the nose between the 26th and 28th rows of the head, fill it.
We embroider eyes. To do this, we first outline the eyes with pins as shown in the photo.
Points 1 and 4 are located between 29 and 30 rows, points 2-3 and 5-6 between 28 and 29 rows. Eyelet width 3 sc, height 1 sc, distance between eyes 5 sc. Now, using a single black thread, we embroider the outline of the eye, while catching the threads of the head (I am using ordinary sewing thread). Then, in order to secure the embroidered outline and make it more dense, we wrap it with the same black thread.
We embroider cilia. I do not wrap them around, since the stitch in this case is short. You can do as you like. Similarly, we embroider the second eye. We fix the thread, cut it off.
We knit a cap.
1st row: 6 sc into magic ring
2nd row: 6 inc (12)
3rd row: 12 sc
4th row: 6 dec (6)
Change the thread to contrasting
5 row: (1 sc, inc) * 3 (9)
6 row: 9 sc
7 row: 1 sc, inc, (2 sc, inc) * 2, 1 sc (12)
8 row: 12 sc
Cut the thread, leaving a long end for sewing. We sew the cap to the top of the snowman, so that the cap is slightly tilted to the side, we fill it.
We sew buttons to the glass. We attach the suspension cord to the crown. Using a needle, insert one end of the cord into the magic ring, draw it out at any arbitrary point, then insert the other end of the cord into the magic ring. and output at the same point as the first. We tie the ends of the cord with a strong knot and hide it inside the toy. Done!
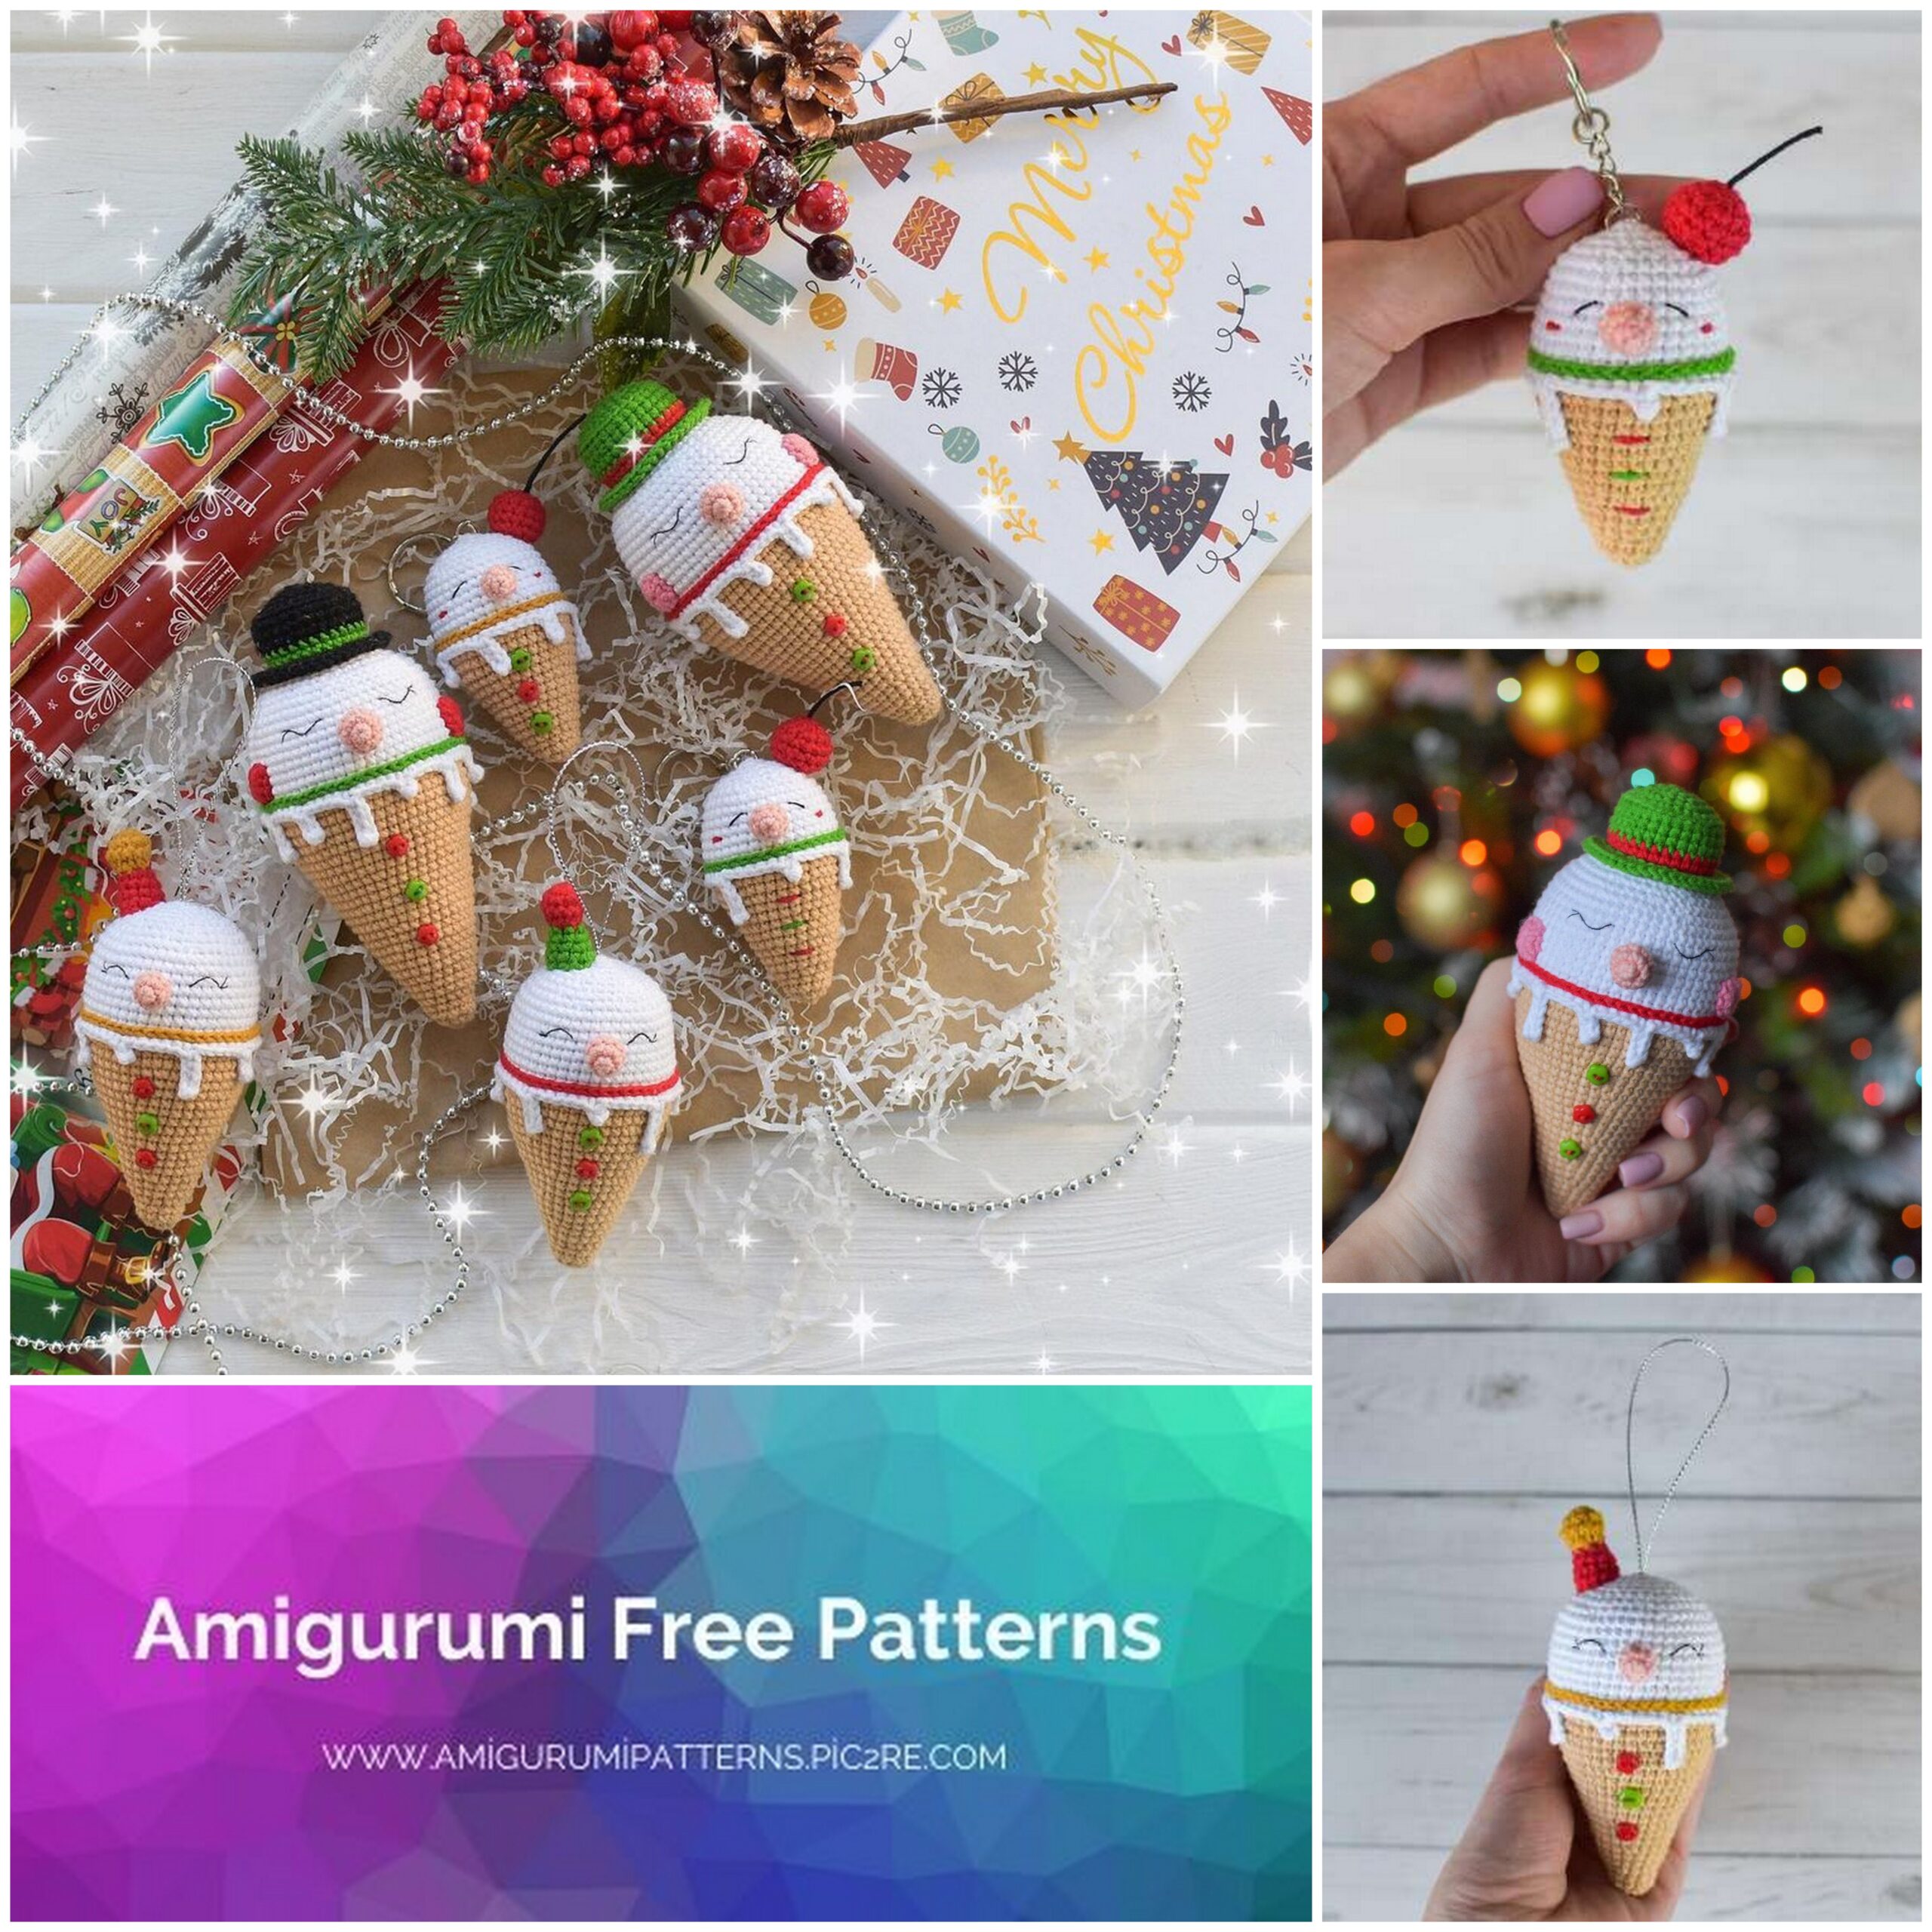
SMALL ICE CREAM (KEY FOB)
We knit the toy from the bottom up, i.e. moving from the cup to the ice cream. We start knitting with a sand-colored thread, fill the part tightly as we knit.
1st row: 6 sc into magic ring
2nd row: 6 inc (12)
3-4 row: 12 sc (2 rows)
5 row: (1 sc, inc) * 6 (18)
6-7 row: 18 sc (2 rows)
8 row: 1 sc, inc, (2 sc, inc) * 5, 1 sc (24)
9-10 row: 24 sc (2 rows)
11 row: (3 sc, inc) * 6 (30)
12-13 row: 30 sc (2 rows)
14th row: 2 sc, inc, (4 sc, inc) * 5, 2 sc (36)
15-16 row: 36 sc (2 rows)
Change the thread to white
17 row: 36 sc
Row 18: 36 sc for blo
19-25 row: 36 sc (6 rows)
26 row: 2 sc, dec, (4 sc, dec) * 5, 2 sc (30)
27 row: (3 sc, dec) * 6 (24)
28 row: 1 sc, dec, (2 sc, dec) * 5, 1 sc (18)
29 row: (1 sc, dec) * 6 (12)
30 row: 6 dec (6)
We tighten the hole, hide the thread inside the part.
We knit smudges.
To do this, turn the ice cream upside down and attach a white thread to the last free half loop of the 17th row, tied behind the blo.
Knit 6 sc, cast on 6 ch, insert the hook into the 2nd loop from the hook and return along the chain, knit 5 sc, attach the chain with one sl-st to the same base loop from which sc was knitted. Similarly, we continue knitting smudges, i.e.
we knit out each smudge from the 6th column. Alternate the length of the smudges at your discretion. I knitted chains in this way – 5, 3, 4, 2 loops (+1 chain loop). We glue or sew on the smudges (I glue them).
We tie the ice cream with one row of sl-st, insert the hook between 17 and 18 rows.
We knit a nose.
1st row: 4 sc into magic ring
2nd row: 4 inc (8)
3rd row: 8 sc
4th row: 1 sc, dec, 2 sc, dec, 1 sc (6)
Cut the thread, leaving a long end for sewing. Sew on the nose between 20 and 22 rows of the head, fill it.
Sew the eyes with a double thread of black (I am using regular sewing thread) between 21 and 23 rows of the head with one stitch. Eye height 1 sc, width 2 sc, distance between eyes 4 sc.
Sew the cheeks (I use split red thread Alize Cotton Gold, 2 threads out of 4) with 3 stitches. We place the cheeks between 20 and 21 row at a distance of 1 sc from the peephole.
We knit a cherry.
We prepare in advance a small piece of waxed cord (about 3-4 cm), at one end we tie a tight knot.
1st row: 6 sc into magic ring (before pulling off the hole, place the cord inside so that the knot is inside the cherry)
2nd row: 6 inc (12)
3rd row: (3 sc, inc) * 3 (15)
4-5 row: 15 sc (2 rows)
6 row: (3 sc, dec) * 3 (12)
7 row: 6 dec (6)
We fill the part, we tighten hole, hide the thread inside. We sew or glue the cherry to the top of the ice cream in such a way that it is slightly tilted to the side (I glue it).
Sew on buttons or embroider stitches on a cup with contrasting threads, as shown in the photo. We attach the pendant for the keychain. Done!
So that is all! Our set of ice cream is ready!
Thank you for tying them together with me!
I wish you continued creative success! Until next time!