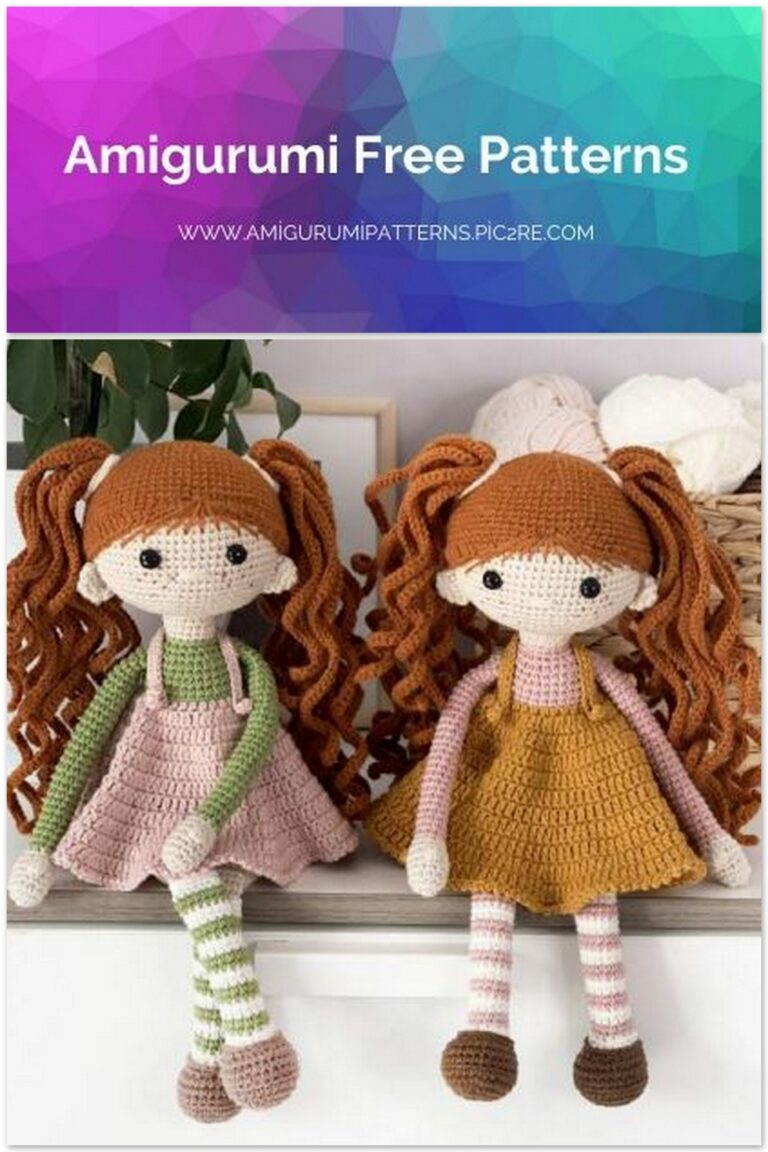
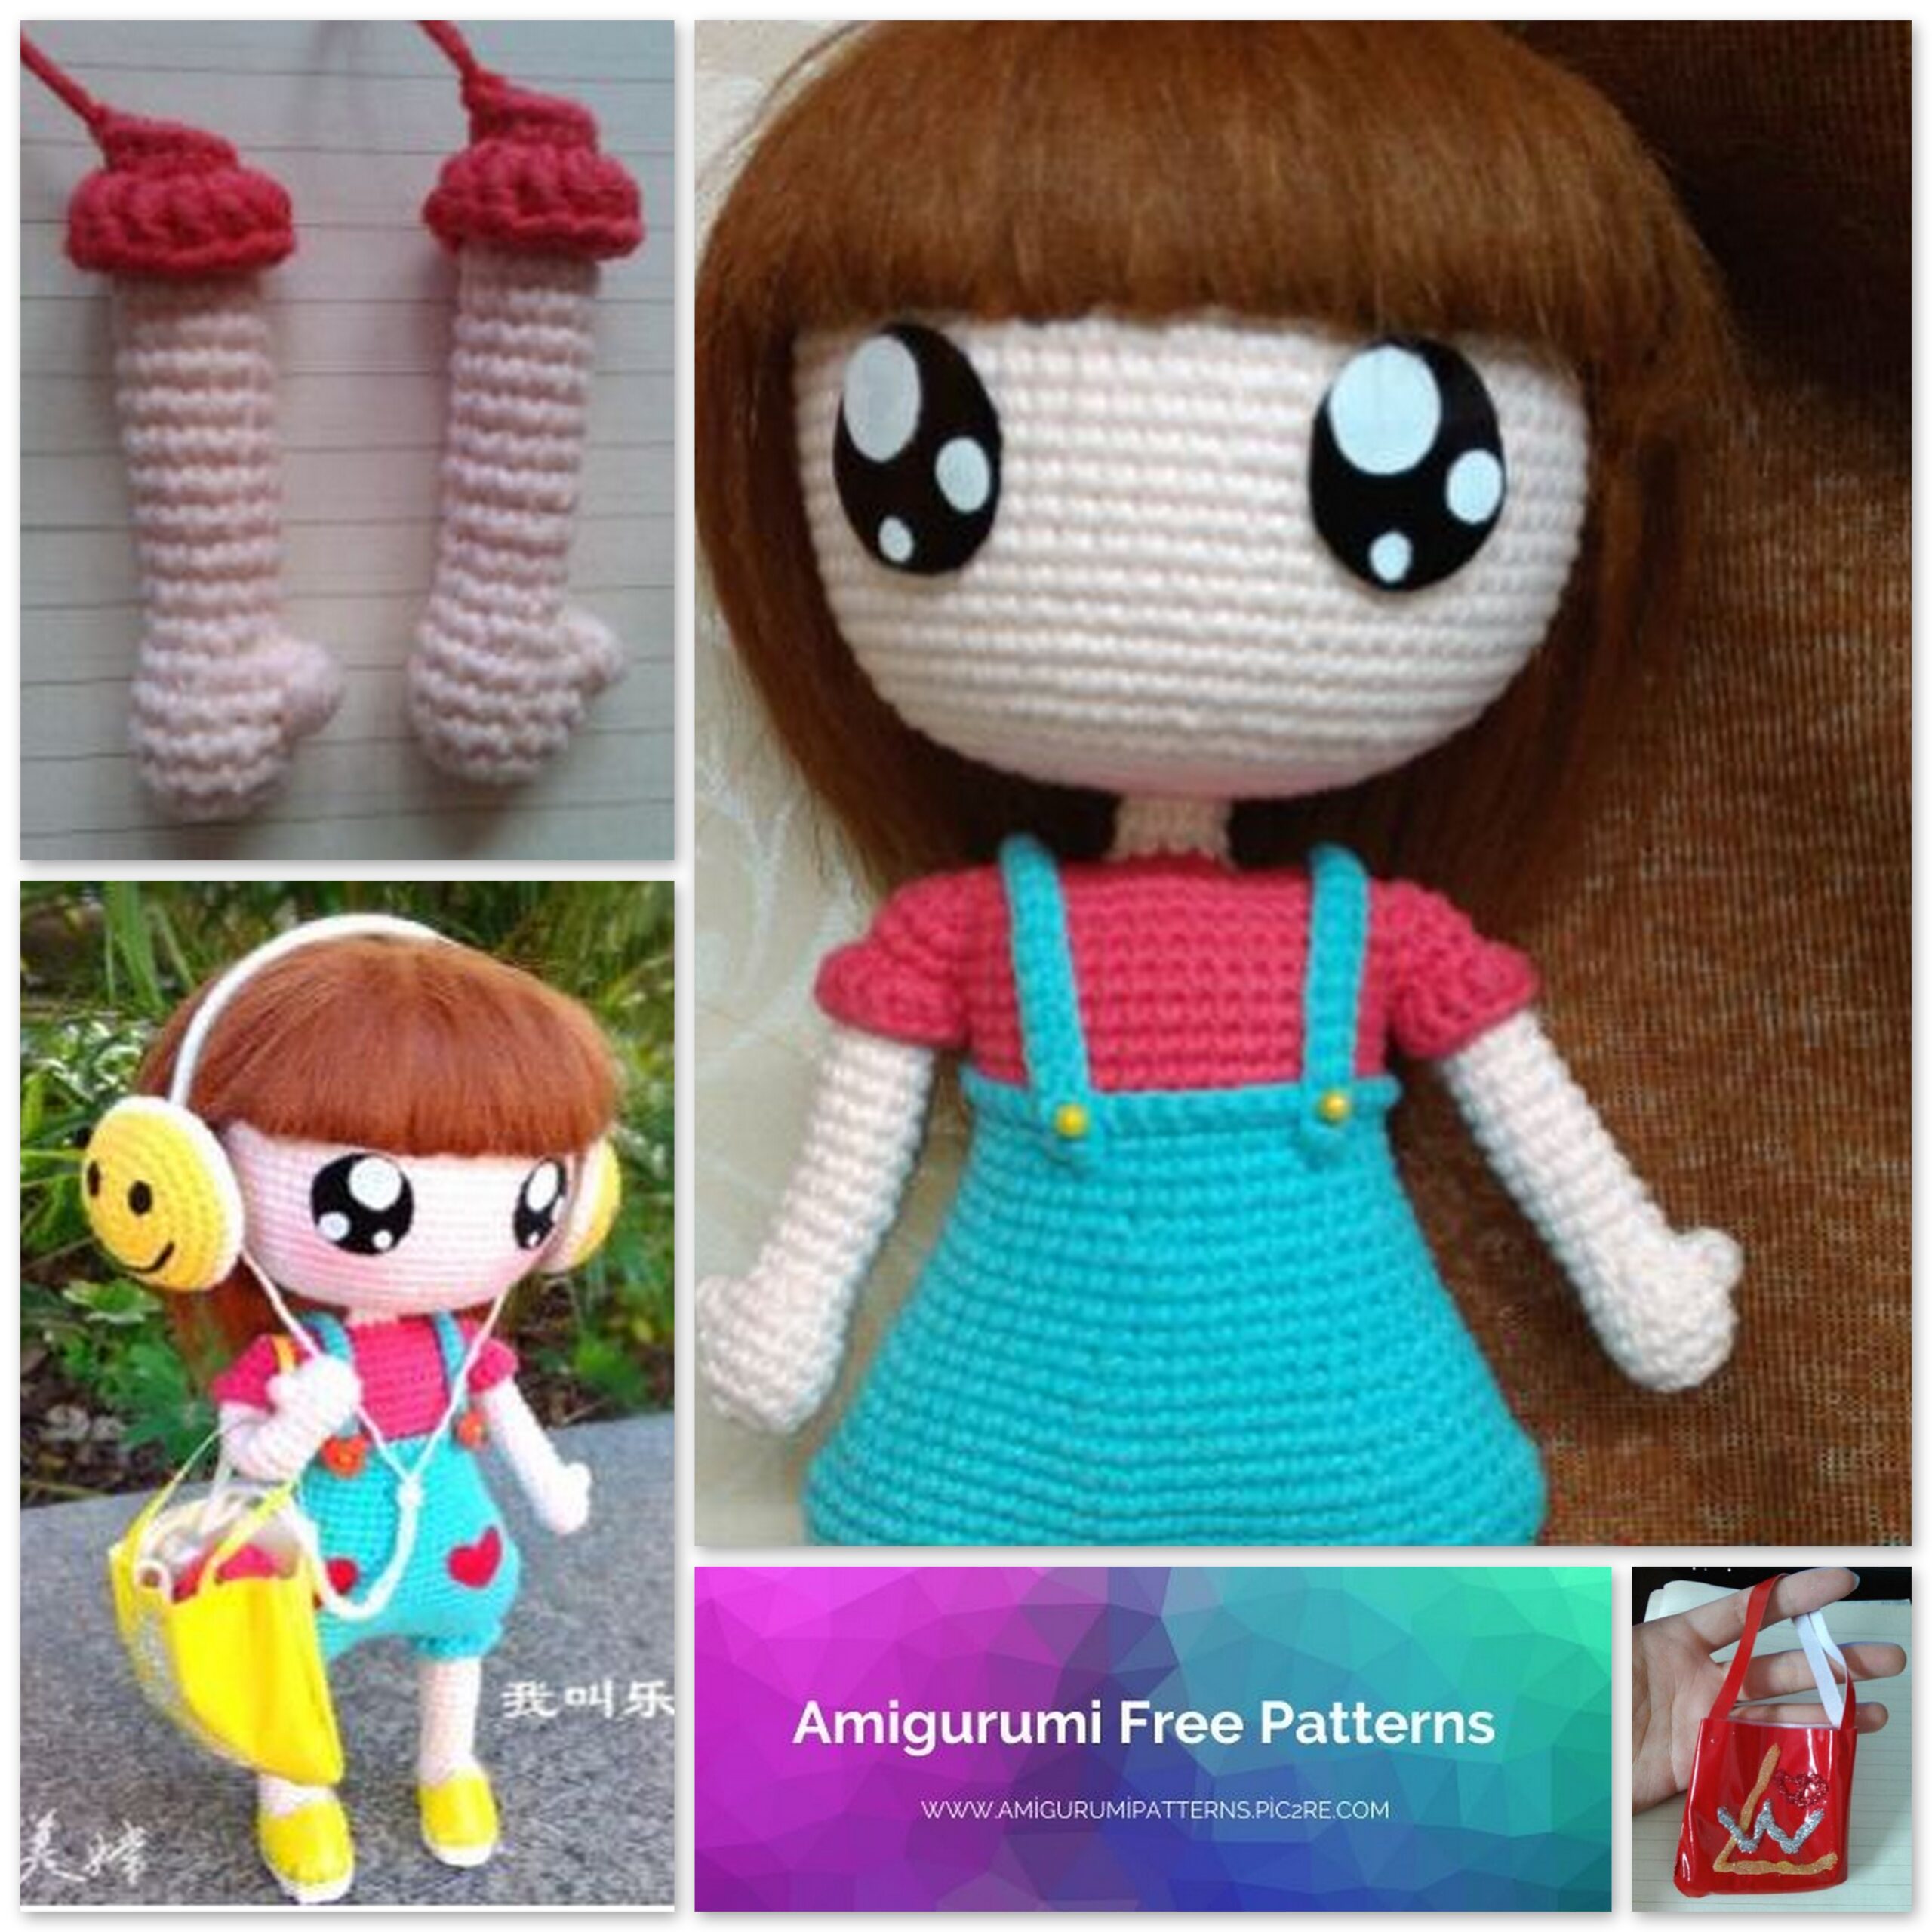
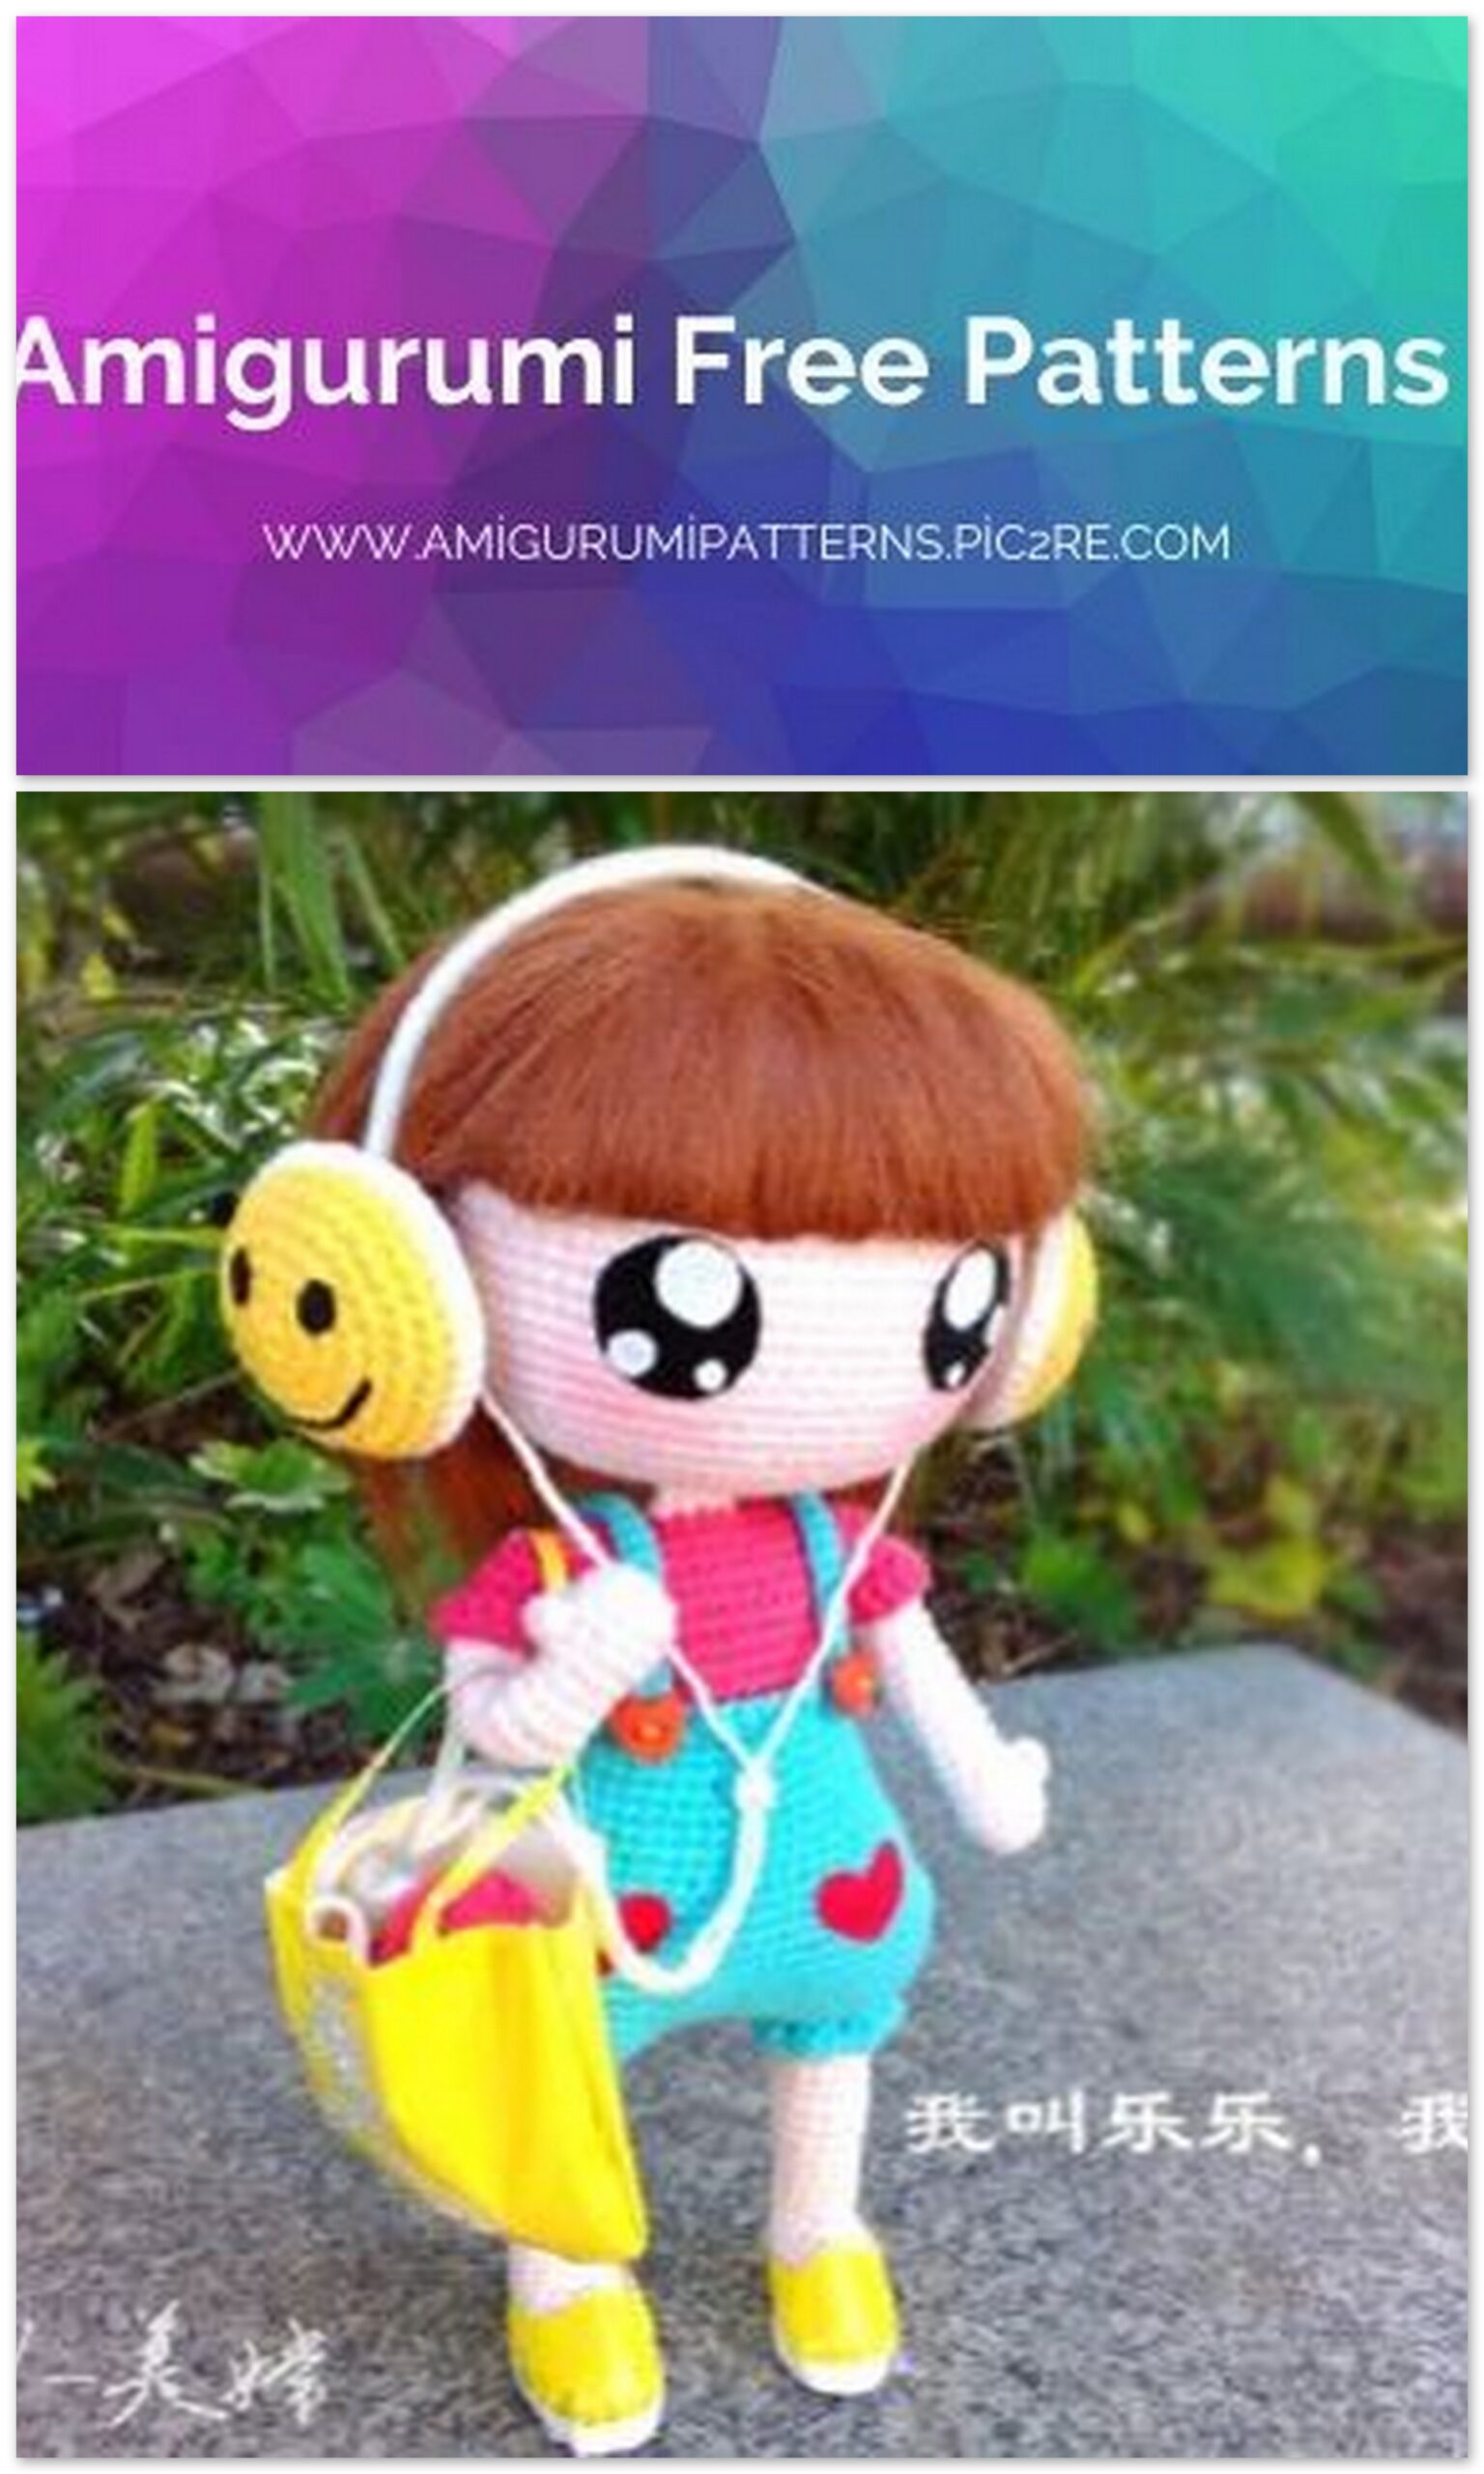
Amigurumi Doll Lele Free Pattern
Pinterest Offical Page : amigurumipatterns.pic2re.com
Facebook Group: amigurumipatterns.pic2re.com
Facebook Offical Page: amigurumipatterns.pic2re.com
We continue to share the most beautiful amigurumi patterns. You can visit our website for Amigurumi Doll lele free pattern.
Crochet symbol description:
SC=short stitch
HDC=medium long stitch
DC=long stitch
İNC=add stitch
DEC=minus stitch
W=3 stitches and one stitch
T=3DC
hand
Circle Remarks Needles
1:circle 6SC (6) skin tone
2:2İNC (12)
3: No increase or decrease (12)
4:11SC, jujube needle (5DC jujube needle) (12)
5:(2SC, DEC)*3 (9)
6: (8SC, İNC) (10)
7-17:No increase or decrease (10)
18:Change the watermelon red line, without adding or subtracting 10 Watermelon red
19: Half stitch inside the hook, no increase or decrease 10
Hook in the outer half of the 19th circle: stand 3 stand up needles, (DC, İNC) 5
body
Circle Remarks Needles
1: 9 braid stitch, 1 standing stitch, barb inc, 7SC, 2inc, 7SC, inc 22 skin tone
2:inc, inc ,8SC, inc ,inc, 10SC 2(6)
3: Half stitch inside the hook, no increase or decrease (26)
4: 12SC ,3DEC ,8SC (23)
You can stick a piece of hard paper on the soles of your feet to make the soles of your feet flat
5: 7SC, DEC, SC ,DEC, SC ,DEC, 8SC (20)
6: 6SC, (DEC, SC )3, 5SC (17)
7: 5SC, DEC, W, DEC, 5SC (13)
8: 5SC, DEC, 6SC (12)
9-12: No increase or decrease (12)
13: 6SC, inc, 5SC (13)
14: No increase or decrease (13)
15: 6SC, inc, 6SC (14)
16-19: No increase or decrease (14)
20-21: Change the blue line, do not add or subtract 14 blue
22: Half stitch inside the hook, no increase or decrease (14)
23: 2İNC 28
Hook on the outer half stitch of 22 turns (HDC, SC) 7 Doll’s legs are hooked to yourself
24: leg 2 hooks, 10 braid stitches to connect the legs, and short stitches at the connection
28 stitches on both legs + combined two-leg braid stitch on hook 10 stitches = 66 (66)
25: No increase or decrease (66)
26: Add three stitches on each side (each person’s connecting leg starts at a different position, so in Add three stitches on each side of the symmetry) (72)
27-29: No increase or decrease (72)
30: Subtract three stitches on each side of the symmetry (66)
31: No increase or decrease (66)
32: (9SC, DEC)* 6 (60)
33: No increase or decrease (60)
34: (8SC, DEC)*6 (54)
35: No increase or decrease (54)
36: (7SC, DEC)* 6 (48)
37-40: No increase or decrease (48)
41: (6SC, DEC)*6 (42)
42-44: No increase or decrease (the blue line is continuous) (42)
45: Change watermelon red thread, half stitch inside the hook 42 Watermelon red
46-48: No increase or decrease (42)
49: Combine the hand and the body, take two stitches on the hand and hook the body together (adjust yourself Position) (42)
50: 38 stitches on the body + (8 stitches left on the hand) 2 = 54 (54)
51: No increase or decrease (54)
52: Symmetrical shoulders on each side: 5DEC (44)
53: Symmetrical shoulders on each side: 4DEC (36)
54:The shoulders are symmetrical on each side: DEC, W, DEC (leave a long thread to sew the shoulders) (28)
When the shoulder needle is reduced, the number of needles before and after counting should be the same, so as not to bring the arm forward or Who is behind. Now you can join the shaping line
On the outer half stitch of the 45th circle, the reserved blue thread hook: 1 standing stitch, drawing and pulling, 25 braid stitch Barb 24 Short needles (to form a strap) are pulled out every other stitch, and continue to hook the short needles on the outer half of the needle.
Hook to the back position on the other side, the shoulder strap hook method is the same.
head
Circle Remarks Needles
1:Hook 5 stitches on the front and back of the skin color line. This circle forms the neck, leaving 9 stitches on each side of the shoulder.
Use the reserved watermelon red thread to pick the outer half needle to sew, and you can put a few on the neck
Fixed with broken cotton swab 10
2-3: No increase or decrease (10)
4: (3SC, DEC)*2 (8)
5: 2İNC (16)
6: (SC, İNC)* 8 (24)
7:(SC, İNC)(2SC, İNC )*7 (32)
8:(3SC, İNC)*8 (40)
9: (2SC, İNC)(4SC, İNC)*7 (48)
10: (5SC, İNC)*8 (56)
11:(3SC, İNC)(6SC, İNC)*7 (64)
12: (7SC, İNC)*8 (72)
13-33: No increase or decrease (72)
34: (7SC, DEC)*8 (64)
35: (3SC, DEC)(6SC, DEC)*7 (56)
36: (5SC, DEC)*8 (48)
37: (2SC, DEC)(4SC, DEC)*7( 40)
38: (3SC, DEC)*8 (32)
39: (SC, DEC)(2SC, DEC )*7 (24)
40: (SC, DEC) *8 (16)
41: 2DEC (Leave the thread and pick the outer half needle to tighten the suture) 8
headset
Circle Remarks Needles
1: Yellow coil from 6SC 6 yellow
2: 2İNC (12)
3: (SC, İNC)*6 (18)
4: (SC, İNC)(2SC, İNC)*5 (24)
5: (3SC, İNC)* 6 (30)
6: (2SC, İNC)(4SC, İNC)*5 (36)
7: Do no increase or decrease (36)
1: White coil from 6SC (6 ) white
2: 2İNC (12)
3: (SC, İNC)*6 (18)
4 :(SC, İNC)(2SC, İNC)*5 (24)
5: (3SC, İNC)* 6 (30)
6 :(2SC, İNC)(4SC, İNC)*5 (36)
The two crocheted discs, facing back, crochet a short needle to merge
Leave a mouth plug cotton, adjust the shape, continue hooking to finish sealing
Prepare a sizing line and bend it into a suitable arc of the head
Wind the wire back and forth several times on the shaping line, and finally fix it with hot melt glue
Draw your favorite expression on the leather, cut it out, and paste it on the earphones, you can have different sides
For the same expression, use the milky white wire to make the headphone cable.
Then the thread can be tied with a thread ball or something, and put it in the bag when you bring it to the doll.
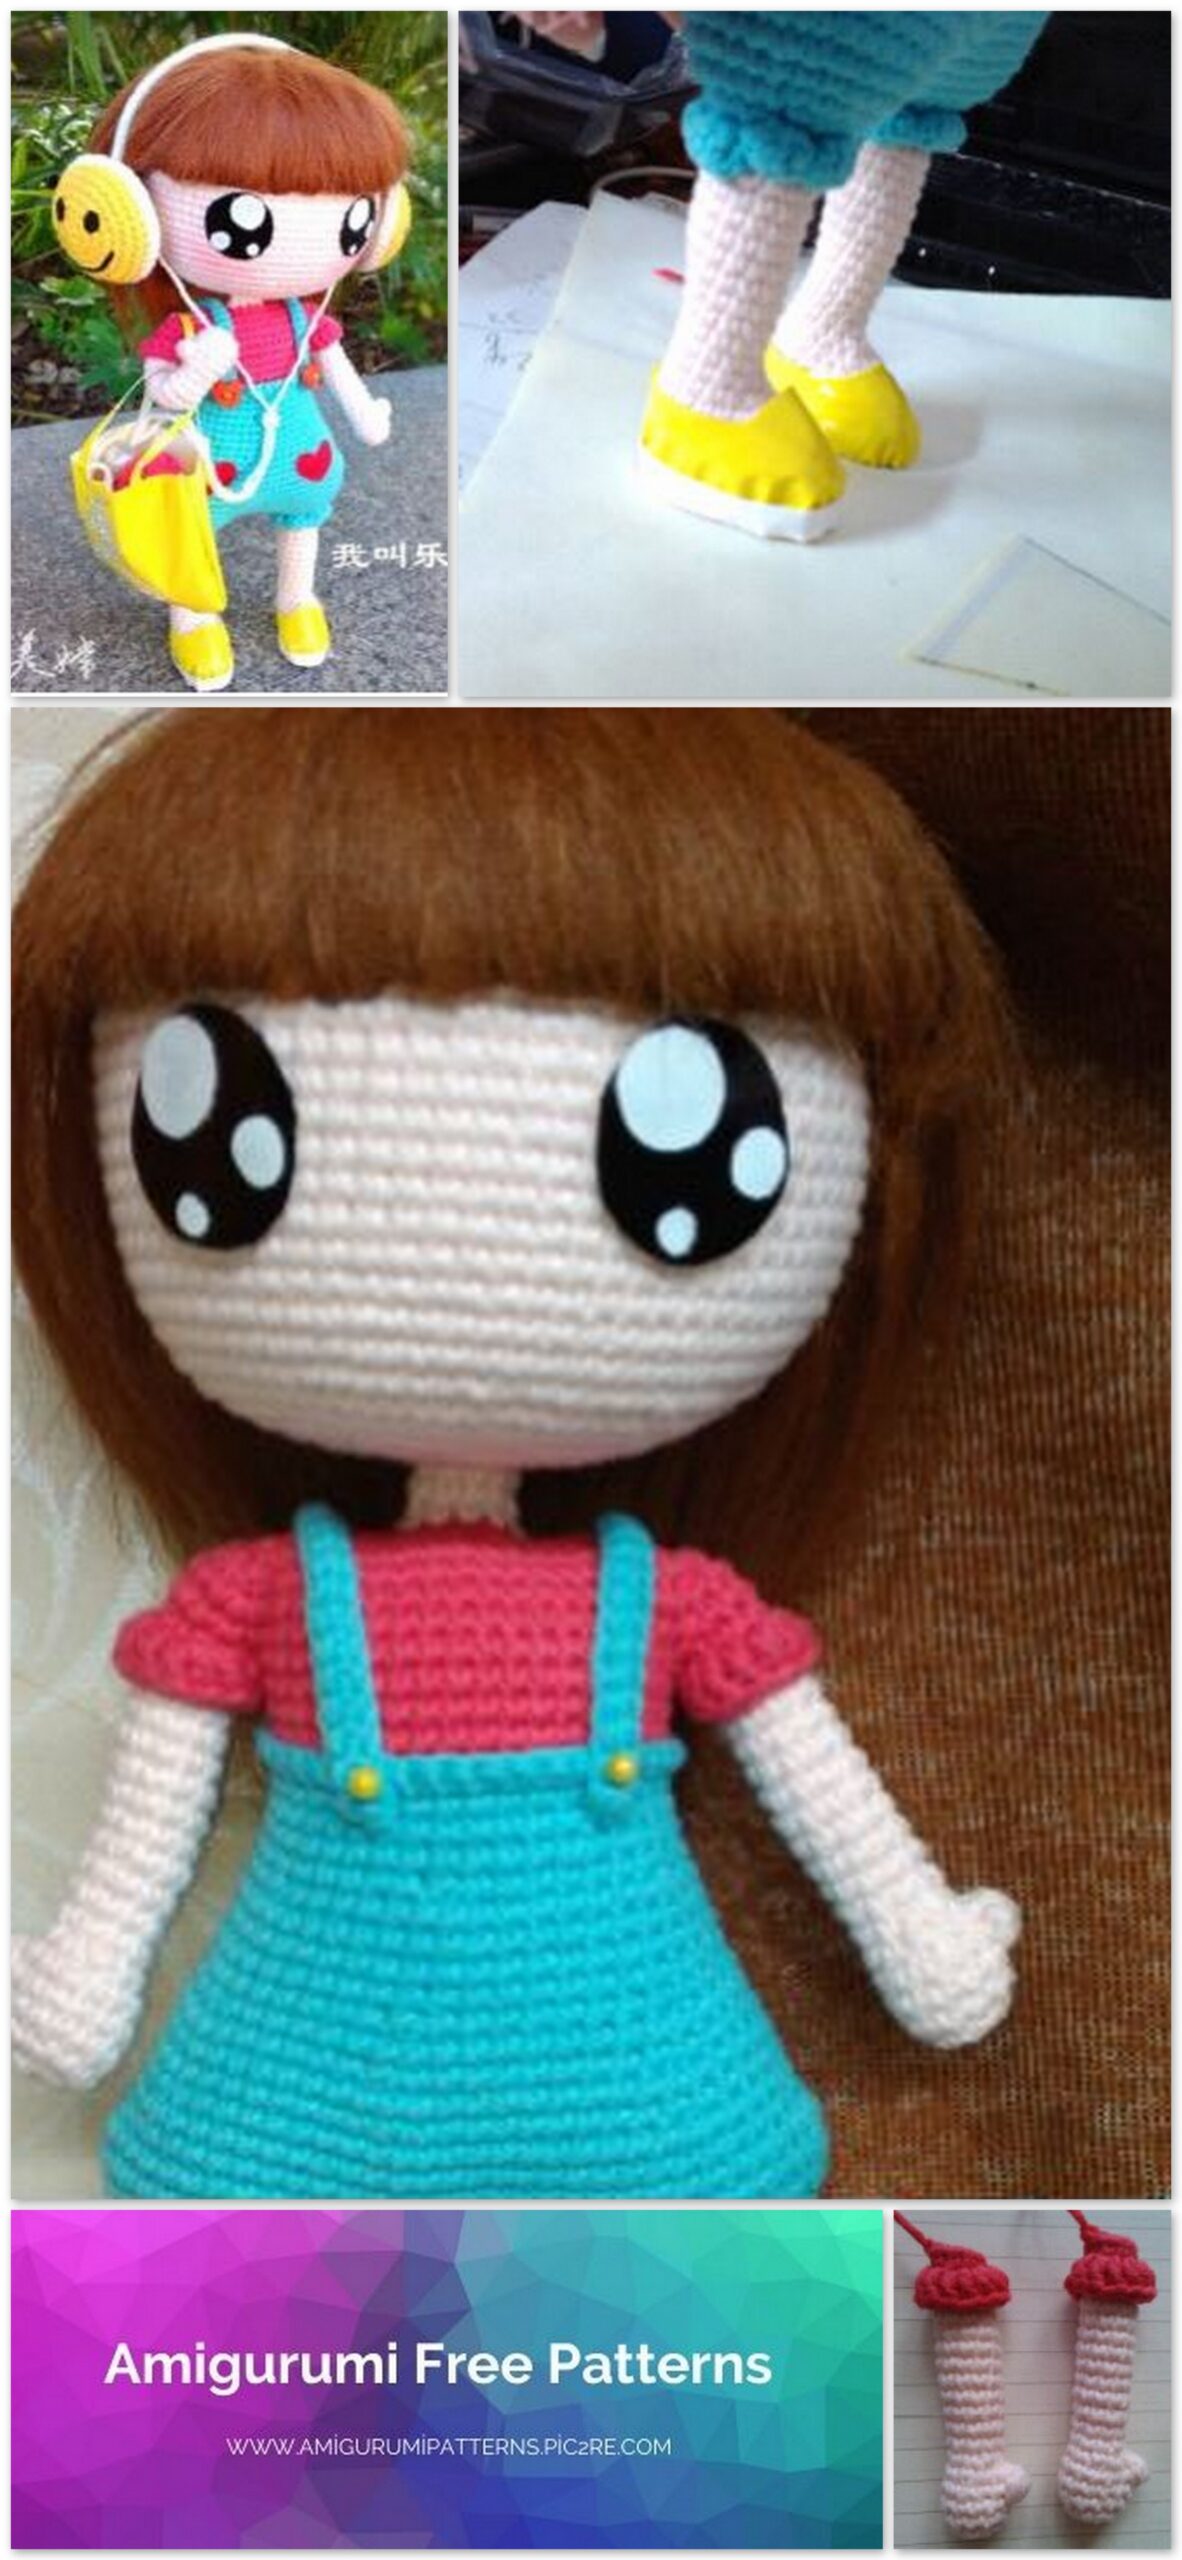

Shoes tutorial
1: (borrowing online tutorials) clear and easy to understand
2: White cloth wraps the instep and fixes the heel
3: Use a pen to draw the desired shoe shape and sole
4: Take off the cloth and spread it flat
5: This is the shoe shape I drew on the leather
6: Cut it out
7: Use a needle and thread to sew a few stitches tight on the toe, then use
The upper stands up, which is conducive to stitching the sole
8: Sew the soles and the uppers together, and sew them carefully
The effect is better. I am worried that the sewing will not fit well, so I
The doll’s feet are covered with seams
9: Two layers of non-woven fabrics are pasted on the soles, no shots,
Cut according to the size of the sole. Cut on white leather
On the next side, stick a circle around the edge of the shoe
10: The position of the toe cap, you can use your finger to top
Once, smooth the bottom folds and stick to the white leather
11: It may not be very delicate the first time,
Try a few more times, practice makes perfect
12: This is the simplest shoe type, you can also
Design other shoe types by yourself.
Eye tutorial
1: Prepare two black and white soft leather
2: Draw eyes on the paper, according to your preference
3: Cut out the eyes and use a red water-soluble pen
Draw it on the back of the leather,
4: This is the case after drawing, the red pen can still be used
You can see the shape. (I do a demonstration, do it
It’s rough, so be careful when you do it.
The line drawing is smooth)
5: Draw and cut off the whites of the eyes
6: Use alcohol glue to glue the whites of your eyes carefully
On black leather.
Place the eyes on the doll, and then carefully glue them with alcohol glue
Do this, the doll is almost finished, don’t forget to put on blush
Bag tutorial
1: Prepare to make the leather of the bag. I will use red as a demonstration here. Please be careful when you do it.
2: Fold in half, stitch the left and upper edges together
3: I used glue to bond, but it is easy to crack
4: Turn over after sewing
5: Cut out two shoulder straps
6: Glue it on the bag
7: Use the hot melt glue gun to draw the pattern you like
8: Sprinkle the prepared glitter quickly
9: After the hot melt adhesive dries, remove the excess glitter
10: The pattern is out, hehe
11: According to this method, make your own logo
12: Different colors of glitter can also be used
It’s done, hurry up and try it on Lele’s back