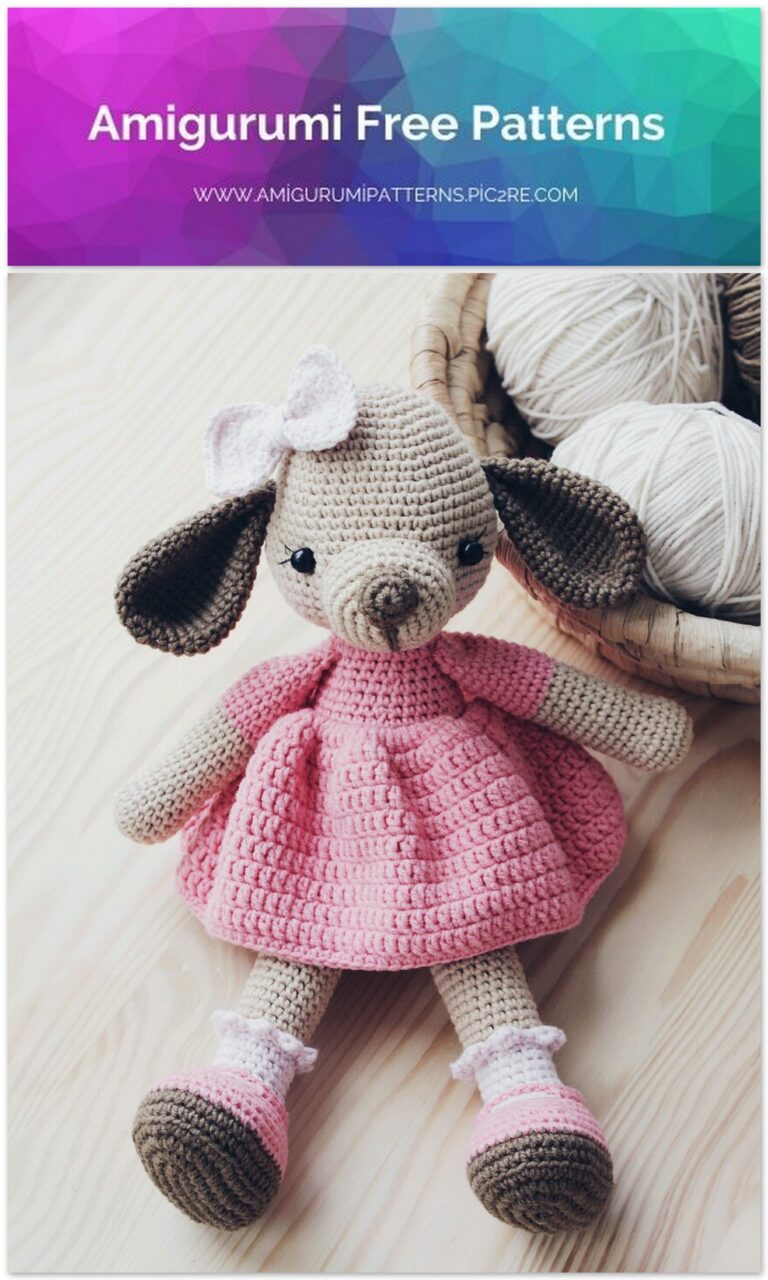
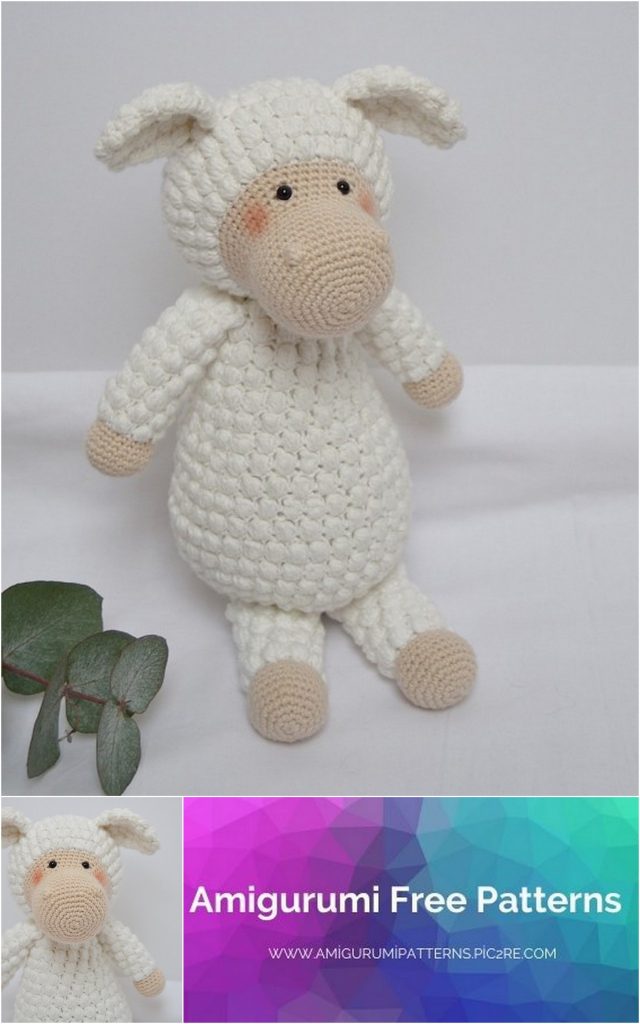
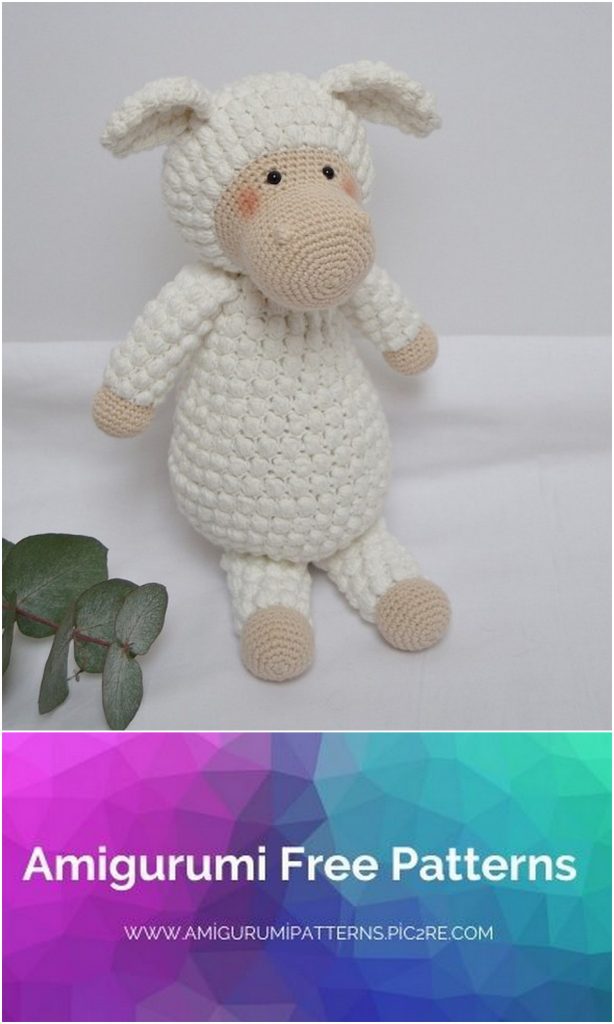
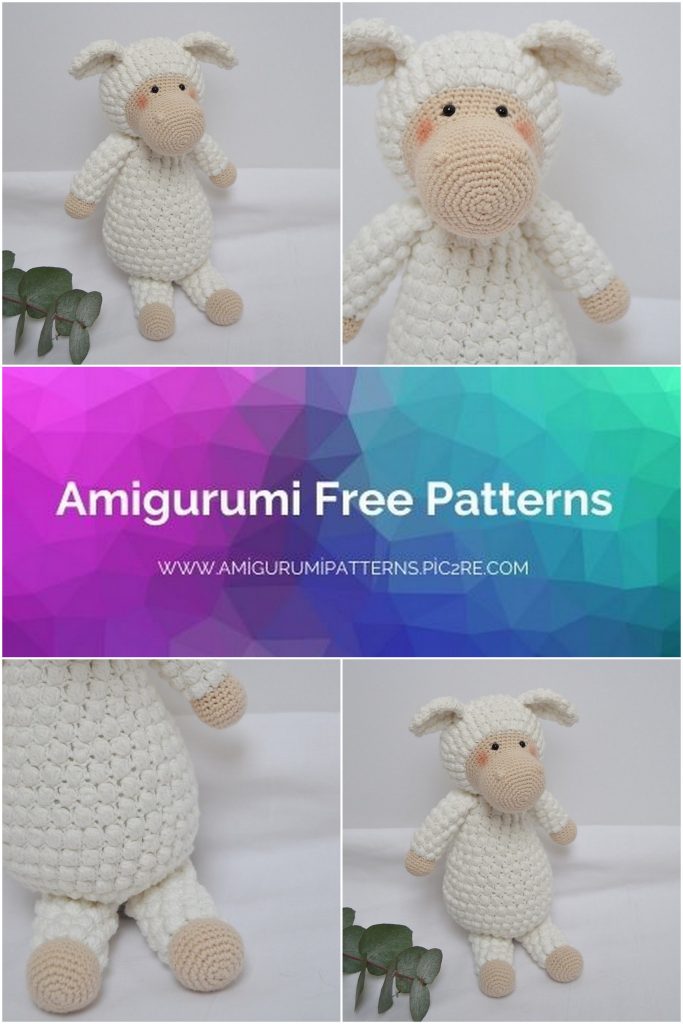
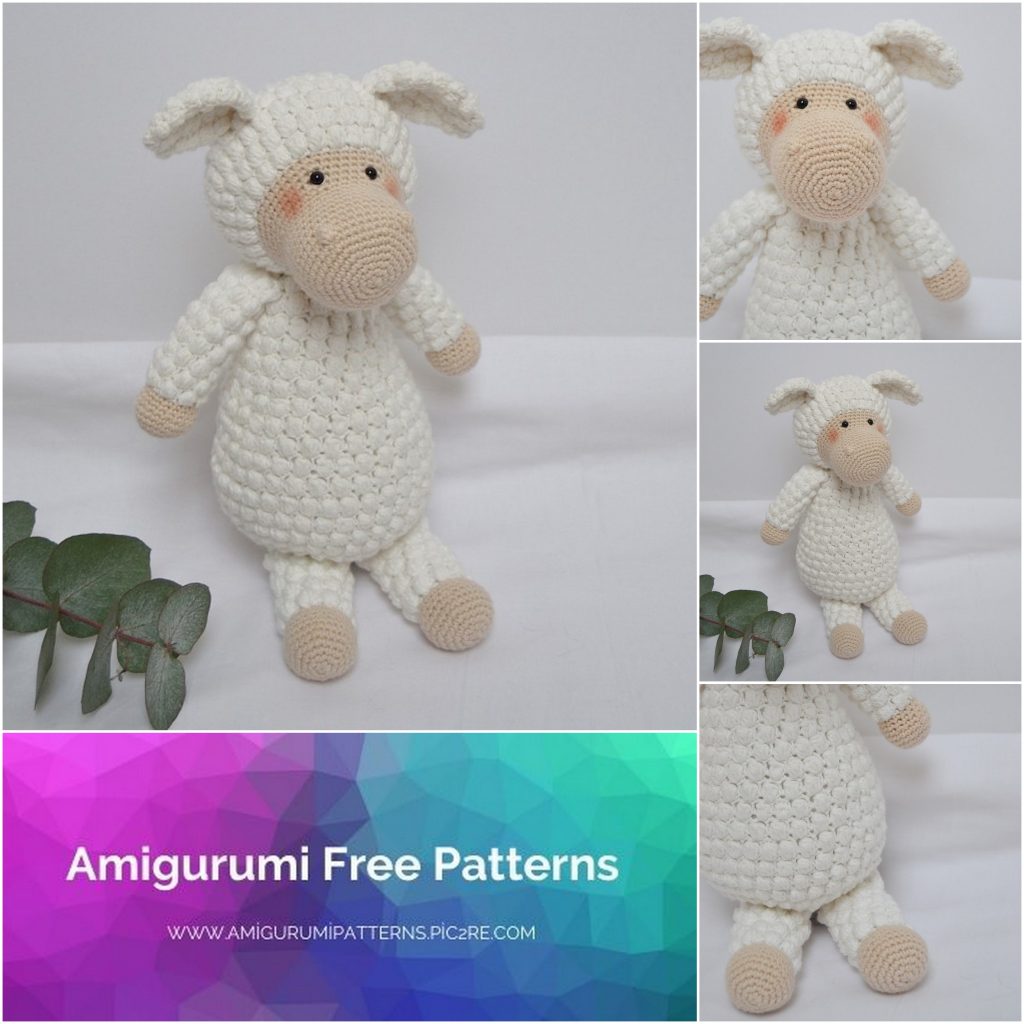
Amigurumi Frida the Sheep Free Pattern
Pinterest Offical Page : amigurumipatterns.pic2re.com
Facebook Group: amigurumipatterns.pic2re.com
Facebook Offical Page: amigurumipatterns.pic2re.com
CROCHET PATTERN
Frida the Sheep
MATERIALS
2 skeins of Rainbow Cotton 8/4, color 002
1 skein of Rainbow Cotton 8/4, color 003
Crochet hook size 2.5 mm
Safety eyes 6 mm
Fiberfill
Pins
Needle for assembling
YARN QUALITY
Rainbow Cotton 8/4, Hobbii
100% cotton / 50 g = 170 meters

ABBREVIATIONS
ch – chain
sl st(s) – slip stitch(es)
sc – single crochet
Bs – bubble stitch (4 unfinished dc in the same stitch, yarn over and pull through all the loops on the hook)
Smallbs – small bubble stitch (3 unfinished
dc in the same stitch, yarn over and pull
through all the loops on the hook)
inc – increase: 2 sc in the same st
dec – decrease: 2 sc together
(xx) – the number of stitches after ended round
* * – repeat instructions within the asterisks the number of times stated after the last asterisk
[ ] – repeat instructions within the brackets
the number of times stated after the last
bracket
Size
Onesize
MEASUREMENTS
Height: approx. 22 cm
PATTERN INFORMATION
All pieces are worked in the round.
EXPLANATIONS
Color changes: insert the hook through the next stitch and pull the previous color along back through the stitch. You have now two loops on the hook, just like when you make a regular sc. Finish the sc by pulling the new color through the two loops on the hook. Tighten the loose ends and weave them in thoroughly.
HEAD
Color: 003
Rnd 1: Start with a magic ring. 6 sc in the magic ring (6)
Rnd 2: inc x6 (12)
Rnd 3: *1 sc, inc* x6 (18)
Rnd 4: *2 sc, inc* x6 (24)
Rnd 5: *3 sc, inc* x6 (30)
Rnd 6: *4 sc, inc* x6 (36)
Rnd 7: *5 sc, inc* x6 (42)
Rnd 8: 1 sc in each st (42)
Rnd 9: 10 sc, 1 bs, 9 sc, 1 bs, 21 sc (42)
Rnds 10-14: 1 sc in each st (42)
Rnd 15: *5 sc, dec* x6 (36)
Rnd 16: 1 sc in each st (36)
Rnd 17: *5 sc, inc* x6 (42)
Rnds 18-19: 1 sc in each st (42)
Rnd 20: *6 sc, inc* x6 (48)
Rnd 21: 1 sc in each st (48)
Switch to color 002
Rnd 22: *7 sc, inc* x6 (54)
Now we are going to make the bubble stitches. On the rounds where you work bs and sc alternating, be careful to ‘pop’ the bubble out to the right side of the work before tightening the single crochet, otherwise the stitches will create a bubble on the wrong side. Note that the order of the single crochet and the bubble stitches alternates on the next part of the work. On the rounds that end with a bs: this bs will become round when you begin making the sc on the next rnd.
Rnd 23: *1 bs, 1 sc* (54)
Rnd 24: *8 sc, inc* x6 (60)
Rnd 25: *1 sc, 1 bs* (60)
Rnd 26: *9 sc, inc* x6 (66)
Now, attach the eyes between rnds 18 and 19 with 9 stitches in between.
Rnd 27: *1 bs, 1 sc* (66)
Rnd 28: 1 sc in each st (66)
Rnd 29: *1 sc, 1 bs* (66)
Rnd 30: 1 sc in each st (66)
Rnd 31: [*1 bs, 1 sc* x4, 1 bs, dec] x6 (60)
Rnd 32: *8 sc, dec* x6 (54)
Rnd 33: [*1 bs, 1 sc* x3, 1 bs, dec] x6 (48)
Rnd 34: *6 sc, dec* x6 (42)
Rnd 35: [*1 bs, 1 sc* x2, 1 bs, dec] x6 (36)
Rnd 36: *4 sc, dec* x6 (30)
Rnd 37: *1 bs, 1 sc, 1 bs, dec* x6 (24)
Rnd 38: * 2 sc, dec* x6 (18)
Now, stuff the head
Rnd 39: *1 bs, dec* x6 (12)
Rnd 40: dec x6 (6)
Sew together the last 6 sts. Sew through one of the loops of each of the last 6 sts.
Pull the thread to close the hole and weave in ends.
BODY
Color: 002
Rnd 1: Start with a magic ring. 6 sc in the magic ring (6)
Rnd 2: inc x6 (12)
Rnd 3: *1 sc, inc* x6 (18)
Rnd 4: *2 sc, inc* x6 (24)
Rnd 5: *3 sc, inc* x6 (30)
Rnd 6: *4 sc, inc* x6 (36)
Rnd 7: [*1 bs, 1 sc* x2, 1 bs, inc] x6 (42)
Rnd 8: *6 sc, inc* x6 (48)
Rnd 9: [*1 bs, 1 sc* x3, 1 bs, inc] x6 (54)
Rnd 10: *8 sc, inc* x6 (60)
Rnd 11: [*1 bs, 1 sc* x4, 1 bs, inc] x6 (66)
Rnd 12: 1 sc in each st (66)
Rnd 13: *1 bs, 1 sc* (66)
Rnd 14: 1 sc in each st (66)
Rnd 15: *1bs, 1 sc* (66)
Rnd 16: 1 sc in each st (66)
Rnd 17: *1 bs, 1 sc* (66)
Rnd 18: 1 sc in each st (66)
Rnd 19: *1 bs, 1 sc* (66)
Rnd 20: *9 sc, dec* x6 (60)
Rnd 21: *1 bs, 1 sc* (60)
Rnd 22: 1 sc in each st (60)
Rnd 23: *1 bs, 1 sc* (60)
Rnd 24: *8 sc, dec* x6 (54)
Rnd 25: *1 bs, 1 sc* (54)
Rnd 26: 1 sc in each st (54)
Rnd 27: *1 bs, 1 sc* (54)
Rnd 28: *7 sc, dec* x6 (48)
Rnd 29: *1 bs, 1 sc* (48)
Rnd 30: *6 sc, dec* x6 (42)
Rnd 31: *1 bs, 1 sc* (42)
Rnd 32: 1 sc in each st (42)
Rnd 33: *1 bs, 1 sc* (42)
Rnd 34: *5 sc, dec* x6 (36)
Rnd 35: *1 bs, 1 sc* (36)
Rnd 36: 1 sc in each st (36)
Rnd 37: *1 bs, 1 sc* (36)
Rnd 38: *4 sc, dec* x6 (30)
Rnd 39: *1 bs, 1 sc *(30)
Rnd 40: 1 sc in each st (30)
Rnd 4 1: *1 bs, 1 sc, 1 bs, dec* x6 (24)
Rnd 42: 1 sc in each st (24)
Stuff the body well.
Cut off the yarn but be careful to leave a long tail for assembling.
ARM
Color: 003, make 2
Rnd 1: Start with a magic ring. 6 sc in the magic ring (6)
Rnd 2: inc x6 (12)
Rnd 3: *1 sc, inc* x6 (18)
Rnd 4: *2 sc, inc* x6 (24)
Rnds 5-6: 1 sc in each st (24)
Rnd 7: *2 sc, dec* x6 (18)
Rnd 8: 1 sc in each st (18)
Rnd 9: *7 sc, dec* x2 (16)
Switch to color 002
Rnd 10: 1 sc in each st (16)
Now, repeat alternating the next two rounds 7 times in total:
*1 bs, 1 sc* (16)
1 sc in each st (16)
Rnd 25: *1 bs, 1 sc* (16)
Stuff the hand well and a little less in the actual arm. And finally, crochet the opening closed with sl sts. Cut off the yarn but be careful to leave a long tail for assembling.
LEG
Color: 003, make 2
Rnd 1: Start with a magic ring. 6 sc in the magic ring (6)
Rnd 2: 2 sc in each st (12)
Rnd 3: *1 sc, inc* x6 (18)
Rnd 4: *2 sc, inc* x6 (24)
Rnd 5: *3 sc, inc* x6 (30)
Rnds 6-7: 1 sc in each st (30)
Rnd 8: *3 sc, dec* x6 (24)
Rnd 9: 1 sc in each st (24)
Rnd 10: *2 sc, dec* x6 (18)
Switch to color 002
Rnd 11: 1 sc in each st (18)
Now, repeat alternating the next two rounds 5 times in total:
*1 bs, 1 sc* (18)
1 sc in each st (18)
Rnd 22: *1 bs, 1 sc* (18)
Stuff the foot well and a little less in the actual leg. And finally, crochet the opening closed with sl sts. Cut off the yarn but be careful to leave a long tail for assembling.
EAR
Color: 002, make 2
For the ears you will be making smaller bubble stitches. You will do this by working only 3
unfinished dc in one stitch. I call these bubble stitches ‘smallbs’.
Rnd 1: Start with a magic ring. 6 sc in the magic ring (6)
Rnd 2: 1 sc in each st (6)
Rnd 3: inc x6 (12)
Rnd 4: *1 smallbs, 1 sc* (12)
Rnd 5: *1 sc, inc* x6 (18)
Rnd 6: *1 smallbs, 1 sc* (18)
Rnd 7: 1 sc in each st (18)
Rnd 8: *1 smallbs, 1 sc* (18)
Rnd 9: *2 sc, inc* x6 (24)
Rnd 10: *1 smallbs, 1 sc* (24)
Rnd 11: 1 sc in each st (24)
Rnd 12: *1 smallbs, 1 sc* (24)
Rnd 13: *2 sc, dec* x6 (18)
Rnd 14: *1 smallbs, 1 sc* (18)
Rnd 15: *1 sc, dec* x6 (12)
Rnd 16: *1 smallbs, 1 sc* (12)
Fold the ear flat and sl st together. Cut off the yarn but be careful to leave a long tail for assembling.
ASSEMBLING
Head
The head must point downwards a little. It can be helpful to pin the head to the body first.
Sew through the stitches of the body and then through the head. And finally, stuff some extra fiberfill into the neck before closing it completely to avoid a wobbly head. Weave in ends thoroughly.
Ears
Attach the ears after 3 rounds of bubbles – seen from the front side – with 6 bubbles in between the ears. Weave in ends thoroughly.
Legs
Place the legs under the tummy. They should point outward a bit. Sew the legs on about 3 rows from the beginning of the body. Weave in ends thoroughly.
Arms
Sew the arms on approx. 1 round from top of the neck. Weave in ends thoroughly.
Rouge
To give Frida the Sheep pink cheeks, I have added a bit of regular makeup rouge.