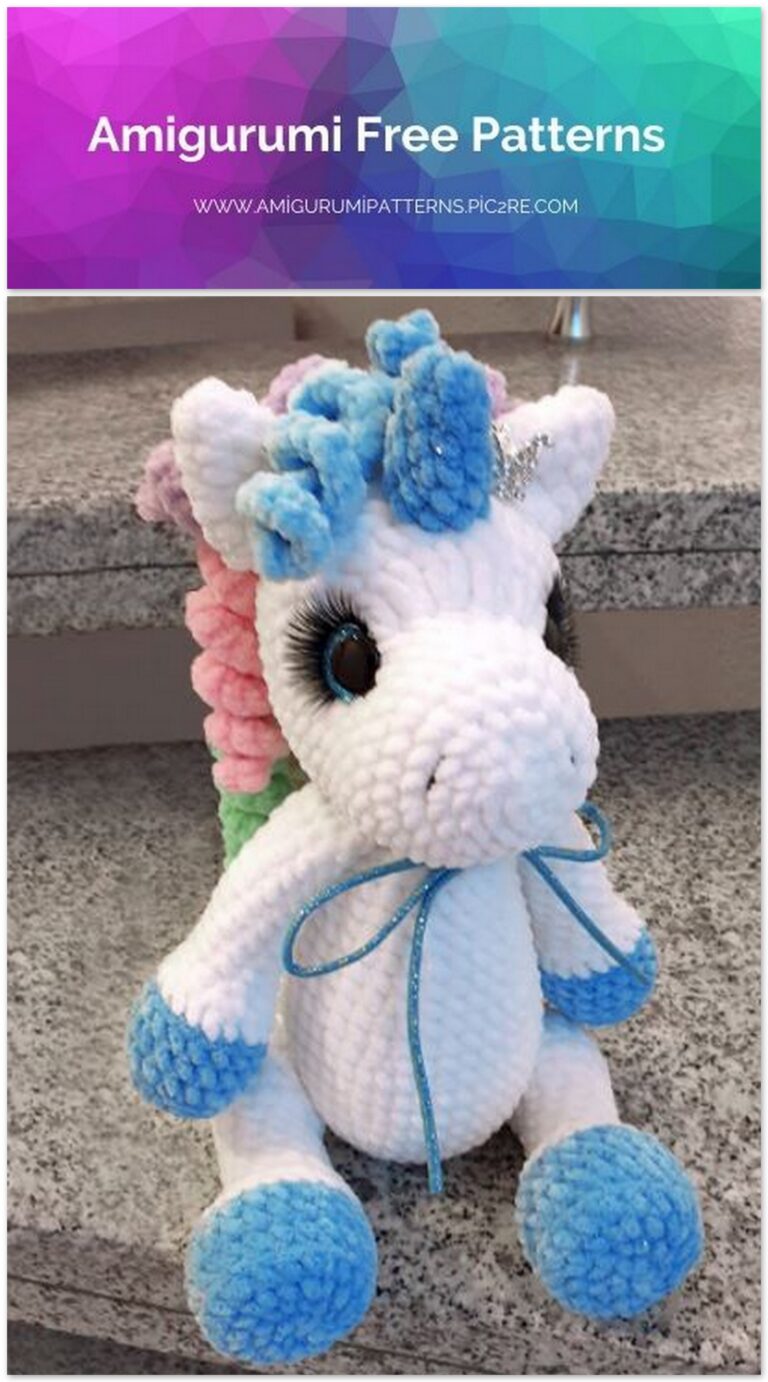
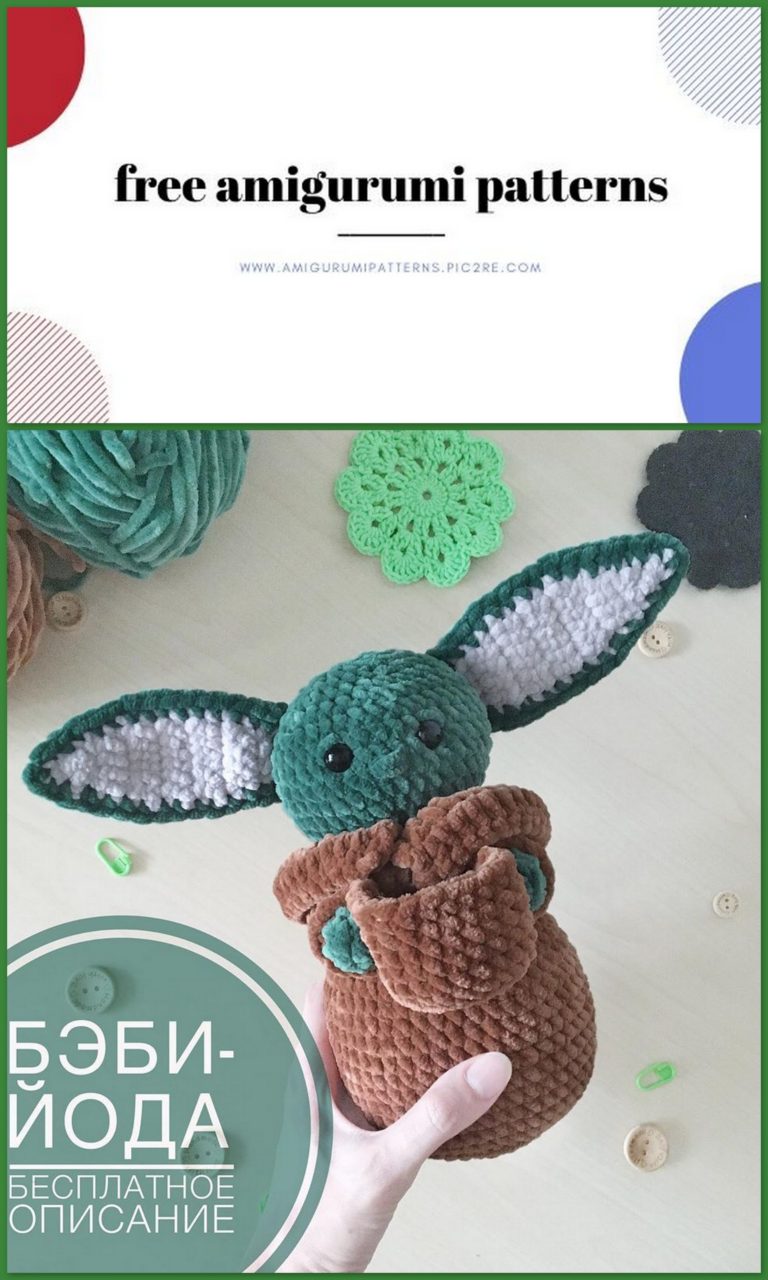
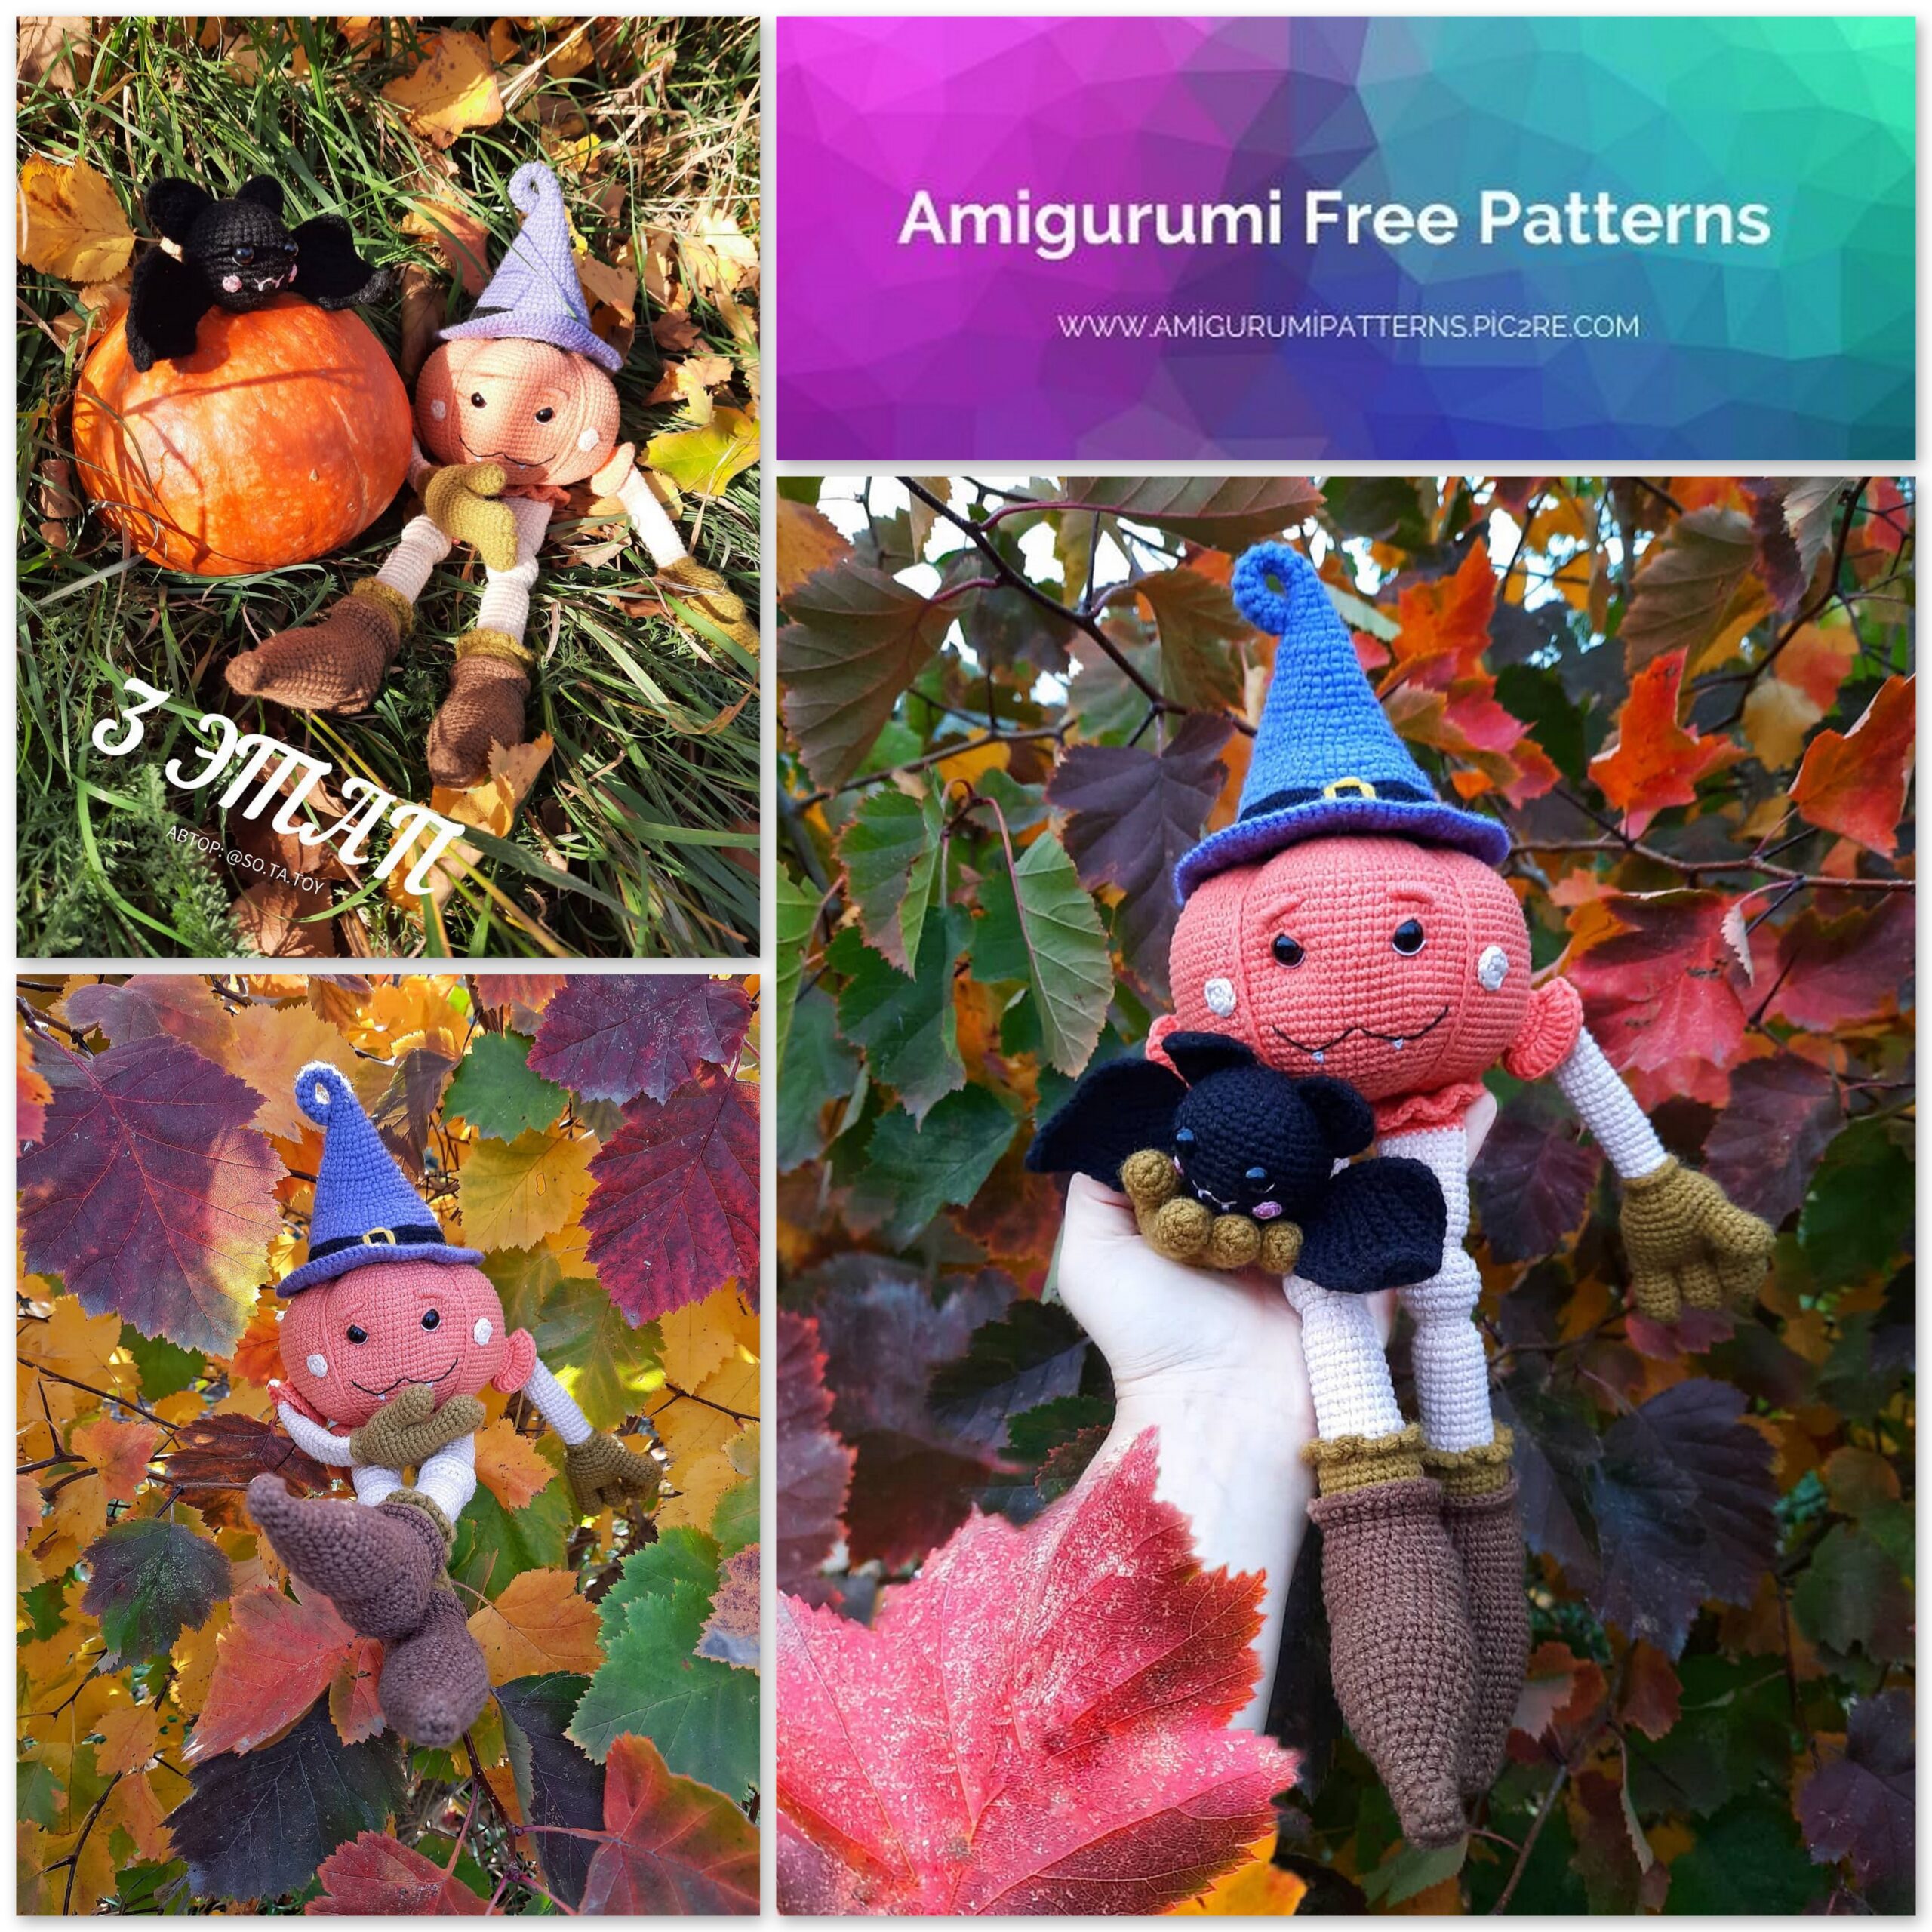
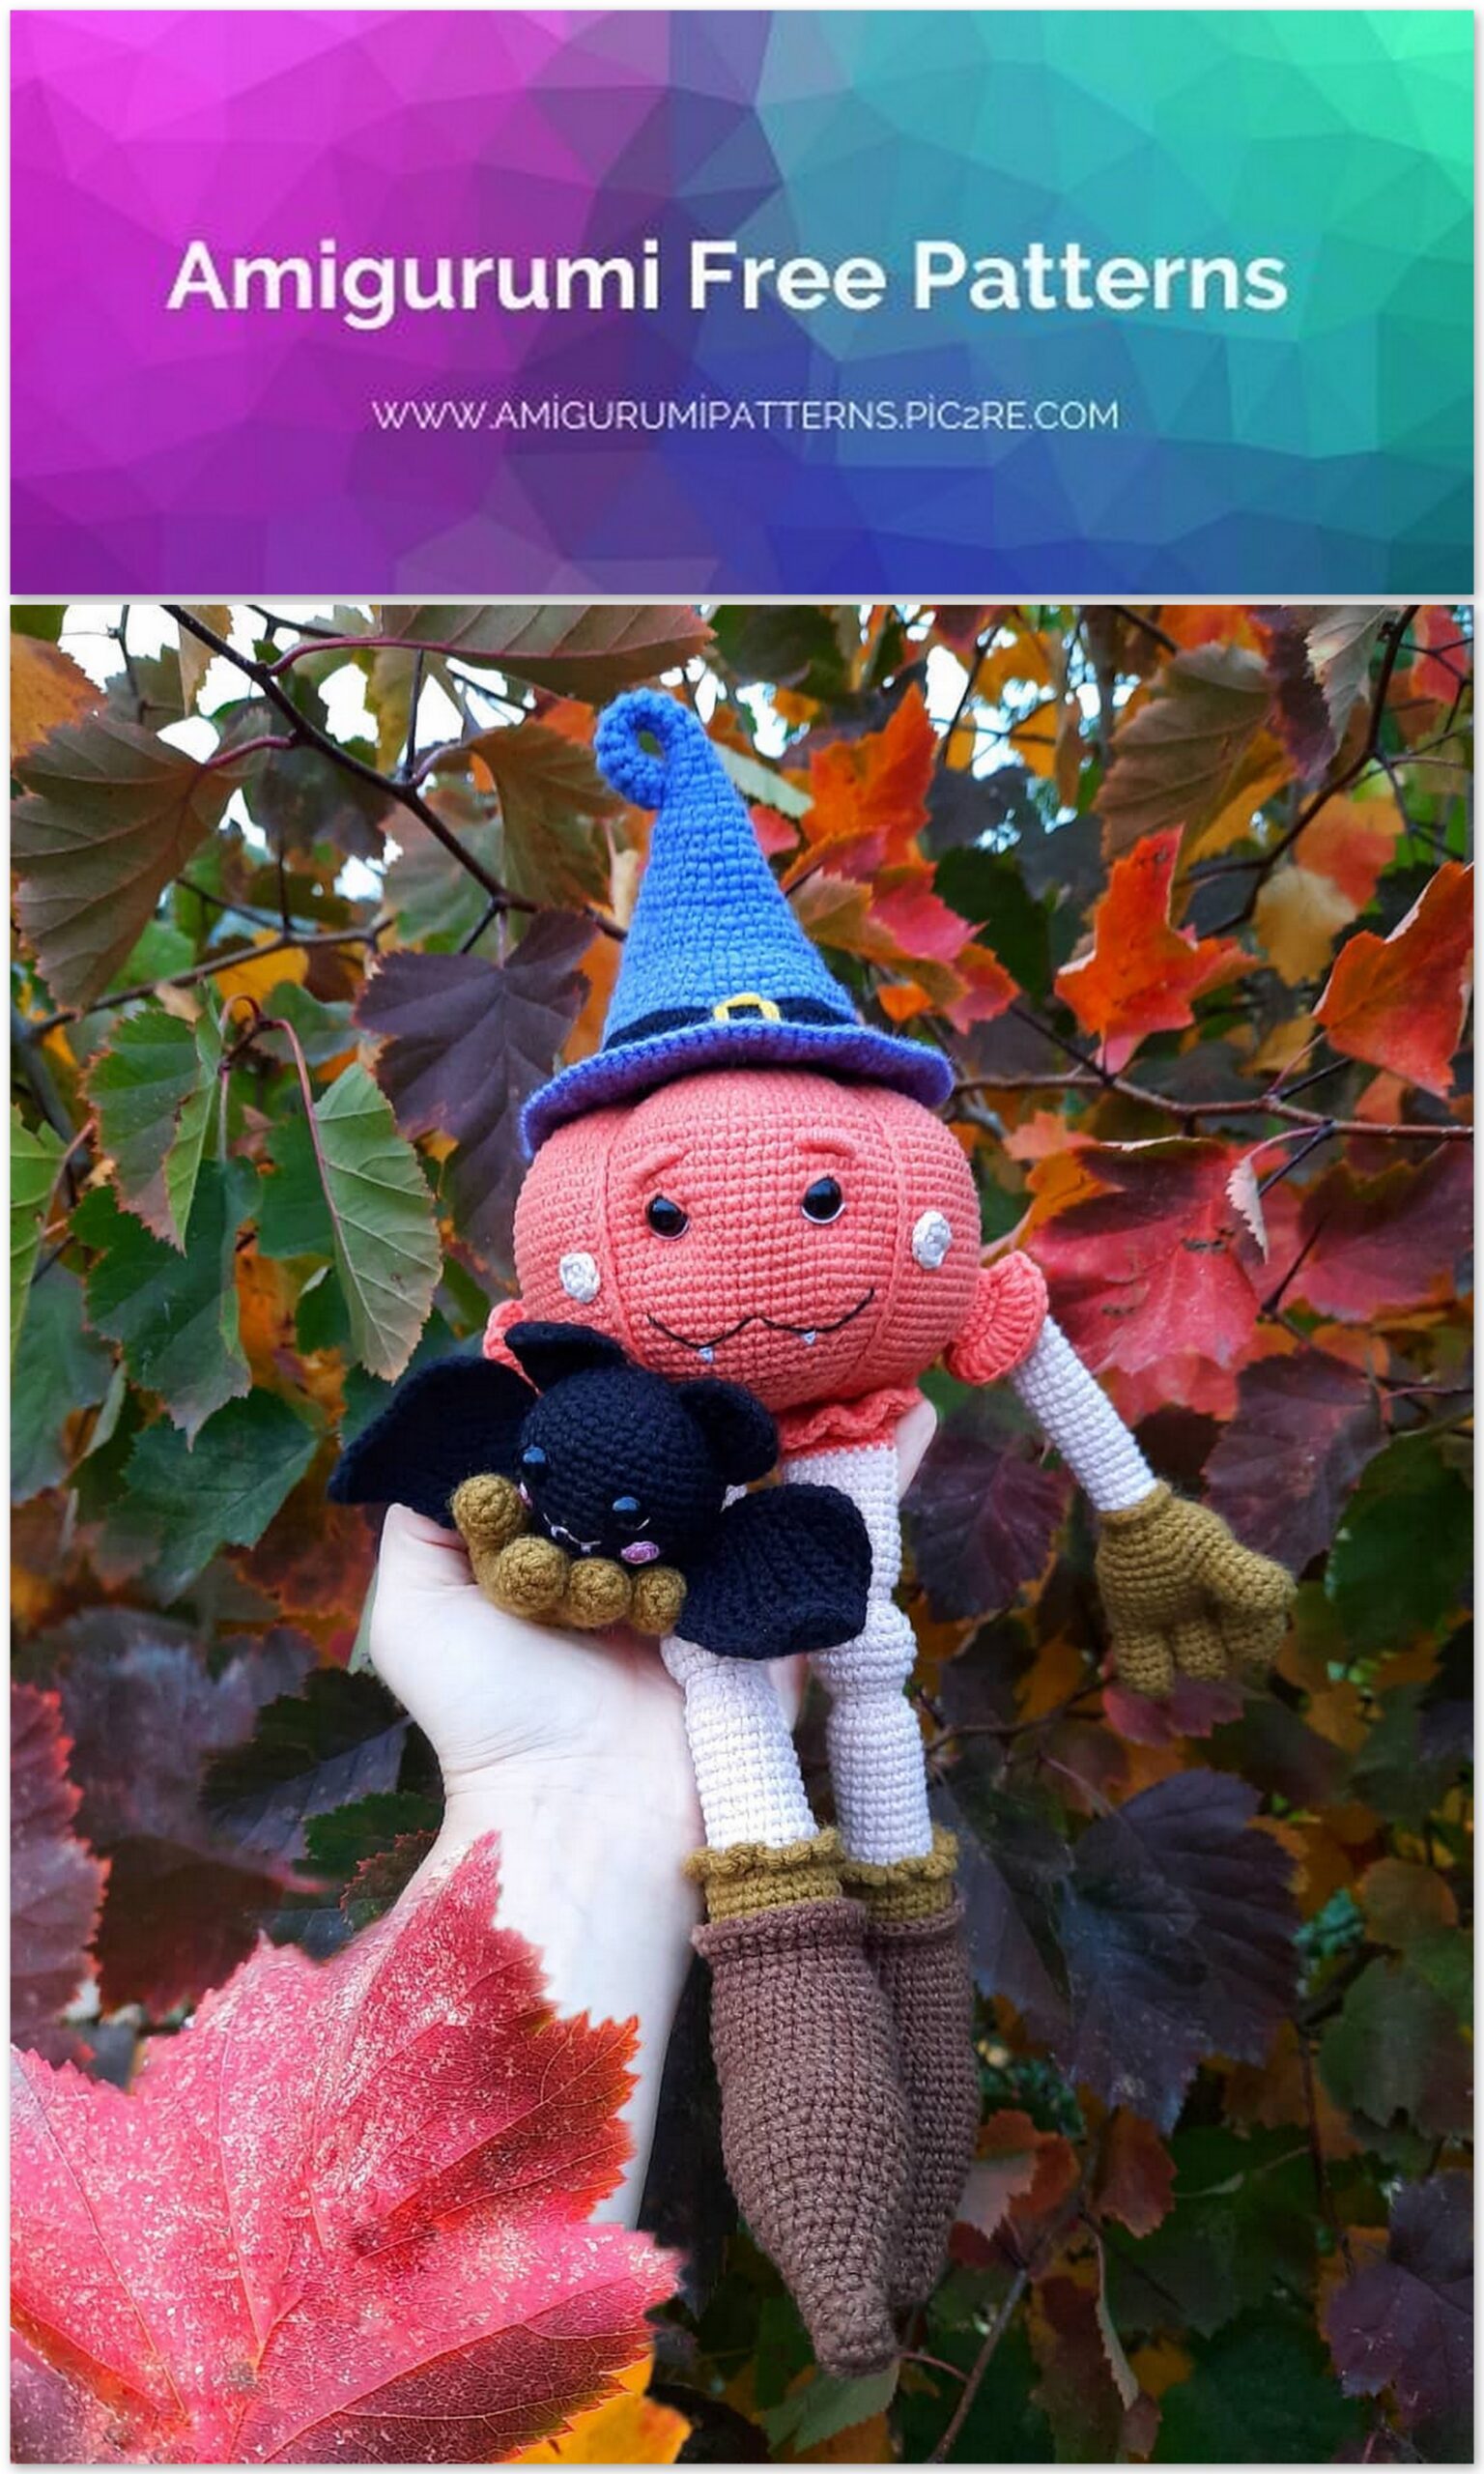
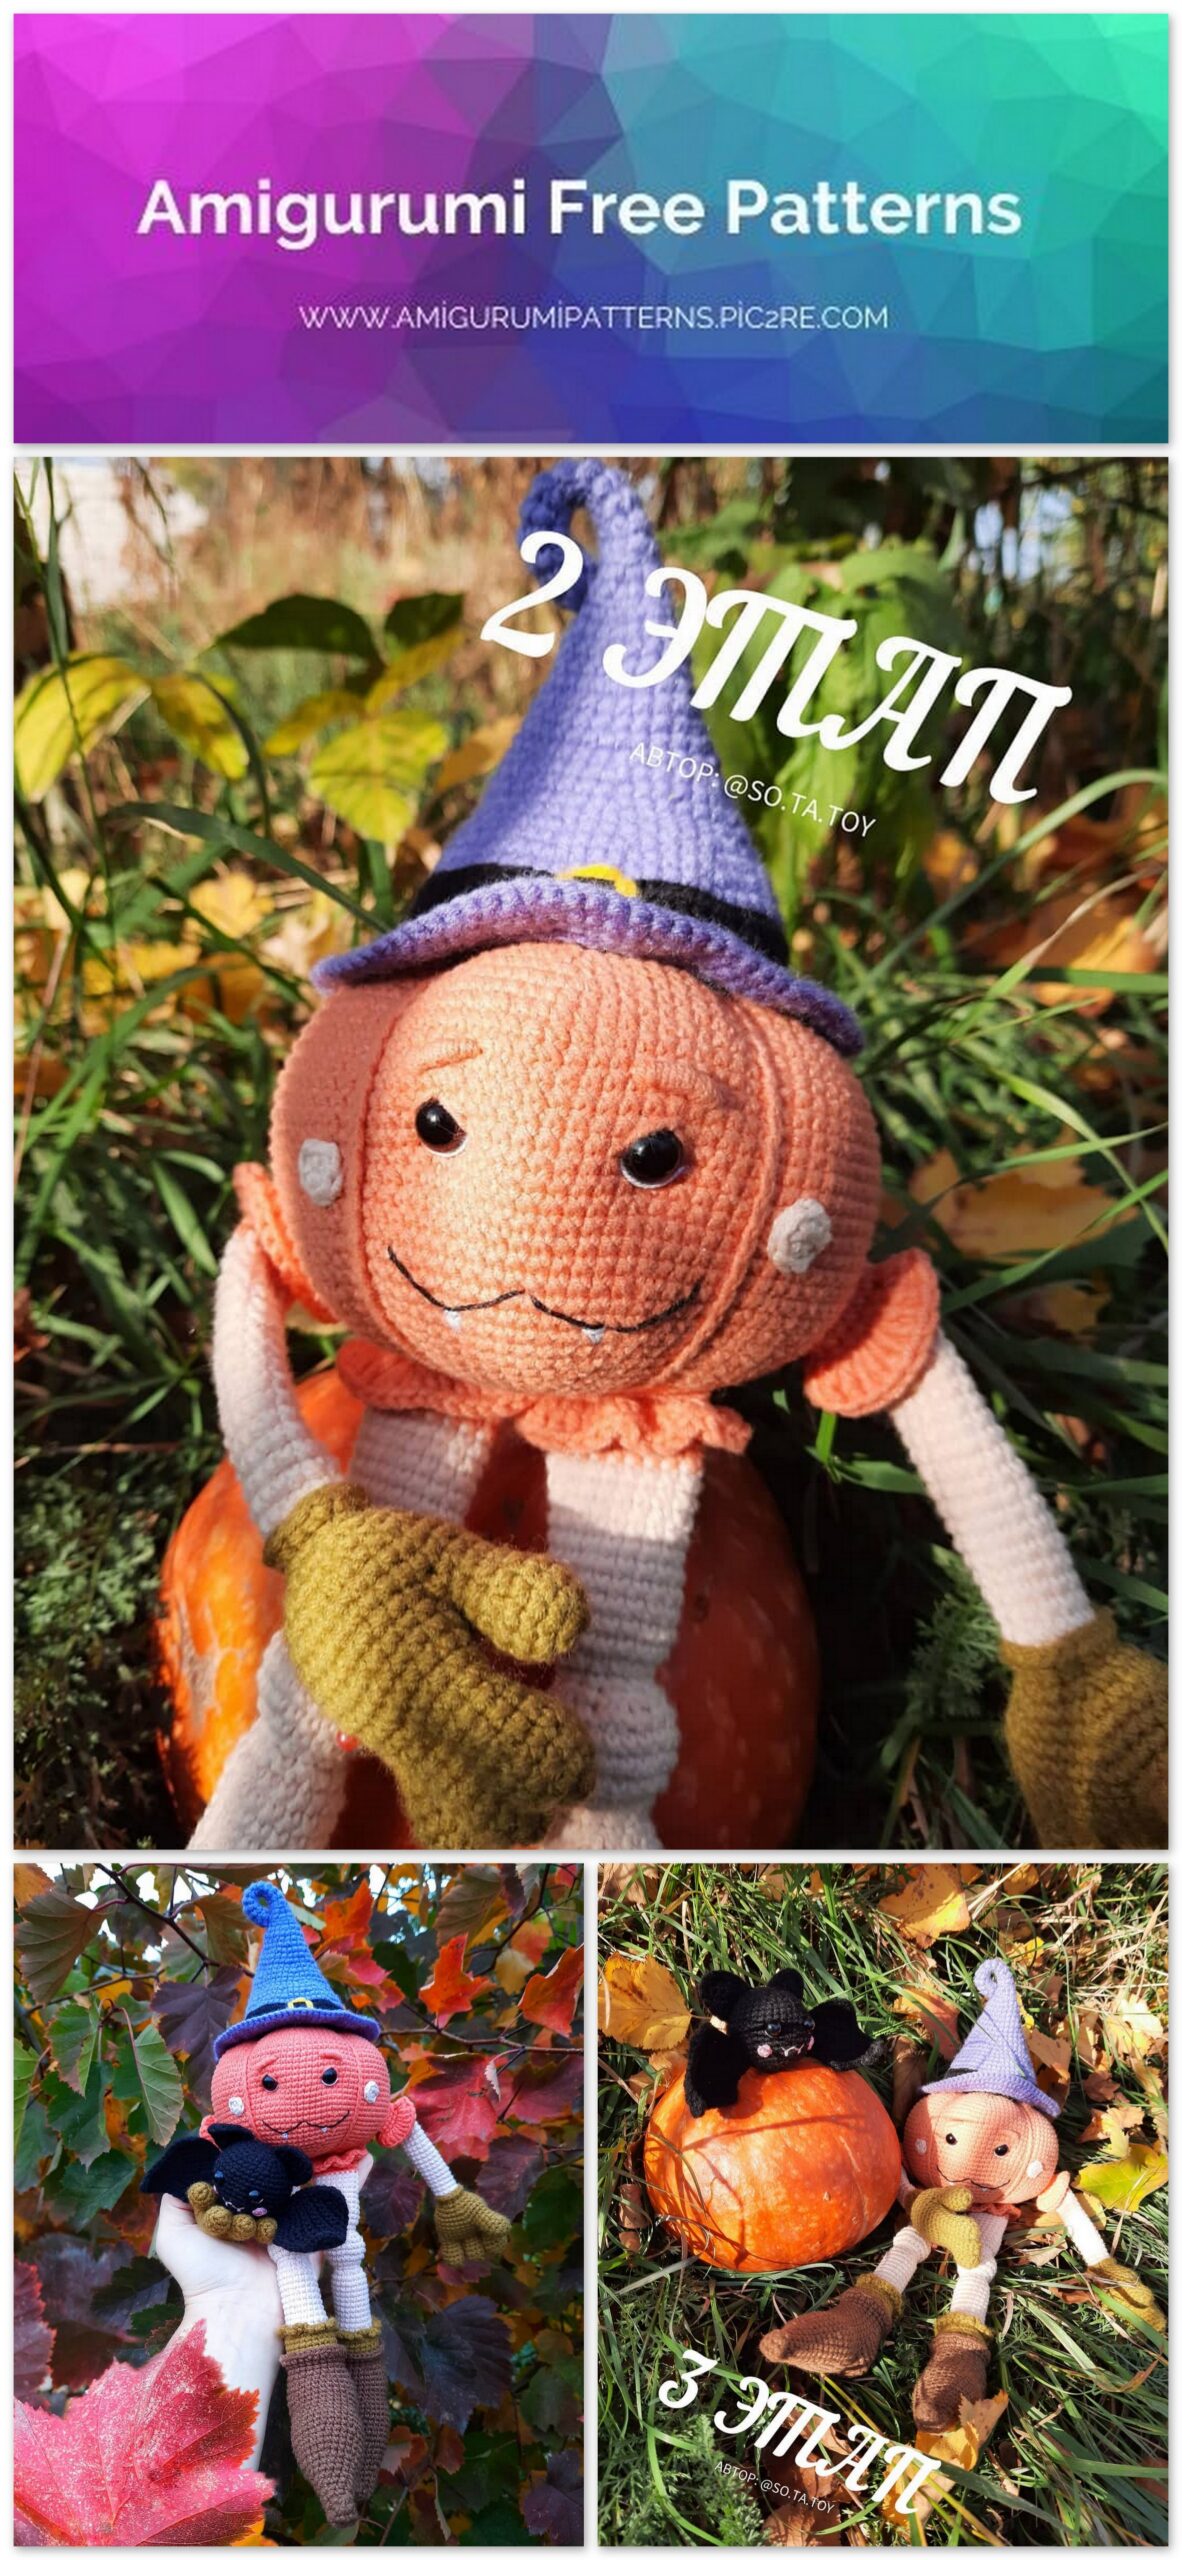
Amigurumi Pumpkin Boo Free Pattern
Pinterest Offical Page : amigurumipatterns.pic2re.com
Facebook Group: amigurumipatterns.pic2re.com
Facebook Offical Page: amigurumipatterns.pic2re.com
“PUMPKIN BOO”
A new pattern for Halloween, Amigurumi pumpkin boo free pattern. Browse our website for free patterns.
MATERIAL
– Hook No. 2.5
– YarnArt Jeans yarn (thread No. 1) No. 23
– YarnArt Jeans yarn (thread No. 2) No. 40
– YarnArt Jeans yarn (thread No. 3) No. 73
– YarnArt Jeans yarn (thread No. 4) No. 29
– YarnArt Jeans yarn (thread No. 5) No. 72
– YarnArt Jeans yarn (thread No. 6) No. 59
– you will also need thin yarn of black, white and yellow
– Wooden beads with a diameter of 20 mm
– Eyes on a secure mount 8 mm
– Filler (I have holofiber)
– Needle (with a blunt end, for sewing parts)
– marker (to mark the beginning of the row)
– tailor needles (for face design)
From these materials, the pumpkin “Boo” will be 26-27 cm (without a hat), and 35-37 cm (with a hat).
I WISH YOU A PLEASANT KNITTING AND Smooth LOOPS !!!
CH – air loop
SL-ST – connecting post
PP – half loop
P.S. – offset loop
SC – single crochet
DC – double crochet
İNC – increase (knit 2 SC in one loop)
DEC – decrease (knit 2 SC together at the front walls)
(SC, İNC) * 6 (18) – repeat
combination in brackets 6 times.
The number in brackets is the total
columns in a row.
DESIGNATIONS BASE KNIT HOOK N ° 2.5
Thread No. 1
1.6 SC into magic ring (6)
2.3 İNC in each loop (18)
3.1 SC, 3 İNC, (2 SC, 3 İNC) × 5, 1 SC (30)
4.2 SC, 3 İNC, (4 SC, 3 İNC) × 5, 2 SC (42)
5.3 SC, 3 İNC, (6 SC, 3 İNC) × 5, 3 SC (54)
6.4 SC, 3 İNC, (8 SC, 3 İNC) × 5, 4 SC (66)
7.5 SC, 3 İNC, (10 SC, 3 İNC) × 5.5 SC (78)
8-9. (78)
10.6 SC, 3 İNC, (12 SC, 3 İNC) × 5, 6 SC (90
11. (90)
12.7 SC, İNC, (14 SC, İNC) × 5.7 SC (96)
13.8 SC, İNC, (15 SC, İNC) × 5.7 SC (102)
14-27. (102) – (14 rows)
In these rows we insert eyes, if they are on a safe mount. I have done this: in row 21 we knit 37 SC, 1 CH, 10 SC, 1 CH, 53 SC (102)
After knitting this row, the beginning of the row, as it were, shifts to the side.
Then we knit the rows following the pattern. And when you knit up to 27 rows, you can insert eyes.
28. (15 SC, DEC) × 6 (96)
29-30. (96)
31. (14 SC, DEC) × 6 (90)
32. (90)
33. (13 SC, DEC) × 6 (84)
34. (12 SC, DEC) 6 (78)
35. (11 SC, DEC) 6 (72)
36. (10 SC, DEC) × 6 (66)
37. (9 SC, DEC) × 6 (60)
38. (8 SC, DEC) × 6 (54)
39. (7 SC, DEC) × 6 (48)
40. (6 SC, DEC) × 6 (42)
41. (5 SC, DEC) × 6 (36)
42. (4 SC, DEC) × 6 (30)
43. (3 SC, DEC) × 6 (24)
We stuff the detail, tightly, but not zealous.
Then we continue to knit according to the pattern.
44. (2 SC, DEC) × 6 (18)
45. (1 SC, DEC) × 6 (12)
46.6 DEC (6)
We tighten the hole with a thread, make a tie in the middle of the pumpkin, then fix the thread, hide it and cut off the excess.
STRETCH
Between the 2nd and 3rd rows, attach the thread SL-ST and dial 27 CH (you may have a different number of loops, since it all depends on the density of your knitting), and fasten the thread at the bottom of the pumpkin, do the same between two rows (44 and 45) with SL-ST.
We make neat transitions along the row where you attach the thread, also with the help of SL-ST (I have 2 SL-ST), and along the top row, I also move the beginning of the tightening with the help of several SL-STs.
And so we repeat five more times. (See Photos)
EYE TREATMENT
We make a tightening, through the top of the pumpkin.
Then this place will be closed with the tail of a pumpkin.
We introduce the needle through the crown of the pumpkin, between the 3rd and 2nd rows from the beginning of knitting (numbers 1 and 3, photo N ° 2) and we withdraw the needle near the eye, where the numbers 1 and 2 are indicated (photo N ° 1), then we enter the needle back to the places where the numbers 3 and 4 are indicated, and we withdraw the thread back through the crown of the pumpkin, between the 2nd row and the spacecraft (numbers in photos 2 and 4)
We do the tightening itself. Then this place will be closed with a pumpkin tail, and it will not be visible. Fasten, hide and cut off the excess.
TAIL
Start knitting with thread N ° 4
1.6 SC into magic ring
2.6 SC for the back half loop (PP)
3 – 7. (6) (5 rows)
8. (2 SC, İNC) × 2 (8)
9. (3 SC, İNC) × 2 (10)
10. (4 SC, İNC) × 2 (12)
11. (1 SC, İNC) × 6 (18)
12. 3 SC in each half loop of the previous row (54)
Next, we knit the last SL-ST column, fasten the thread and leave 15-20 cm for sewing on the part. We do this for the remaining front half-loops and sew the tail to the pumpkin.
We also knit a circle of 6 SC into a magic ring, and leave the thread for sewing. I use this circle to sew on the pumpkin bottom. So we close the place where we made the ties (jumpers), and we make this place neat.
We start knitting with thread number 2
1.5 SC into magic ring
2. İNC, 4 SC (6)
3. (6)
4. İNC, 5 SC (7)
5. İNC, 6 SC (8)
6. İNC, 7 SC (9)
7. İNC, 8 SC (10)
8. (İNC, 4 SC) × 2 (12)
9. (İNC, 5 SC) × 2 (14)
10. (İNC, 6 SC) × 2 (16)
11. (İNC, 7 SC) × 2 (18)
12. (18)
13. (2 SC, İNC) × 6 (24)
14-16. (24) (3 rows)
17. (3 SC, İNC) × 6 (30)
18-20. (30) (3 rows)
21. (3 SC, DEC) × 6 (24)
22. (24)
Next, we make 3 offset loops (PS), so that the beginning of the next row starts from the side (we unfold the knitting), and we knit according to the scheme in rotary rows:
23.12 SC
24. CH, 12 SC (unroll knitting)
25. CH, 12 SC (unroll knitting)
26. CH, 12 SC (unroll knitting)
27. CH, 12 SC (unroll knitting)
Then we start to make decreases, skipping the first SC from the hook from the previous row and
the penultimate one, so the heel of the foot will look neat. (If you canIf you can make decreases in the usual way, do this: (DEC, …. SC, DEC), and so all the rows with decreases, as indicated in the diagram)
BOOTS + LEGS
For now, we continue to knit in rotary rows:
28. CH, 1 SC skip, 9 SC, 1 SC skip, 1 SC (unroll knitting) (10)
29. CH, 1 SC skip, 7 SC, 1 SC skip, 1 SC (unroll knitting) (8)
30. CH, 1 SC skip, 5 SC, 1 SC skip, 1 SC (unroll knitting) (6)
31. CH, 1 SC skip, 3 SC, 1 SC skip, 1 SC (unroll knitting) (4)
32. CH, 1 SC skip, 1 SC, 1 SC skip, 1 SC (unroll knitting) (2)
Next, we begin to tie the resulting
heel:
33. CH and tie 10 SC along the heel, then knit 14 SC along the main part of the part (14 SC
is obtained due to the fact that we knit 1 SC each in the corners on both sides of the heel (see photo), continue to tie another 10 SC on the other side of the heel, and then we knit 2 more SC (we knit the last SC of this row in CH of the rise, which we typed at the beginning of the row. (36)
34. Mark the first SC of this row with a marker, and knit according to the scheme 36 SC (36)
35.9 SC, DEC, 12 SC DEC, 9 SC, DEC (33)
36. (9 SC, DEC) × 3 (30)
37. (30)
38. (3 SC, DEC) × 6 (24)
39-40. (24)
41. We knit this row for the front half-loops (24)
42. (1 SC, İNC) × 12 (36)
We fill the part of the boots, and fasten the thread, cut it off.
Next, change the thread to N ° 4 and knit socks:
43. Attach the thread for the remaining half loops in
Row 41 and knit 24 SC. (24)
44-47. (24) (4 rows)
48. (2 SC, DEC) × 6 (18)
49. In this row we knit by the front half-loops, we collect 3 CH and in each half-loop
we attach these 3 CH SL-ST.
We fix the thread, cut off the excess.
Next, we take and change the thread to N ° 3 and knit according to the scheme:
50. (18)
51-60. (18) (10 rows)
61. (1 SC, DEC) × 6 (12)
62. (12) (We fill this part of the leg a little)
63. (1 SC, İNC) × 6 (18)
64. (2 SC, İNC) × 6 (24)
65-66. (24)
Put a wooden bead in the resulting “bowl” so that the knee would keep its shape. (You can also not do this, but simply fill this part of the part with filler). And then we tie the bead, leaving it already inside the knee.
67. (2 SC, DEC) × 6 (18)
68. (1 SC, DEC) × 6 (12)
69. (12)
70. (1 SC, İNC) × 6 (18)
71-80. (18) (10 rows)
Next, we knit 4 offset loops (you may have a different number of loops, because you may have a different knitting density. But the beginning of the row should be on the side of the part, and after that we change the color of the thread to the main one (thread N ° 1) and knit according to the scheme):
81-83. (eighteen)
84. (18) (we knit this row behind the back wall of the loop)
85. We fill the part a little, fold it in half, and knit for both walls of part 9 SC (9)
We fix the thread, and leave 15-20 cm for sewing.
Next, we knit a frill, attach the thread to the remaining half-loops, knit 2 CH, and in this
we knit another DC loop, and then in each half-loop we knit 2 DC (36)
We fix and hide the thread.
You can also fasten the tip of the shoe by twisting it a little and sewing it to its main part.
GLOVES + HANDS
Take thread N ° 4 and knit from the fingers.
1.6 SC into magic ring (6)
2.6 İNC (12)
3-4. (12)
5. (2 SC, DEC) × 3 (9)
6-7. (nine)
We knit three fingers, fasten the thread for each, and leave not much at a time to sew the resulting holes between the fingers. From the 4th
we do not cut the thread of the finger, but continue to knit ..
8.4 SC at 1st finger, 4 SC at 2nd finger, 9 SC at 3rd finger, then knit 5 SC at 2nd finger and 5 SC at 1st finger (27)
9-11. (27) (3 rows)
We close the holes between the fingers after row 9, fasten the threads, and cut off the excess. We fill each finger. And in the 12th row, we knit the fingers of the left and right hands.

Left hand:
12.1 SC, 4 SC (knit together with finger), 22 SC (27)
13.2 SC, 7 SC (on the finger), (7 SC, it turns out as a result of the fact that I knitted 1 SC along the edges of the fingers, so that no holes would form), and after that we knit another 22 SC (31)
14. (DEC, 29 SC) (30) fill your finger
Right hand:
12.8 SC, 4 SC (knit together with finger), 15 SC (27)
13.9 SC, 7 SC (on the finger, as well as on the left hand), 15 SC (31)
14. DEC, 29 SC (30) fill in a finger.
15. (30)
16. (3 SC, DEC) × 6 (24)
17. (2 SC, DEC) × 6 (18)
18. (1 SC, DEC) × 6 (12)
19. (12) in this row, change the color of the thread to N ° 3.
20. We knit this row behind the back wall of the loop (12)
21-36. (12) (16 rows)
Next, we make offset loops, I have 4 of them, this is done so that the beginning of the row is on the side, and then we change the color of the thread to N ° 1.
But before changing the thread, we leave the long end so that later we can knit the edging of the glove: (1 SC, İNC) × 6 (18), after finishing knitting the hand.
37-39. (12)
In row 39, make 1 more offset loop if you need it.
40.12 SC for the back wall of the hinge (12)
41. Stuff the part a little, fold it over the floors, and knit part 6 SC (6) for both walls
We fasten the thread, and leave 15-20 cm for sewing.
Then we take the thread, attach the 40th row to the front wall of the loop, we dial 2 CH and
we knit 1 DC in the same half-loop, and then 2 DC in each half-loop (24)
Fasten and hide the remaining thread.
HAT
Start knitting with thread N ° 51.6 SC into magic ring (6)
2-12. 6 SC (6) (11 rows)
13. (1 SC, İNC) × 3 (9)
14.9 SC for the back wall of the hinge (9)
15. (2 SC, İNC) × (12)
16.12 SC for the back wall of the hinge (12)
17. (1 SC, İNC) × 6 (18)
18-19. (eighteen)
20. (2 SC, İNC) × 6 (24)
21-22. (24)
23. (3 SC, İNC) × 6 (30)
24.5 SC, 10 SC for rear half loops, 15 SC (30)
25.5 SC, 10 SC for the front half loops of the previous row, 15 SC (30)
26. (4 SC, İNC) × 6 (36)
27. (36)
28. (5 SC, İNC) × 6 (42)
29.4 SC, 16 SC for rear half loops, 22 SC (42)
30.4 SC, 16 SC for the front half loops of the previous row, 22 SC (42)
31.3 SC, İNC, (6 SC, İNC) × 5, 3 SC (48)
32. (7 SC, İNC) × 6 (54)
33.4 SC, İNC, (8 SC, İNC) × 5, 4 SC (60)
34. (60) Change the thread to N ° 6
35.60 SL-ST
36.60 SC (behind the back wall of the loop of the knitted row of connecting posts) (60)
37-38. (60) In the 38th row, change the thread to N ° 5
39.60 SL-ST
40. (9 SC, İNC) × 6 (behind the back wall of the loop of the knitted row from SL-ST) (66)
41. (1 SC, İNC) × 33 (99)
42-43 (99) The last loop of the row, we knit SL-ST, then we close the knitting, fasten the thread and hide it, cut off the excess.
We also sew on the tip of the hat, twisting it a little.
And we also embroider the buckle on the black stripe with yellow thread, and hide the ends of the thread, and so that they do not dissolve, we fix the buckle from the inside out a little with glue.
REGISTRATION
After we have connected all the details for the toy, we proceed to its design.
We take the tailor’s needles and outline where the toy’s mouth will be located.
It looks like this for me:
Where you have the pumpkin jumpers on the sides of the eyes, I step back from them 1 SC, this is all approximately, you may be a little different.
Further from the bottom of the eye, I retreat 6 SC, and so it turns out that we have already outlined two extreme points
mouth.
Then I count the total number of loops, from and to, the marked points, and dividing in half
I set another tailor’s needle in the middle. (I have 16 SC, respectively, I divide
the sexes are 8 SC each, and I outline one more point). Next, we need to outline two more points, in total you will have five of them for your mouth, stepping back also rows down, I divide the resulting 8 SC in half, and in the middle, that is, in the 4th SC from the edge, I set two more points …
Next, we take a thin black thread, and begin to outline our mouth. We introduce a needle into any
the extreme point (Those points that we marked first), and, as it were, we wind the thread on the tailors
needles. Having passed all five points we marked, we introduce the needle to the nearest lower point,
we make, as it were, a yarn over an already existing thread, and we insert the needle at the same point that we brought it out, and we tighten the resulting loop inside the part, so we repeat two more times, and then we fix the thread, hide and cut off the excess.
Then we take a thin white thread and embroider two teeth at the bottom of the mouth.
Next, we embroider the eyes and eyebrows.
I embroider eyes like this:
At the top of the eye I lay a thread in the color of the main part, so that the thread does not slip anywhere,
you can fix it with a loop in the middle, or you can apply a little glue to the needle, smear the thread with it and fix it.
I also do the lower eyelid with a white thread.
So the eyes are more lively.
And then we embroider the eyebrows, you can arrange them as you like.
Then I knit the cheeks, thread # 3, typing 6 SC into the magic ring, and leaving the thread for sewing. I place the cheeks behind the tie-bars from the pumpkin face, and sew them on.
Next, we proceed to sewing on the legs and handles.
We take the legs and fix them with tailor’s needles, do it between the first and second bridges from the face of the toy (see the photo), and alternately sew to the “bottom” of the main part.
Then we sew on the hands, I sew them about 4-5 rows up from the edge of the leg, and 1 SC will recede from the second tie-jumper from the face.
I also fix it with tailor needles from the beginning, check the symmetry of the left and right hands, and sew.
At the end we put on our hat.
And then you can sew it on, or leave it removable.
Decide for yourself.
Your toy is ready !!!
THANK YOU FOR PARTICIPATING!!!
THE BASIS.
We knit with thread number 6
1.6 SC into magic ring (6)
2.6 İNC (12)
3. (1 SC, İNC) * 6 (18)
4. (2 SC, İNC) * 6 (24)
5. (24)
6. (3 SC, İNC) * 6 (30)
7.2 SC, İNC, (4 SC, İNC) * 5, 2 SC (36)
8-14. (36) (7 rows)
We insert the eyes (if you have them on a safe mount) between 8-9 rows, and after 6 SC from each other. The size of the peephole is 8 mm.
15.2 SC, DEC, (4 SC, DEC) * 5, 2 SC (30)
16. (3 SC, DEC) * 6 (24)
17. (24) We fill the part.
18. (2 SC, DEC) * 6 (18)
19. (1 SC, DEC) * 6 (12)
20. 6 DEC (6) Tighten the hole, fasten the thread and hide it.
Ears. (2 PARTS)
We knit 2 details of the ears according to the scheme No. 1. We leave the thread 15-20 cm for sewing.
BONUS
SCHEME No. 1
SCHEME No. 2
FENDERS (2 PARTS)
We also knit two wings according to scheme # 2.
But when we start tying the part after row 13, then we tie one wing further immediately after it, and leave the thread for sewing.
And at the second wing, having knitted row 12, we unfold the knitting, knit the harness and SC, and only then we knit 13 ryaz from SL-ST (connecting posts).
Next, we sew all the details. We design the muzzle at your discretion.
Your BAT IS READY !!!
THANKS FOR YOUR WORK!!!
YOUR THE TOY IS READY !!!